How to Handle that Cumbersome Crossbow

By Mike Marsh

Six secrets to taming your crossbow’s
balance and weight!
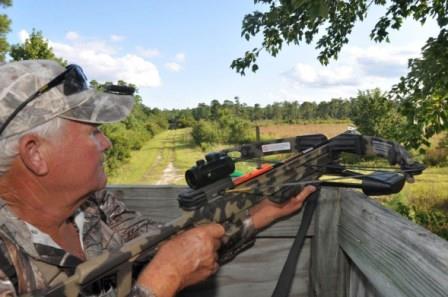
Hunter with crossbow finds a comfortable shooting spot for the day

Jerry Simmons hunts from an elevated stand with a crossbow. The sturdy rail keeps the crossbow steady and ready at all times to ensure a comfortable and enjoyable hunt. (Photo: Mike Marsh)

Hunters who use crossbows during archery season know that their accuracy and power come with some big tradeoffs. They lack the lightweight portability of a hand-held vertical bow and the easy maneuverability of a firearm. Plus, the length of the stock combined with the width of the limbs take up a great deal of space. And it’s cumbersome when carrying it to your stand.

Some hunters wonder why a crossbow needs to be so blasted heavy. The simple answer is that it needs a beefy frame to be powerful enough to take big game while handling its impressive release energy — without flying apart. That’s why a crossbow is heavy and cumbersome, which can nullify some of its advantages. Here’s how to deal with it.
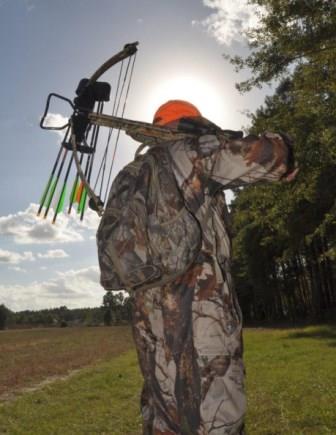
Hunter with crossbow slung over his shoulder

This hunter is carrying his crossbow over his shoulder. Not only is it uncomfortable during long trips to the stand, but it also poses some risks. A better way to carry it is with a sling or inside a soft case that has a shoulder strap and hand-grip. (Photo: Mike Marsh)

1. Case it

Many hunters have learned to carry the crossbow in a soft case by the case’s shoulder strap when moving through the woods. Make sure your case has a handgrip as well. It will make it easier to maneuver through tight spots, or to hand off to another hunter. Wait until you arrive at your hunting site to remove the crossbow, cock it and load an arrow. The case will put an end to losing vital gear, and protect the crossbow from weather, spills and hard knocks. A case makes the entire weapons package much easier to carry.

2. Sling it

When travelling open country, carrying a crossbow with a sling is a convenient option. I use a padded sling with silicone rubber applied to the gripping side to keep the strap from slipping down my shoulder. I loop my cocking rope through the thumbhole stock and carry the crossbow with the quiver attached and the bow de-cocked and unloaded.
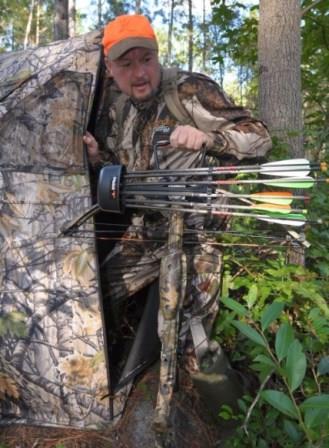
Hunter goes inside his ground blind with his crossbow

Chris House enters a ground blind with his crossbow. Many hunters discover that maneuvering a crossbow inside a ground blind is easier than in a tree stand. The trick is to pick a large, hub-style blind that allows you to shoot in any direction. (Photo: Mike Marsh)

3. Rail against instability

Every elevated stand I use for crossbow hunting has a rail for resting the crossbow’s forearm. Resting the forearm on the rail and the butt on my thigh allows me to control the crossbow at all times. Crossbows are front-heavy, and horizontal limbs make it unstable if you lean it against the side of a stand. It can suddenly rotate and bump the scope when you attempt to pick it up.

4. Don’t quibble with quivers

If you think a crossbow is cumbersome, why would you add a quiver and make it more awkward and unwieldy? The quiver adds weight and restricts maneuverability due to the nock-ends of arrows sticking beyond the bow. The easy solution is to remove the quiver before you cock the bow. Tie it to the treestand or put in the side pocket of a ground blind.

5. Go large

I usually hunt from a roomy, hub-style, cube shaped blind that has ample room to shoot from the front and strong side if I am sitting in a folding chair in one corner. I do not use a chair with arms because they interfere with resting and moving the butt and pistol grip. If game is approaching and far enough away to risk movement on my part, my blind is large enough that I can slide the chair around or kneel to take a shot in any direction.

A homemade crossbow rest for ground blind hunting

The author usually hunts from a ground blind when using a crossbow. He uses a rest made from the top hub and metal supports of a beach tent canopy with a piece of a kid’s water noodle that has a section of PVC pipe through it center-bolted to the hub. The rest holds the crossbow at the ready and rotates 360 degrees. (Photo: Mike Marsh)

6. Give it a rest

When you are inside the blind, use a rest to hold the bow as well as stabilize it for shooting. A four-legged metal walking cane you can purchase at most drug stores for about $20 makes an inexpensive rest. The cane has a 90-degree, foam padded handgrip that’s perfect for resting the forearm of a crossbow. Its telescoping shaft has push-button stops to make it easy to adjust for height. I also have another favorite rest I made from a discarded beach tent frame with four metal supports and a plastic hub at the peak. After drilling a hole through the hub, I bolted in place a piece of a kid’s water noodle with a section of PVC pipe slipped inside it. The four-legged rest easily adjusts for height and rotates 360 degrees. I rest the forearm of my crossbow on it and hold the butt stock on my upper thigh, always ready to raise it smoothly and quickly to align the scope and take a shot.

Sometimes hunting with a new piece of gear is just a matter of learning to manage something you haven’t used before. And I’m betting if you get out, you’ll add your own tips to these six ideas that make hunting with a crossbow easier.


About Mike Marsh:

Mike Marsh outdoor writer headshotMike Marsh lives in Wilmington, N.C. and has written thousands of hunting and fishing articles for newspapers and magazines plus four books (“Fishing North Carolina,” autographed, inscribed, $26.60 ppd; “Inshore Angler-Carolina’s Small Boat Fishing Guide,” $26.20; “Offshore Angler-Coastal Carolina’s Mackerel Boat Fishing Guide,” $22.20; and “Carolina Hunting Adventures – Quest for the Limit,” $15, check or MO, 1502 Ebb Drive, Wilmington, NC 28409). His columns appear in Fayetteville, Raleigh, Wilmington, Goldsboro and other newspapers. To contact Mike, read his latest “Barbs and Blasts” articles or order his books online, visit www.mikemarshoutdoors.com.


Join The Havalon Nation

5,889 total views, no views today
Posted in Archery Hunting, Bowhunting, Bows, Crossbows, Guest Writers, How To, Hunting & Fishing Equipment, Hunting Tips, Mike Marsh | Tagged , , , , , , | 3 Comments

A Hunter’s Loftiest Goal — 7 Strategies for Staying Safe in a Self-Climber

By Mike Marsh

What goes up must come down … safely!

A hunter snaps his fall recovery strap into place before climbing his treestand

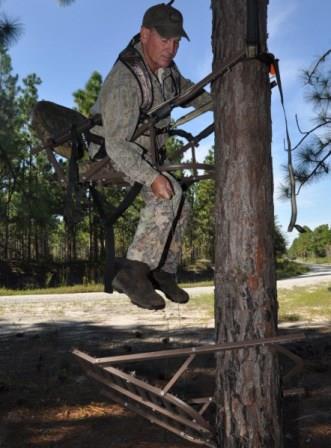
Always carry a fall recovery strap in an outside pocket or mesh bag on your person where it is easy to reach. Better yet, snap it in place before you begin your climb. (Photo: Mike Marsh)

Deer hunters achieve a primary goal when they bring a nice buck home, but hunters have an infinitely more important, mostly unstated goal. That goal is for the hunter himself to make it back home safe, with or without a deer. A large percentage of hunters use self-climbing tree stands to gain the height advantage whitetail aficionados love, but it is that very height which poses a serious risk to anyone unfortunate enough to fall. Here are seven tips — no, let’s call them rules — that will help a treestand hunter come home without injury.

1. Pick the right tree

This means way more than placing your stand in a tree that yields the best shot opportunity. The tree must be straight and free from knots, cat face scars, bends, hollows and large limbs. It must also have bark that is not so slick or scaly that it prevents a solid, non-slip grip with your particular stand. (This means beech, poplar and smooth-bark hickory trees are often unsuitable.) Hunters should also avoid trees with sticky sap. Pines and some other species can drip and ooze sap onto stands, weapons and clothing. Sap can glue your boots to foot sections and your pants to seat sections. If you get sticky with pinesap, Pine-Sol cleaner removes it without damaging stock finishes or plastics and leaves a pine scent.

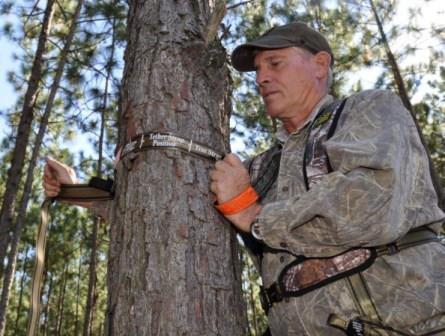
This hunter is getting his strap and harness system tethered to the tree before climbing

To be safe when using a self-climbing stand, hunters must use a strap and harness that keeps them tethered to the tree during the entire ascent and descent. This is a Hunter Safety System Ultra-Lite harness and tether system. (Photo: Mike Marsh)

2. Never, ever climb a power pole

Hunters have been electrocuted by static electricity discharges after they set up stands on power poles. Power poles are also hard and have no bark to provide a gripping surface, and they often ooze creosote that poses an extra slipping risk.

3. Choose a stand rated for your weight and size

Your stand must also be light enough to use without straining ankles, legs and knees. Worse than the challenge of climbing with a heavy stand is joint pain and tired muscles, which make you unsteady and take your attention away from focusing on safety.

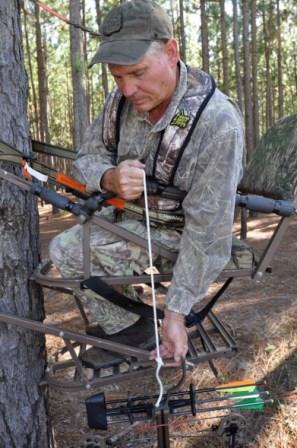
A hunter practicing treestand safety at ground level

Sooner or later, you will lose control of the foot section of your climber. Tie the seat and foot sections together with one or two strings and practice recovering it near ground level with an assistant watching. (Photo: Mike Marsh)

4. Use a tether

A Hunter Safety System (www.huntersafetysystem.com) harness system is one of the best ways to tether yourself to the tree to arrest your fall. It includes a vest or harness with a tether, as well as a lineman-type climbing strap. Most hunters use the tether with self-climbers, as shown in the company’s product videos, by loosening it, sliding it and tightening it again in coordination to the stand’s rhythm while moving up and down the tree. Another great tether is the Q-Safe — which is a spring-loaded nylon strap that snaps snugly to the tree and stays there on its own. Just open it, slide it up and it automatically grips the tree when you release it. It’s called “Q-Safe” because it’s not only safe, it’s quick and quiet.

5. Carry a suspension relief strap

The Hunter Safety System suspension relief strap allows a hunter who experiences a fall to take the pressure of the harness off his legs and body by providing a foothold that also helps in re-entering the stand. Carry the strap in an outer pocket of the supplied mesh bag. Better yet, attach it to the appropriate rear harness loop before the climb.

6. Tie foot and seat sections of your stand together

One of the worst situations for a hunter is losing control of the foot portion and watching it slide down the tree. The hunter can prevent this by tying the two sections together with at least one length of string and preferably two, one on each side. Every hunter should practice setting up his stand and using it, including recovering the foot section, from the lowest height possible with an assistant watching and ready to help.

Hunter pulling his gear up safely to his treestand

When using a self-climber, always haul weapons and gear up after you are in hunting position. Dealing with extra gear bulk and weight can upset your balance and take your mind away from focusing on safety. (Photo: Mike Marsh)

7. Accessorize your climb

Many hunters fail to think of other common sense safety accessories they should carry in case of an emergency. Every treestand hunter should carry:

  • at least one screw-in step to help in re-entering the stand if you fall.
  • a saw for trimming tree limbs — the Havalon Baracuta Bone Saw is compact and works great. (Never use a chopping tool that could upset your balance.)
  • a cell phone, or a safety radio if your partner has one. Keep it in an outside pocket where it’s easily accessible.
  • a line to haul up weapons and other gear after you are securely fastened in the tree.
  • a flashlight to use as a signaling device.
  • a loud whistle you can easily access to get someone’s attention if you need help.

Finally, never carry gear up the tree as you climb. Leave it on the ground and haul it up later, even if you must use multiple lines. Extra gear can destabilize the balance of a self-climber by adding weight you must accommodate, which is magnified by the stand’s leverage. Fussing with extra gear may also take your mind away from focusing on safety.

Know these rules, because it’s up to you to make treestand hunting safe and sound so you return from every hunt to those you love.


About Mike Marsh:

Mike Marsh outdoor writer headshotMike Marsh, a freelance outdoors writer from Wilmington, N.C., has written thousands of hunting and fishing articles for newspapers and magazines as well as four books, including “Fishing North Carolina.” ($26.60 ppd. check or MO, 1502 Ebb Drive, Wilmington, NC 28409). His columns appear in Raleigh, Wilmington, Goldsboro and other N.C. and S.C. newspapers. To contact Mike, read his latest posts or order his hunting and fishing books online, visit www.mikemarshoutdoors.com.


Sign up for the Havalon Nation today!

[hs_action id=”10664″]

3,841 total views, 3 views today

Posted in Big Game Hunting, Deer Hunting, Guest Writers, How To, Hunting & Fishing Equipment, Hunting Safety, Hunting Tips, Mike Marsh | Tagged , , , , | Comments Off on A Hunter’s Loftiest Goal — 7 Strategies for Staying Safe in a Self-Climber

Early Trail Camera Expertise for Anyone

By Vikki Trout

You don’t need to be an expert to make good
use of trail cameras. Here’s 3 reasons simple
is best, plus 14 in-the-field basics!

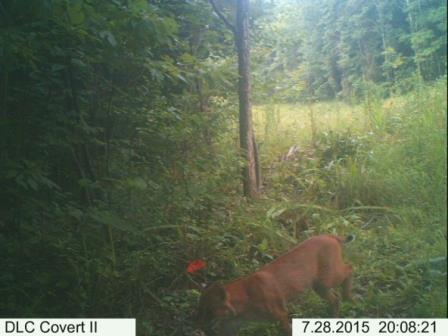
Bobcat caught on a trail camera in daylight

This bobcat obviously had no qualms about appearing in broad daylight. It has probably fed frequently here since ample cover was available. (Photo: Vikki L. Trout)

I could hardly believe my eyes — a huge bobcat right up close to one of my scouting cameras! Thankfully, I took the time to set up my camera and place it in the woods. Otherwise I’d never have known about the massive cat lurking in the area. Since his sighting, we have removed an entire section of tall weeds and briars and replaced it with Imperial whitetail clover (www.whitetailinstitute.com) food plot.

On the flipside — a fresh deer track right in front of another trail camera gave me a rush because it was a big track and I could hardly wait to insert the SD card into my computer and see “who” left it. Unfortunately, that card was blank and I have no idea what went wrong. It has to be activated by using a remote control plugged into the camera, and is very confusing. And that’s why I believe simple is better.

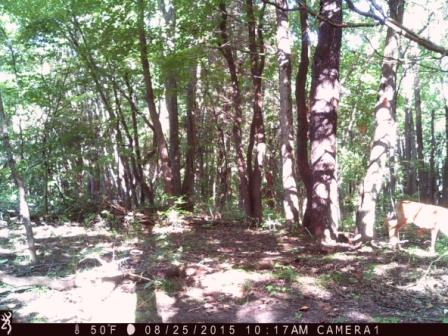
A deer caught out of range on a trail camera

Proper camera placement is crucial to avoid photos of animals that seem to be just out of range. Relocating the camera may help turn this type of photo into a great photo! (Photo: Vikki L. Trout)

Here are three reasons simple is best when it comes to trail cameras.

1. Cameras in the closet are useless

You will be far more likely to use your camera if setup is minimal. Remember, your camera simply monitors game activity. It is not necessary to have added features such as cell phone access that also include subscribing to costly data plans. With too many buttons or settings that are hard to understand, let alone activate, you’ll be frustrated and end up leaving your camera in storage where it does you no good.

2. Beware of complexity

A scouting camera with unnecessary features can lead you to believe you are setting it up correctly, when in actuality one small error can make the camera refuse to function.

Companies that advertise “programming can be as simple or as complex…” scare me away. If I miss something they consider simple, the end result is an empty memory card.

3. Look for a good instruction manual

Even a simple camera needs a good instruction manual. The trouble is, manufacturers put all their effort into the camera itself. Small instruction manuals give the appearance of “easy.” However, concise is not always best when it comes to instructions. If the explanation leaves something out, or if the trail camera has even one setting you don’t understand, you may be lost before you start.

Complex, feature-loaded cameras might be fine for a high-tech wizard, but make you forget why you got the camera in the first place.

A hidden buck from a trail camera picture

Slow trigger speed can leave you wondering what you have. That was the case with this camera that I previously owned. Buck or doe? The deer is almost out of the picture. (Photo: Vikki L. Trout)

With that in mind, let’s review some in-the-field basics.

Reasons for a simple trail camera:

  1. The main objective for a trail camera is to scout your hunting location, not to be a high-tech hunter.
  2. A camera is low-impact compared to a human walking in the deer woods, so it will not spook wildlife as easily. In other words, you can have the camera on a tree or tripod, and keep your presence away from there.
  3. Not only does a simple camera minimize your human, deer-spooking presence. It also minimizes your time there. A more complicated camera will keep you there longer when setting it up and when returning to check the camera.

Putting your camera to work:

  1. Do as much setup as possible at home. Install the batteries and SD card, and take a couple of test shots before you head outdoors.
  2. Regardless of whether you mount your camera on a tripod or tree, make sure it is placed about waist high for best results.
  3. Just as important as programming and setup is camera placement. An improperly placed camera, or a camera with wind-blown vegetation in front of it, will provide little or no information.
  4. Food plots or well-used game trails are great locations for a scouting camera.
  5. If you are not getting photos, consider moving the camera to another location. Sometimes just a short move will produce activity.
  6. Be sure your camera is not facing direct sun, pointing up in the air or down on the ground. Several cameras include “aim” points and are well worth using. Then, you can see exactly where your camera will activate.

Other benefits:

  1. Ever since I got my first scouting camera, I’ve been a firm believer in them. In most cases, it is a treat to get home and check the card on my computer. It is amazing at the number of deer you can capture — and it’s exciting to see the mature bucks that frequent your area.
  2. You may be pleasantly surprised to learn of a flock of turkeys using your food plot.
  3. On the flipside, (yes, always a flipside) you may be in for a shock. Recently near the place where I captured the bobcat photo, another camera photographed three people with saplings they had cut over their shoulders and trespassing across our field. They never noticed the camera but it sure nailed them.
Hunter setting up a trail camera for deer hunting

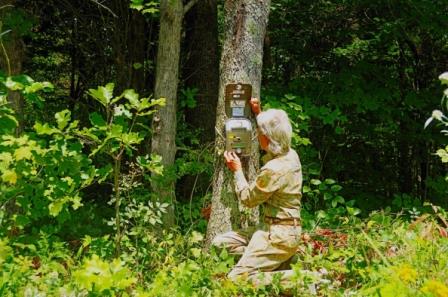
Once the desired location is found, put the camera up and let it do its job. This camera was placed along a well-used game trail, with plenty of evidence that turkeys and deer were passing by. (Photo: Vikki L. Trout)

Do your homework:

  1. Before purchasing any camera, do your homework. I suggest you do an Internet search on trail cameras and consider reviews written by actual users. ChasinGame (www.chasingame.com) or Trailcampro (www.trailcampro.com) include field reviews written by outdoorsmen/women for various trail camera brands.
  2. Basic factors worth considering include: fast trigger speed (1 second or less), efficiency in low light, no bright flash (Black IR LED is best) and a waterproof case.
Hunter cleaning up the area around her trail cam

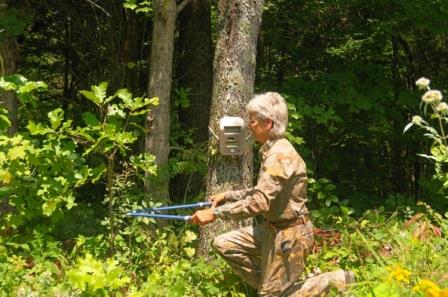
After the camera is placed, prune all debris that may interfere with the camera’s functionality. Nothing is worse than retrieving an SD card with 100 photos of a weed or limb moving back and forth in front of the camera eye. (Photo: Vikki L. Trout)

Once you are comfortable with your camera and ready to take it to the field, I suggest putting it to work in the early spring as well as late summer and fall. In nice weather batteries last longer, and the photos provide a plethora of valuable information as to who is in the area (friend or foe) and the home range of big bucks. It may also give you a stronger desire to hunt early season before that wall-hanger leaves in search of estrous does during the rut — but that’s a topic for another article!


About Vikki Trout:

Outdoor writer Vikki TroutVikki Trout is a full-time freelance writer and photographer from southern Indiana. She loves hunting turkey, deer, bear and small game. When she’s not hunting, she loves capturing wildlife thru the lens of her camera. Please visit her website at www.troutswildoutdoors.com.


Sign up and become a part of the
Havalon Nation today! Click here:

[hs_action id=”10664″]

3,363 total views, no views today
Posted in Big Game Hunting, Deer Hunting, Guest Writers, Hunting & Fishing Equipment, Trail Cameras, Vikki Trout | Tagged , , , , , | 2 Comments

Bullheads Beware! 9 Can’t Miss Tips for Catching Your Next Batch of Bullheads

By Keith Sutton

If you know how to catch them,
pugnacious bullheads provide hours of fun!

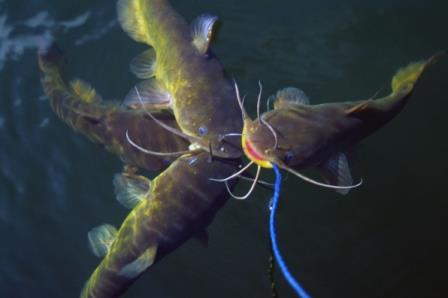
Bullhead catfish hooked on a stringer

Filling a stringer with delicious bullheads can be easy for the angler with a few tricks up his sleeve. (Photo: Keith Sutton)

I love fishing for bullheads. The big ones reach only a few pounds in size, but these little catfish

  • eat almost anything
  • strike hard
  • fight tenaciously
  • are delicious when rolled in cornmeal and fried golden-brown.

Do you need any more reason to be a fan of bullheads? It’s not surprising thousands of people like me are bullhead fanatics. In fact, judging by numbers caught, bullheads are the #1 sportfish in states such as Iowa and Nebraska, and they’re popular everywhere else, too.

If you’re among the many who enjoy fishing for these bantam brawlers, or a convert just learning the bullhead-fishing craft, here are nine tips to help you squeeze the most enjoyment out of your next fishing trip.

1. Use sharp hooks with barbs exposed

Many novice bullhead fishermen have trouble hooking cats. Remember these simple methods that will help alleviate that aggravation. First, be sure your hooks are needle-sharp. Run each point over a fingernail. Sharp hooks dig in. Those that skate across the nail without catching should be honed or replaced. Second, instead of burying your hook in bait, leave the barb exposed. Catfish won’t notice, but you will — you’ll get more hookups.

2. Avoid shadows

Bullheads scurry for cover whenever a shadow passes overhead, fearful it could be a heron, eagle or other fishing-loving bird. Therefore, if you fish during daylight hours in clear water, you’ll have more luck if you place yourself so the sun never casts your shadow on the spot where you are fishing.

3. Make your own doughbait

For a bullhead catcher that’s hard to beat, whip up a batch of this easy-to-make doughbait. Run a pint of chicken livers through a blender until liquefied. Transfer to a bowl, then stir in Wheaties cereal a little at a time until the mixture becomes firm and easy to handle. Roll into grape-size pieces and place in a zip-seal bag. Cool until firm in your refrigerator or cooler before using.

Homemade bait used for fishing bullhead catfish

Bloody chicken livers and Wheaties cereal can be combined to make doughballs that bullheads can’t resist. (Photo: Keith Sutton)

4. Give worms a soak

Here’s an old-timey trick that might garner you some extra bites. Before you go fishing, soak your fishing worms in pickled beet juice for several hours. This kills the worms and turns them a red color that’s more attractive to bullheads. It also toughens the worms, making it harder for bullheads to steal them from your hook.

5. Try grocery baits

Doughbait and worms are hard to beat for bullhead bait, but a trip to the grocery will turn up many other superb enticements. Bacon works great (especially hickory-smoked). Bullhead relish hot dog chunks and cheese, too, and fresh bloody chicken livers are always top-notch cat catchers. Where bullheads are plentiful, bread and even bubble gum will work in a pinch.

6. Avoid bullhead turnoffs

It’s very important for catfish anglers to remember that all catfish, including bullheads, have turbo-charged senses of taste and smell. They’re covered from nose to tail with taste buds in the skin and whiskers, and have much-better-than-average olfactory organs. This can work in your favor because heightened senses allow catfish to find your bait more easily. But bullheads also can detect, and will avoid, even minute quantities of sunscreen, gasoline, oil or insect repellent on your bait. Avoid getting any of these on your hands, if possible. Or, slip on some latex gloves before handling your bait.

Angler with his bullhead catch of the day

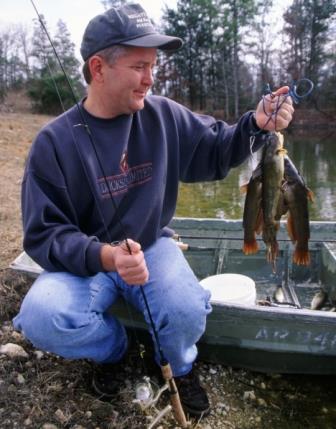
Bullhead fishing often is thought to be a warm season pursuit, but fishing deep holes in winter is a surefire way to catch a mess of these scrumptious panfish. (Photo: Keith Sutton)

7. Fish in winter

Bullheads can be caught year ’round, but my favorite months to fish for them here in the South are January and February. When the water temperature is between 40 and 55 degrees, bullheads congregate in the deepest water. I drop a rig baited with chicken liver to the bottom of a hole, then crank the bait up a foot above the substrate. The cats usually strike quickly. In a couple hours, it’s not unusual to catch 15 to 20. You may struggle to catch them through the ice, but in open water it’s a great way to liven up a dreary winter day, and bullheads never taste better than when fresh-caught from icy-cold water.

8. Kids’ favorite

Because they’re easy to catch and abundant in many waters, kids love fishing for bullheads. So next time, take a youngster along. Transferring your knowledge and skills to an enthusiastic kid makes bullhead fishing one of best of all ways to enjoy time outdoors.

9. Try this tasty recipe

Taking a kid fishing is one reward, but another is eating the bullheads you catch. Throw them on ice as soon as they’re caught and remove all the dark red flesh along their sides when cleaning them. Then try this scrumptious recipe: Combine 3/4 cup yellow cornmeal, 1/4 cup flour, 2 teaspoons salt, 1/2 teaspoon cayenne pepper and 1/2 teaspoon garlic powder in a large bag. Add fish and shake to coat. Pour 1 inch of canola or peanut oil in a skillet and heat to 365 degrees. Fry fish on both sides until it flakes easily with a fork, about 5 minutes. Serve piping hot.


About Keith Sutton:

Outdoor writer Keith SuttonKeith Sutton didn’t earn the nickname “Catfish” for nothing. He’s the author of several books on catfishing, including “Hardcore Catfishing,” “Catching Catfish” and “Pro Tactics: Catfishing.” His special insights about catching these whiskered warriors were garnered through more than 50 years of on-the-water research and countless hours of discussions with biologists, researchers and expert anglers. In 2011, he was inducted into the National Fresh Water Fishing Hall of Fame as a Legendary Communicator.


Click here to join the Havalon Nation!

[hs_action id=”10664″]

16,123 total views, 1 views today

Posted in Bait, Catfishing, Fishing Tips, Fresh & Saltwater Fishing, Guest Writers, How To, Keith Sutton | Tagged , , , , | 1 Comment

Don’t Let the Heat Stop You from Hog Hunting

By Mike Marsh

6 secrets to protecting your pork
from hot weather!

Hunter uses the right ammo to take down a hog

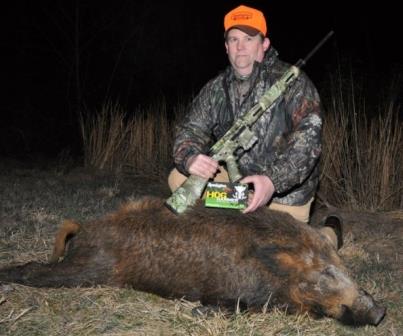
Nighttime is the right time for hunting hogs. Cooler night temperatures give hunters plenty of time for transportation and cleaning chores without the worry of spoiled meat. And selecting the correct ammunition can save your bacon. Remington’s Hog Hammer Ammo is designed specifically to stop heavy hogs. (Photo: Mike Marsh)

No one will argue that aging game birds and venison can enhance taste and texture. But aging of pork may result in spoiled meat and food poisoning for those who dare to eat it. And since lots of pigs are shot in hot weather, you need to know how to protect your pig meat from the heat before you ever embark on a hog hunt. Advance preparations are critical. Here’s what you need to know for healthy, appetizing wild hog.

1. Make a late date

Time of day is an important consideration for any hot weather hunt. In my home state of North Carolina and many others, night hunting of feral swine is legal. During the night, the air temperature can be more than 20 degrees cooler than daytime temperatures and hunters do not have to worry about sunlight heating up a hog before they can recover it. Any hunters who cannot hunt at night should hunt in the evening, so they can complete cleaning and transportation chores after sunset.

Hog hunters take in a hog at night

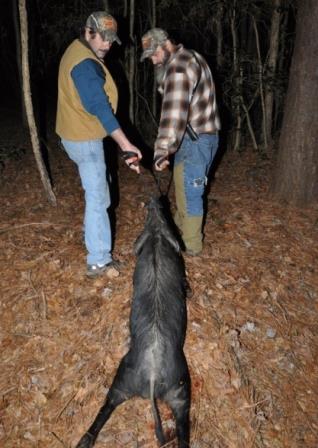
The author took this hog during a late afternoon hunt with Johnnie Dale (right) of Buffalo Creek Guide Service. The dragging and cleaning chores took place during cooler temperatures after dark. (Photo: Mike Marsh)

2. Made in the shade

Putting a hog in the bed of a pickup truck with a black plastic liner in full sunlight guarantees a freshly killed hog will retain its body heat and could become even hotter. If you must transport a hog under direct sunlight, cover it top and bottom with damp burlap or a wet blanket. Evaporative cooling will chill it, especially with the airflow generated by a moving vehicle.

3. Elevate the lowly pig

Insert a gambrel through the hog’s hocks and lift it off the ground using a winch and frame mounted to a receiver hitch. Or, place it on receiver-hitch carrier with a metal grate floor to allow air to circulate around the body and begin the cooling process.

4. Dress for dinner

Dress the hog as soon as possible and use fresh water to clean the body cavity. Field dressing the animal at the kill site begins the cooling process immediately. If the animal cannot be field dressed at the site, take it to a dressing facility to skin and clean it without delay. Wash the hog with clean, cold water to cool the carcass and preserve the quality of the meat. Butcher the hog into the smallest pieces possible and place them on ice.

5. Chill out

As quickly as possible, field dress the hog, fill the body cavity and surround the body with ice. Ice is cheap, so take your ice into the field. Place the hog in an ice chest or fish bag. I nicknamed my large offshore fishing ice chest “Critter Coffin” for all of the game animals it has kept on ice over many years. A very large hog or several small pigs fit easily inside. Not only does it keep hogs cold, it keeps the vehicle clean. A winch and frame mounted on a receiver hitch helps lift the hog into the ice chest. A fish bag used by offshore big game tournament anglers also works well for hogs and offers greater portability. It folds or rolls up to stow easily in a small space. If you have several pigs, line a pickup bed with a tarp and fill it with ice. Once the pigs are on ice, cover them with another tarp. Do not put a warm hog into a cooler or bag without ice because the cooler is insulated and will hold the heat inside.

Blood sign left by a wounded hog

A large boar left this blood sign in a briar thicket. One downside of hunting in the evening is the potential risk of following a blood trail into thick cover in the dark. Because it was late in the day, the pork at the end of this trail was not spoiled by sunlight and heat. (Photo: Mike Marsh)

6. More than one way to skin a pig

A small shed with a window air conditioner makes a great place to skin a pig. Even a garage can work as a skinning area with the addition of a simple window unit and a sheet of plastic on the floor, allowing the hunter more time to complete the chore than out in the open where the air is hot. If you do not have an air conditioner, use an electric fan to cool an enclosed skinning space.


About Mike Marsh:

Mike Marsh outdoor writer headshotMike Marsh is a freelance outdoor writer from Wilmington, NC, who has written thousands of articles about hunting and fishing for newspapers and magazines. His columns appear weekly in his hometown newspaper, Wilmington Star News, as well as many other newspapers. To contact Mike, read his latest posts or order his hunting and fishing books, visit www.mikemarshoutdoors.com.


Join the Havalon Nation today!

[hs_action id=”10664″]

4,485 total views, 1 views today

Posted in Big Game Hunting, Guest Writers, Hog Hunting, How To, Hunting Tips, Mike Marsh | Tagged , , , , , | Comments Off on Don’t Let the Heat Stop You from Hog Hunting