Flash Frozen Panfish Fillets by Mike Bleech

Ice Fishing Tips for Lake Erie


ice-fishing-bluegill-havalon

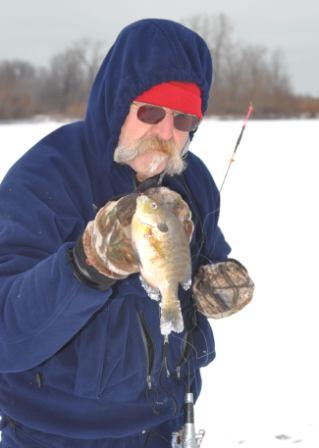
Charlie Brant is on his way to a fine meal with this fat bluegill.

“Lake Erie perch!”
“Bluegill through the ice!”
“I say Lake Erie perch!”
“Yea, they’re good, but you just can’t beat bluegill through the ice.”

Two of my fishing buddies walked onto the ice before me. They had gotten there early enough to have plenty of holes drilled, and to get into one of these ridiculous fishermen arguments, this time over what is the best tasting freshwater fish. It was all the more ridiculous because we were fishing in a bay off Lake Erie where we were likely to catch both perch and bluegill. Quite often our catches there also include crappie and pumpkinseed. So maybe it is not one of the great mysteries of life. It is a great argument nonetheless because no matter which side prevails every side comes out a winner.

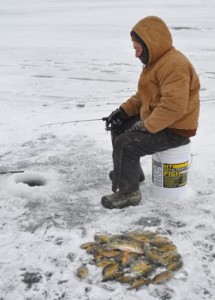
These comparatively small fish are collectively called ‘panfish’ for very good reason. They are the right size for a frying pan, and they come out of the frying pan tasting great. Taste is enhanced by the way they are handled while ice-fishing. Anglers typically  toss fish onto the ice as soon as they are unhooked where they quickly freeze, then at the end of the day they are collected in a plastic bucket for transportation. Some ice-fishermen try to get sneaky by putting their fish into a plastic bucket immediately so no one else can see their catches.

Panfish Rate Second Only to Bass in Popularity

Anglers love panfish, and a large share are enthusiastic about ice-fishing for these tasty critters. According to the 2006 National Survey of Fishing, Hunting, and Wildlife-Associated Recreation, a U.S. Fish and Wildlife Service report which is done every five years, panfish rate second only to bass in popularity among anglers, and in that part of the survey crappie are not included as panfish. If crappie are thrown in with the panfish group, as they are classified by most anglers, then the panfish group is far more popular than any other type of fish. Ice-fishing is not compared with open water fishing in popularity, however you get a pretty good notion about the popularity of ice-fishing when you consider that ice-fishermen annually spend more than $81-million on equipment.

ice-fishing-croppie-havalon

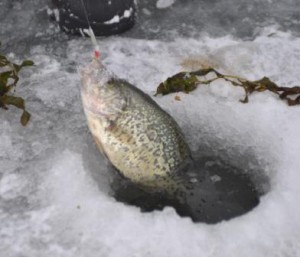
Crappie are the 'king of panfish'. They are among the most popular sport fish.

Great eating is just one of the main reasons that ice-fishing for panfish is so popular. Panfish generally are abundant, and in the better panfish lakes there is a good chance that at least one species is cooperating. At the Great Lakes bay nearest my home, crappie tend to hit best through early ice and late ice. Perch often go on a feeding binge during February. Bluegill and pumpkinseed are most cooperative of all, hitting well all through winter. Of course, none of this is a guarantee that any fish will be hitting at any particular moment. Just like other fish, there will be fast times and slow times, but mostly fair times.

Panfish limits are typically quite generous. Limit catches are more common than they are with most other species. My own personal limits which are fewer than the regulations allow are based on how many fish I want to fillet, or how many I can eat. I see no sense in stocking my freezer with so many fish fillets that some get freezer burnt. Tactics used to ice-fish for panfish may vary somewhat between the specific panfish that are targeted, but since more than one panfish species are often present at the more popular ice-fishing lakes, tactics that appeal to all panfish are very useful.

My Personal Favorite is a Two Jig Rig

Perhaps the most widely useful terminal rig used to ice-fish for panfish, and my personal favorite terminal rig, is a two jig rig. The upper jig is usually a teardrop jig, or something similar, and the lower jig, the terminal jig, is a jigging spoon. The reason for having the jigging spoon at the bottom is because it is heavier so it sinks fastest.

A simple concept, having the heavier jig at the end of the line serves one of the most basic, most important tasks, locating bottom. With a relatively heavy jig an ice-fisherman can feel bottom. That is, an angler can feel the difference in tension on the line when the jigging spoon hits bottom. Even if this cannot be felt, you can still detect bottom by watching the line. A jigging spoon keeps tension on the line. When the jigging spoon hits bottom there is no longer tension on the line so it begins to coil into loops, or a spiral shape.

ice-fishing-crappie-havalon-2

Line that is light enough for bluegill is stressed to its limit by nice crappie.

Tying the Two Jig Terminal Rig

This does not mean that panfish are always close to bottom, it is just a starting point. Of course tying the two jig terminal rig is simple, but it may not be easy because the line, either 3 pound-test monofilament ice line or 4 pound-test fluorocarbon are my preferences, is so thin that seeing it is difficult. I have a good reason for tying the rig exactly the way I do it. First the teardrop jig is tied to the end of the line. Next cut the line above the jig so the cut piece of line is a few inches longer than the distance of separation you want between the jigs. This extra line is used up tying knots. Next tie the jig to the end of the main line again, tying it to the line eye just where the first knot was tied. Then the jigging spoon is tied to the terminal end of the leader. Now you are ready to tip the jigs with bait.

Why tie both knots to the eye of the upper jig rather than tying that jig on a dropper line? Dropper lines are constantly tangling. Only rarely will the line tangle with the upper jig tied right into the running, or main, line. As far as I have been able to determine, tying the rig this way does not reduce hits a bit. It may even increase hits on the upper jig.

Use Different Colors on the Upper and Lower Jigs

Use different colors on the upper and lower jigs, and tip them with different baits unless a pattern has already been established. There are so many ‘favorite’ jig color patterns that suggesting specific color patterns amounts to a list of every combination imaginable. Instead, just ask the local tackle shop for suggestions, or ask ice-fishermen who are familiar with the lake.

Baits used to tip the small jigs that are used for panfish typically are either minnows or grubs. Keep the entire rig small since the mouths of some panfish are very small. Among the more popular panfish in ice-fishing territory, the various sunfish, notably bluegill, have the smallest mouths. Maggots are usually my bait of choice for sunfish. If you have the chance, watch sunfish hitting a jig tipped with bait. You will see that they nip at the bait. Small sunfish will not even get the hook into their mouths. Crappie and yellow perch have comparatively large mouths. Small minnows, especially shiners where they are available, may be the best bait for both of these species. Larger grubs such as wax worms or meal worms may be more effective at times. Black crappie tend to favor grubs over minnows, while white crappie, especially if you are specifically targeting large fish, prefer minnows in most cases.

Ice-fishing has some obvious limitations. One of these is that lifting and dropping a lure is about all that can be done to give it action. The shape of the jig can add something to the action, but still the angler is limited to lifting and dropping. The variables are the length and the speed of the lift, and the speed of the drop. Before accepting this limitation though, use your imagination. You can do more than first meets the eye. This is strictly for hard-core ice-fishermen. Casual ice-fishermen rarely will put this much effort onto their fishing, and they seldom will believe that doing these little things can be so important.

Using a Longer Jigging Rod Increases Your Chances
ice-fishing-bluegill-havalon-2

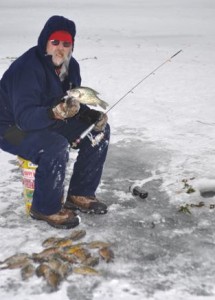
Tossing fish on the ice as soon as they are unhooked freezes them quickly. This preserves their flavor.

Using a longer jigging rod increases the variables that can be employed with ice jigs because it increases the distance the jig can be lifted. This in turn allows more things that can be applied to the lift. A simple lift can be changed to a series of short lifts which raise the jigs as much as 6 feet while you are sitting on a bucket. An action of this sort tends to be very effective for crappie for a couple of reasons. Sometimes crappie seem to want a jig to be rising or dropping. Crappie may be anywhere in the water column, and they might change their depth in a second. Commonly, crappie move upward when they get most active.

Bluegill and other sunfish usually prefer that a jig barely moves, except for an occasional lift to get their attention. It is the aroma of the bait that makes then strike, whereas the jigging motion may be the primary thing that attracts strikes by perch and crappie. Setting the hook quickly is usually imperative to catching a good mess of bluegill. These fish tend to suck the hook into their mouth and expel it very quickly. Keep a close watch on the rod tip.

A Rod With a Very Sensitive Tip is One Which Bends

This brings us to one of the most important tackle choices necessary to catch panfish through the ice. Feeling a panfish take a jig is just about impossible when you are wearing gloves, or when your hands are cold. Sensitivity means seeing the rod tip bend. A rod with a very sensitive tip is one which bends under the least amount of pull. You can add to this sensitivity by painting the rod tip fluorescent red or some other highly visible color.

The ice-fisherman who consistently has panfish flopping on the ice is one who pays attention to all details, things that other ice-fishermen ignore.

CRISPY BLUEGILL CHIPS

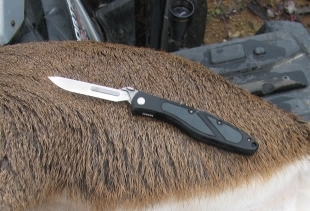
There are lakes where big bluegill are abundant. But there are many more where any sunfish longer than 6 inches is unusual. You can still get great tasting fillets when the panfish are small if you fillet them using an ultra-sharp knife like the Havalon Baracuta Fillet Knife. Only with this extremely sharp blade can you get worthwhile fillets from modest-size panfish.

Have a pan filled with a water, salt, and baking soda solution before you start filleting. After cutting the fillets and rinsing them well, toss them in the solution. Let them sit in this solution at least overnight on the top shelf of the refrigerator.

When you are ready to eat, prepare a mixture of corn starch and onion salt. Remove the fillets from the water solution, rinse them well, then shake them in a plastic bag with the corn starch and onion powder. Fry in hot oil, and you have a great meal of thin panfish fillets.

4,031 total views, no views today
Posted in Ask Havalon, Guest Writers, Hunting & Fishing Equipment, Mike Bleech, Skinning Knives, Uncategorized | Tagged , , , , , , | Comments Off on Flash Frozen Panfish Fillets by Mike Bleech

Bow Hunting The Late Deer Season by Brad Herndon

Fewer hunters, high numbers of deer and some dandy bucks left

By Brad Herndon

deer-hunting-late-season-brad-herndon-bh9

Use whatever it takes to get to stand without being detected by the deer.

              The date was January 7.  It was the last day of Indiana’s late archery season, and soon it would be over since the sun was beginning to set in the west. 

With only 10 minutes of shooting light left I noticed movement in the broom sedge to the west of me.  Antlers appeared; then more antlers.  Two 10-point bucks were headed toward me on their way to an unpicked cornfield one half mile away.

Within a few minutes, one of the 10-pointers stood in front of me, barely 12 yards away.  I was able to place the arrow right through both lungs and I watched him topple over since he ran only 80 yards. 

He ended up netting 121 5/8, missing being a Pope & Young buck by a little over 3 inches.  Still, this was one of my most satisfying bow hunting seasons ever since the deer was taken in virtually the last minutes of the season.

By the way, this isn’t the only buck I’ve taken in the January season.  In fact, the late December and January seasons are some of my favorite times to hunt because the deer are fairly predictable during this time. I’ll explain why.

It’s All About Food

            There will be a few doe fawn come in heat during the December bow seasons when they reach a body weight of 70 pounds or more. When this occurs and you’re in the right location, you will experience absolutely incredible action since every buck in the area will be there. I’ve been in on several of these late season buck explosions and have seen as high as seven bucks milling around one doe fawn.

deer-hunting-late-season-brad-herndon-deer-trails

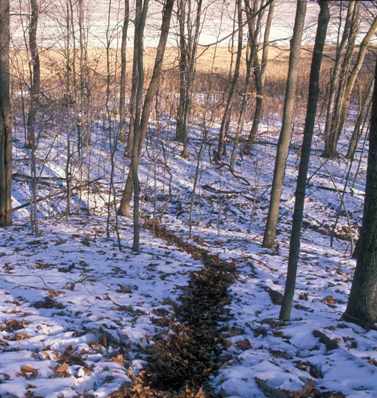
Many deer trails lead to a late season food source like this unpicked cornfield. It's a hot spot!

            Typically this isn’t the type of action you will encounter in late bow seasons. Instead, the hunting will revolve almost completely around remaining food sources. This can be corn, soybean, and alfalfa fields, or it can be a location that still has a lot of acorns.

            During the often frigid, post-rut time period, the bucks are in a rundown condition and desperately need to replenish their fat reserves. A complex carbohydrate food is what they seek if it’s available, and you can bet when the light diminishes at the end of the day, all types of deer will be heading to these food sources.

deer-hunting-late-season-brad-herndon-acorns

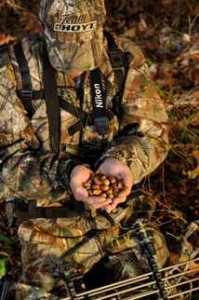
Alert hunters are keying in on this great late season food source.

Know the Acorn Crop in Your Region

To locate these food sources takes some work. You should be familiar enough to know your home turf, and you should be monitoring the acorn crop in your region. If acorns are scarce, all of them will be gone by late season so you can rule that food source out at times. If, however, acorns are plentiful and your deer herd isn’t out of control, there should be “hot” acorn locations which will pull in the hungry whitetails. I look for ridges or points saturated with white oak trees in my territory, and they have been productive hunting spots for me in good acorn years.

Walk the Corn, Soybean and Alfalfa Fields

Regarding field food sources, simply walk the corn, soybean and alfalfa fields in your region to determine if sufficient food is left there to pull in deer from the surrounding timber. Finding great food sources such as these is becoming more difficult all the time because of the highly efficient harvesting methods of the latest farm combines. Often when a soybean field is harvested you can’t tell anything has ever been grown in the field. Likewise shelled cornfields can be sparse when it comes to food left behind for wildlife. Alfalfa fields, meanwhile, usually remain an excellent food source for deer.

Find Fields Hidden From View of a Road

deer-hunting-late-season-brad-herndon-field-corn

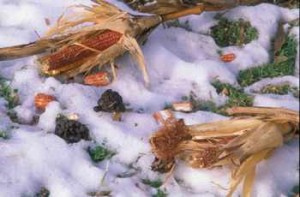
This picture shows deer are actively eating in this cornfield.

Keep in mind while looking for late season food sources that hail damage, blown down cornstalks, and other acts of nature can oftentimes result in there being a notable amount of corn left in the fields. Also, if the fall has been a continuous series of rains, this often prevents the farmers from getting into the fields and there may actually be whole fields of standing corn or soybeans left in the late December and January bow hunting seasons. One final tip: Fields hidden from view of any road usually host the most deer.

How To Set Up On Late Season Food Sources

            There will always be some kind of late season food source left, and if you put in the miles you will find them, just as I do. With this task completed, a strategy has to be formed which will allow you to hunt the location effectively without being picked off until you have a crack at the deer of your choice. This usually isn’t an easy task.

Find Where the Deer are Bedding

            Your first step to success is to find out where the deer are bedding. This could be a brushy section of timber, or it would be a warm south facing hillside, or even a weed field or swamp. A little walking and observation should tip you off to the bedding areas, and this information will also help you determine how, and where, the deer are entering the food source.

Find Where They’re Entering the Food Source

deer-hunting-late-season-brad-herndon-buck-rub

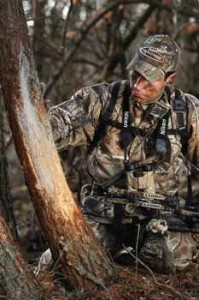
Find a rub like this near late season food and you may have an opportunity at a trophy buck.

On oak tree setups I like to enter from the opposite side of the bedding area, if possible, and wait until there is a wind that will carry my scent back toward my entry way, and thus away from the whitetails. The first hunt is the best because the whitetails don’t have a clue you’re there. In the timber, a variety of deer ages should show up at the oaks within good shooting light. If you want to put your tag on an antlerless deer, you could position your stand near the first productive white oaks the deer come to.

If you’re waiting for a mature buck, though, this strategy usually won’t work because several doe and fawn may come in early and feed past, and behind you. This means they will catch your wind, blow and bound off and alert any late entering mature bucks to your presence. Because of this I locate my stand near the oaks the farthest away from the deer’s entry location. This takes patience for them to get to you, but it will pay off.

Field Hunting

deer-hunting-late-season-brad-herndon-wind-check

You can't fool a deer's nose. Always be sure to have the ideal wind direction before sitting a late season stand.

            Hunting fields can be tricky. If you know where deer are coming into a field and you just want any deer to eat, you can place a stand at this site. Using a wind that will blow your scent out into the field assures you the first deer past will present you with a good shot.

If, on the other hand, you’re looking for a good buck, most likely the first deer out will be doe and fawn. Obviously you let them go by, they start feeding in the field where they will wind you, you get busted and the big buck is alerted and never shows up until after dark.

As I said, hunting fields is tricky.   I’ll use the buck I killed at the introduction of this story to illustrate what some of your options will be.

Understand How the Wind Will Bust You

My goal was to kill a mature buck, 3 ½ years of age, or older. I had located a standing cornfield in a valley in a hilly region. Timber was on only one side of this field, with the  field making a 90 degree curve around a timbered point. I knew where two bedding areas were, one to the south of the field, the other to the southwest of the field. This gave me options.

deer-hunting-late-season-brad-herndon-pinch-point

This archer positioned his stand near a cornfield that deer pour into each evening.

At first I tried setting up down low and catching a northwest wind that would enable the deer to feed out in the field, yet not wind me when they got there. As many of you know, the wind may switch from time to time when you hunt low areas in the hills. The weather was just above zero and snow was on the ground, and this brought many deer into the field early. Every other hunt, though, I got busted by the wind. That’s no good.

As a result, I switched to another section of the field down low where a wind coming down a long hollow could be better used. Although this worked to perfection, presenting me with tons of shots at antlerless and small antlered bucks, no big bucks were sighted. A week had passed by then. My next step was to move up on top of the ridge within ¼ mile of the southwest bedding area. Sitting on a good trail on the ridge presented me with shots at 2 ½ year old bucks, but again no mature bucks.

As you can see, I patiently implemented my hunting strategies, moving cautiously into the bigger deer’s domain. Finally I made plans to hunt an inside corner right next to the bedding area, hoping to catch them just as they came out to make their way to the corn field one half mile away. A northwest wind was needed for this hunt and this didn’t occur until the last day of the season on January 7. As you have already read, my deliberate patience finally paid off. In all, it took me eight hunts to taste success, all in bitterly cold weather.

            Each of these hunts were evening hunts, a time period I feel is by far the best for late season success. Morning hunts, moreover, can be successful if you locate on key funnels I mentioned in last month’s article.

Be Confident, Dress Right

deer-hunting-late-season-brad-herndon-shoes

Learn how to dress to keep warm. Heavily insulated, dry boots are a must.

           A great trophy hunting friend of mine once told me to remember this when hunting in late season: Every deer you want to kill next year is alive right now. He was right, of course, and what he said really made my confidence level shoot up several notches. It should do the same for you.

            Now, many years later I can honestly say I enjoy hunting the late season as much as any other season. Few hunters are in the woods, you will see high numbers of deer at the food sources, and there are some dandy bucks left. I use topo and aerial maps to help me determine stand locations, use a weather radio to determine wind directions, and doggedly stick to my hunting plan without fail.

            I’ve also learned how to dress for brutal weather over the years, a key factor in staying on stand. I use pack books, excellent insulated coveralls, and super thermal underwear to wick away body moisture. A heavy hat, an insulated face mask, warm gloves, hand and foot warmers, and other layers of clothing all are part of my final outfit. I even use a bow vest so my hands aren’t holding a cold, heat-sapping bow riser for hours on end.

deer-hunting-late-season-brad-herndon-buck

Author Brad Herndon killed this buck on the last evening of the Indiana season.

           So hang tough this December and January, for the buck of your dreams may only be a hunt away.

Editor’s Note: The author’s best selling book, Mapping Trophy Bucks, can be purchased at Amazon here Mapping Trophy Bucks by Brad Herndon.  Many consider this one of the best deer hunting books of all time. 

See Brad Herndon’s article for The Havalon Post on How to Map Trophy Bucks here.

27,133 total views, 1 views today

Posted in Brad Herndon, Deer Hunting, Guest Writers, Uncategorized | Tagged , , , | 7 Comments

Brad Herndon Reviews Havalon Knives for Field Dressing Deer

Outdoor Writer Brad Herndon Reviews Havalon Knives

Outdoor writer and pro hunter Brad Herndon

This is my first year using Havalon knives and as the 2010 season has progressed I have been able to use them quite a bit — for field-dressing, caping out a buck, and for butchering. Therefore I want to update you on my thoughts about them.

Havalon for Field Dressing a Deer

For field-dressing a mature 5 ½ year old buck I used the Piranta Whitetail skinning knife. It has a 2 ¾ inch blade, with the knife being 7 ¼ inches long overall. I use the shortest knife possible for a job since short knives enable me to have more accurate control over the blade and thereby I can increase my speed without sacrificing safety.

This knife was razor sharp and enabled me to quickly open up the deer. Also, due to its sharpness and adequate length I was safely able to cut around the buck’s anus cavity. Once I reached up inside the deer and cut its windpipe and esophagus, and made the other necessary cuts, I was able to roll the innards out, along with the anus related tissue  through the anus cavity and bring out the deer’s entrails cleanly without tainting any meat.

Havalon for Caping a Buck

After letting the deer hang for three days I caped out the buck. The Piranta Whitetail was up to this task as well. I’m an experienced caper and take my time so I used the standard blade for this task. However, if you’re inexperienced in the caping process Havalon does make a blunt tip blade for the Piranta that helps prevent poking holes in the cape.

Havalon for Quartering and Butchering a Deer

After the caping process was completed it was down to quartering and butchering the buck. Again I used the Piranta for this, being careful to use the knife for cutting only muscle, fat, ligaments and tendons. Keep in mind saws are made for cutting through bone, not sharp knife blades which will be quickly dulled. Once the meat was deboned, we cut out all parts that would make delicious steaks, saving the rest for roasts and stew meat.

For cutting those big buck steaks I used the Baracuta, which carries a 5 inch blade and an overall length of 11 inches. It worked perfectly for this job, but I didn’t use it for anything else since you sacrifice accuracy and speed when using longer blades and knives for detailed work. Use each knife for the job it is best suited for.

Be Careful, They Are Surgically Sharp

In summation, if you are one of those hunters used to using a near-dull knife, be very careful using Havalon knives at first. They are surgically sharp, and if you make a miscue you’re going to cut yourself quicker than you can believe. Go slow at first, being very careful, and make the adjustment to working with some of the world’s sharpest knives. You will soon find yourself enjoying field-dressing, caping and butchering whitetails, rather than dreading these jobs because of inadequate equipment. And remember, if you do dull a blade, simply clip in a new blade and carry on.

SHOP HAVALON KNIVES

Was this useful to you?  Ever used a Havalon for field dressing, skinning, caping, or quartering?  Tell us about it here.

3,717 total views, no views today
Posted in Brad Herndon, Deer Hunting, Field Dressing Tips, Hunting & Fishing Equipment, Reviews of Havalon Knives, Uncategorized | Tagged , , , , | Comments Off on Brad Herndon Reviews Havalon Knives for Field Dressing Deer

Havalon Knives Reviewed by BC Hunting

Havalon Knives reviewed by BC HuntingProperly skinning and caping your game is a critical part of preserving your trophy should you wish to have it mounted by your taxidermist.  Aside from practice and skill, the only tool that will help you do a better job is a razor sharp knife designed for the purpose of skinning and caping game.”

“Being a backpack hunter, trophy care is very important to me when we are several days away from a taxidermist.  Up until now, I’ve always carried my handmade hunting knife, and a 2 different sized scalpal handles with blades to make my caping job easier.  I am always interested in new hunting gizmos and through a hunting forum I belong to I was introduced to a company out of Cincinnati, Ohio, by the name of Havalon Knives.  Havalon came out with an ingenius design of a knife called the Piranta that incorporates the simplicity and compactness of a pocket knife, with the lazer sharp precision of removable scalpal blades.”

The reviewer goes on to give a thorough analysis of “construction,” “blades,” and “ease of use” based upon real world experience in the field. 

To read the complete review click here Havalon Knives Reviewed by BC Hunting.

2,531 total views, no views today

Posted in Field Dressing Tips, Reviews of Havalon Knives, Skinning Knives | Tagged , , , | Comments Off on Havalon Knives Reviewed by BC Hunting

October Havalon Email Subscriber Winner Announced

Havalon Knives is pleased to announce that Peter Stokes of California has won a free Havalon knife set.  Mr. Stokes was eligible because he subscribed to our email news during the month of October.   His choice of prize:  a Havalon Piranta-Tracer.  He will receive the knife, a set of replacement blades and a knife holster.

If you want to be eligible to win, just sign-up for our email news on the home page of our website.  Good luck!

2,013 total views, no views today
Posted in Havalon Knife Winners | Tagged , | Comments Off on October Havalon Email Subscriber Winner Announced