To Field Dress or Quarter Your Elk? by Bob Robb

On an on-your-own elk hunt, you have to handle the butchering and packing chores yourself.
Here’s how to go about it….

After Your Elk is Down
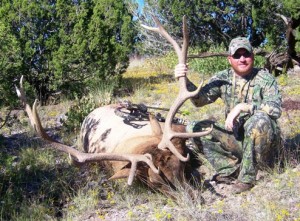
calling in this bull and shooting with a bow was fun.

Man that was fun, calling this bull in and shooting him with a bow! But now … party’s over! Time to get to work butchering him before the meat spoils.

I’ll never forget the day I shot my first bull elk.

Just out of college, my old roommate and I traveled 21 miles on horseback into the rugged Selway-Bitterroot Wilderness Area of Idaho on a semi-guided elk hunt. The crusty old cowboy who took us in would have rather been drinking than hunting, but we didn’t care. We had shot a lot of mule deer already in our young lives, and even though we’d never hunted elk, how tough could it be?

Back in those days you could hunt during the rut with rifles, and on day two of our September adventure that old cowboy whistled in a big 6×6 bull that I killed with one shot from a 7mm Rem. Mag. at about 100 yards, inside some dark timber on a steep mountainside. As luck would have it, a 2 1/2-year old satellite 5×5 bull also came in, and my buddy killed him. Just like that, our elk tags were filled! We thought we were pretty hot stuff, too.

That is, until we walked over to those two bulls. Holy buckets, they were as big as horses! The thought of field dressing those two bulls on that 60-degree slope suddenly became overwhelming. This was not going to be like taking care of even the biggest-bodied deer we’d ever seen. I thought my bull weighed at least a ton! Looking back, after 35 years of elk hunting and nearly three dozen bulls killed, he probably weighed 750 lbs. Still, that’s a lot of bull — and we had two of them to butcher, then backpack three miles to a horse trail where cowboy could come get the meat.

That took us all of two days of back-breaking work. It was also the beginning of my love affair with elk hunting, one of North America’s most difficult, yet rewarding, big game hunting adventures.

Elk Hunting is Hard Work!

We’ve all heard the saying, “The fun’s over when you pull the trigger!” It is never truer than with elk hunting.

Basically, elk hunting is hard work. But if you think it’s been tough covering mile after mile of rugged mountain terrain for days on end trying to find an elk to shoot, just wait until you shoot an elk in rough country miles from the nearest road. Throw in some nasty weather, like a snow storm, or thunder and a little lightning. Stir in a pinch of thick brush and a steep mountain between you and civilization, and for good measure, add a dash of slippery-as-snot trail — if there’s any trail at all — and you begin to get the picture.

Getting your elk off the mountain to the butcher shop in prime condition is no easy task. Every year hunters lose tons of meat to spoilage or the butcher’s trim knife because they were not prepared to handle the task. Don’t let this happen to you.

The Right Skinning and Butchering Tools
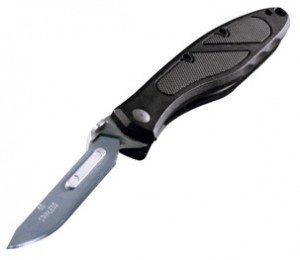
Havalon Piranta ZMeat care begins with the right tools. For elk hunting, you’re going to need at least one, and preferably two, hunting knives with strong blades so sharp they scare you. I really have come to like the Havalon Piranta-Z Black Pro Skinning Knife and Piranta Tracer-22 Skinning and Caping Knife for this type of job. With the weigh-nothing extra blades, no sharpening steel or stone is needed, a big plus! The only other tool you’ll need, a lightweight saw or hatchet for splitting the brisket, slicing through rib bones to reach the tenderloins, and cutting off the antlers, 50 feet of nylon parachute cord or thin-diameter rope, and four or five elk-sized cotton meat sacks. Don’t get the el cheapo cheesecloth bags, but buy the ones that are heavy enough to be washed and re-used. They’re the only ones strong enough for this job. Be sure to have at least one roll of fluorescent flagging and/or your GPS, so you can mark the spot when you have to come back for subsequent trips. A headlamp is cheap, even at twice the price, when you have to butcher and/or pack elk meat after dark.

Your goal is to prevent meat spoilage. You do that by cooling the meat, remembering that on big-bodied animals like elk, meat can spoil both from the inside and outside. You also must strive to keep the meat as clean as possible, free from dirt and its inherent bacteria.

Secure the Elk

be prepared to work hard when hunting on public land.

If you elk hunt on public land, you must be prepared to work hard, cover lots of country, and then if Lady Luck smiles on you, be able to take care of all that meat yourself in the field.

Before any cutting begins, you have to secure the elk, which often has expired on a steep sidehill. That’s where the cord or rope comes in, used to tie antlers or legs to a tree or bush to hold the animal in place as you work. Point the butt downhill if you can. It should be said that butchering an elk is much easier with two people, so if you can get some help, you’re advised to do so.

Field Dress or Quarter Your Elk?

There are two ways to clean any big game animal, including elk. You can do the basic field-dressing routine, which means first gutting the animal. Or you can take the quarters, backstrap, and neck off without gutting. I do both, depending on circumstances.

The basic field dressing procedure is the same as it is with deer and other big game, so we won’t detail it here. You remove the innards, including the anus, taking care not to puncture the bladder or stomach and spilling their contents onto the meat. Suffice it to say, this is not a good idea. Make sure you remove the heart, lungs, and esophagus.

I field dress an elk when I am not going to be able to finish the job right away, as when I might have to leave the carcass to cool overnight before packing it out. When I do this I lay the animal on its back, then cut the front shoulders so they lay out away from the carcass, and cut the hams to the ball joint so they too, are opened up enough to cool down.

havalon knives do the job when butchering.

Only the very best knives, like the Havalon Piranta series,will do when butchering a big bull elk.

However, these days I prefer to simply quarter the animal without exposing his guts. It’s less messy and smelly, and you don’t lose any meat.

To do that, roll the elk on one side and use your knife to remove the hind quarter through the ball joint, and front shoulder by cutting behind the scapula, leaving the hide on until the quarter is either hung or ready for boning and insertion into the meat sacks. That helps keep dirt and crud off the meat itself. Next remove the backstrap, half the neck meat, and the meat off the outside of the rib cage or, if you like, use your saw to cut the ribs completely off. I rarely do this, though. You then roll the elk over and repeat. To get the tenderloins out — they’re located inside the carcass, on each side of the backbone — use the lightweight saw to cut through the tops of the rib cage and remove them this way. When ready for bagging, skin the quarters out. Voila! One butchered elk, without the big mess of field dressing it first.

I virtually always bone my elk meat out, for two reasons. One, it gets rid of excess weight that I don’t have to pack down the mountain. And two, removing the bone opens the meat up and facilitates cooling. Thick chunks of elk meat, like those found on the hams and neck, will spoil quickly near the bone unless they are cooled properly. Boning helps this process. Hunters with the luxury of pack horses often like to keep the bone in, as it can make loading quarters into pack boxes easier.

Some hunters like to take the liver, heart, and tongue, all of which make some fine eatin’. An elk liver is about the size of a football, the heart like an elongated softball, so you’ll have plenty of extra packing if you want them. I often do.

Dreams Do Come True …. But Don’t Count On it!
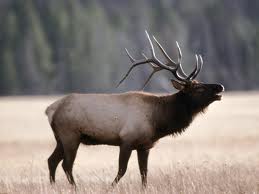
bull elk in field.Let me tell you about a fantasy that actually came true on the 21st bull elk I killed. After years of packing meat either on my back or atop pack horses, I was invited to hunt a private New Mexico ranch. The nice 6×6 I shot was a big-bodied critter, but it didn’t matter — the guide drove the truck right up to him, winched him into the bed — whole — and drove back to the barn, where the elk was hung, his innards removed, and the butcher took place indoors in a clean, sterile environment.

Now that’s heaven on earth! But don’t count on it. On an on-your-own elk hunt, you’re going to have to handle the butchering and packing chores yourself. And while it’s hard work, I look upon it as a labor of love. It means both that I’ve been successful, and that my family can look forward to a year’s worth of some of the most delicious and nutritious meat in all the world.

Was this useful?  Ever use a Havalon to field dress and skin an elk?
Tell us about it here.


42,822 total views, no views today

Posted in Bob Robb, Elk Hunting, Field Dressing Tips, Guest Writers, Hunting & Fishing Equipment, Skinning Knives, Uncategorized | Tagged , , , , , , , , , , , | 16 Comments

Havalon June Email Winner!

Adam Stout June2011

Adam Stout, United Kingdom

Havalon Knives is pleased to announce that Adam Stout from the United Kingdom, has won a free Havalon knife set. Adam was eligible because he subscribed to our email news during the month of June. His choice of prize: the Havalon Baracuta Edge. He will receive the knife, a set of replacement blades and a knife holster.

If you want to be eligible to win, just sign-up for our email news on the home page of our website.

Good luck!

3,036 total views, no views today

Posted in Contests, Havalon Knife Winners, Hunting & Fishing Equipment, Uncategorized | Tagged , , , , | 2 Comments

Does The Havalon Work for Skinning Hogs? ~ by Max Prasac

Hog Hunting in Hell (aka North Carolina in July)

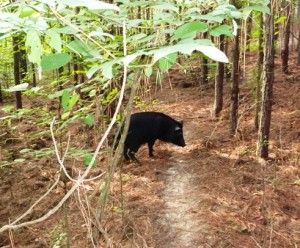
It was one of those grueling hot July summer days in North Carolina, where even the mosquitoes are loathe to move about. The evenings, when the sun had made its retreat to the west, offered no measurable relief from the thick, still, oppressive humidity and heat. Only fools hunt in this weather, so what does that say about me? The hogs had all gone nocturnal (who says they aren’t smart?), forcing us as hunters to go nocturnal as well.

I don’t like hunting in the summer in the south, but deadlines are deadlines, so I found myself in a familiar surrounding at Hog Heaven Outfitters, of Johnston County, North Carolina. I test year round at Hog Heaven (save for deer season), but I try to steer clear in the summer months.

This month I was testing an Ultradot 30, red dot-type sight, on one of my favorite custom revolvers, a Ruger Super Redhawk in .475 Linebaugh. The Ruger Super Redhawk was fitted with a custom-built, five-shot cylinder by Northern California gunsmith Jack Huntington of JRH Advanced Gunsmithing. The load of choice consisted of a 420 grain wide flat-nosed hardcast bullet over a stiff charge of Winchester 296 for a chronograph verified 1,350 fps at the muzzle. This load has proven extremely accurate and has delivered groups that many rifles would be envious of.

We had extensively abused this sight system in the past, and found it to be worth its weight in gold, but I had never used one at night before, and wanted to see just how well it performed. It is legal to hunt hogs in North Carolina at night – which is not the case in every state, so make sure you check the regulations before you try it.

Like any optic, it requires a light source on the animal to work optimally. Hog Heaven proprietor Milt Turnage had set up lights in strategic areas on the property just for such occasions, and was putting me in a spot where the hogs regularly root, sweetening the temptation with some rotting sweet potatoes. Never mind the smell! The shot would be around 50 yards if the hogs decided to even move in the suppressing heat.

THE HUNT

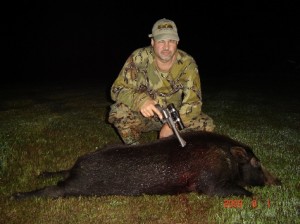
Havalon Photo 2 (a)

The author took this 175-lb sow with his custom .475 Linebaugh Ruger Super Redhawk in the sweltering summer heat of North Carolina.

I made my way out to a ladder stand before dusk, to settle in and start sweating. Did I mention that it was hot? It was a long night. Some time around 4:00 in the morning – it may have been earlier or later, I’m not sure as I was delirious by then – I heard the tell-tale grunting that announces the arrival of wild boar. Finally!


All of my senses came alive and were working at peak efficiency now. The group of hogs cautiously approached the light while I patiently waited and watched. A number of small hogs began rooting around the area, when finally a rather large sow caught my attention. Word of advice – if small hogs show up to eat, there are often bigger ones coming. Large hogs tend to exercise caution more than their younger counterparts and may therefore hang back until satisfied that it is safe to break cover. That’s how they get big. So be patient and don’t shoot the first animal that shows up. I watched her awhile and waited to see what else might show.

When satisfied that no other hogs were en route, I slowly yet deliberately turned my Ultradot on, pulled the hammer back, leveled the red dot on the chosen pig’s shoulder and let 420 grains of lead fly. The shot was true; the hog reared up and took off like it had seen a ghost. When the dust had settled, I slowly made my way down the ladder, flashlight in one hand, revolver on standby in the other, and found blood on the ground. That’s always a good sign. I followed the trail into the heavy briar-laden brush (why do they always head into the thickest brush?), and found her piled up about 25 yards from where I had hit her. It was a clean kill. Now the fun part, getting her out. Fortunately, she didn’t go far, so I didn’t have far to drag.

COOL THE CARCASS QUICKLY

When the weather gets this hot, it is imperative to get the animal skinned and the meat on ice as quickly as possible to avoid spoiling it, unlike hunting deer in the winter where you have the luxury of hanging the deer outside for a couple of days to age the meat. I generally don’t gut hogs unless I have a long distance to move them and can benefit from the reduction in weight, so I simply dragged her out to the road. I made the call to Milt and requested a pick up. By the time Milt showed up, the sun was starting to make its appearance and the promise of another sweltering hot day was on the horizon. We loaded her up in the bed of Milt’s truck and headed back to camp. She was pretty large and weighed in at just over 175-lbs. She would greatly enhance my barbeque.

USING A HAVALON TO SKIN THE HOG

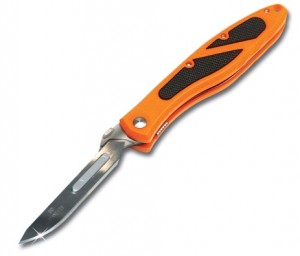
Piranta EdgeAfter hanging her up, and replenishing some lost fluids, guide, Brad Easly and I set out to skin the sow. Anyone who has skinned a wild hog knows that there are few animals that will dull a knife as quickly and efficiently. Having said that, Brad, an experienced skinner, grabbed his knives (yes, plural), and I brought out my one knife, a Havalon Piranta Edge. I have two no-name cheap skinning knives of unknown origin that I have used for a very long time that hold their edge reasonably well….on deer.

Hogs are a different story. I decided to give my new Havalon a go and handed it to Brad. He looked at the bright orange handled knife with a bit of obvious skepticism, but made the decision to humor me. Silly gun writers, what do they know?

If what I had heard about these knives was true, we were on to something good. The lightweight, plastic handled skinning knife comes with a box of replaceable blades and a handy carrying case that you can affix to your belt. The logic behind this knife system is sound. The idea is to use the blade until it dulls, pop it out, and put in a new one without missing a beat. You never have to sharpen a knife again for skinning.

How many times have you had to change knives in the middle of a hog skinning job, with yet another couple of sharpened knives on standby? If you only have one knife, maybe you have to stop and sharpen it before finishing the job. That has happened to me more times than I care to remember. It becomes particularly tedious when you kill multiple hogs and have them lined up for skinning. Makes me tired just thinking about it.

FIRST CUTS

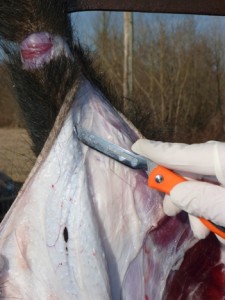
Havalon Photo 3 (a)

The Havalon Piranta Edge proved to be the right tool for the job, making the skinning of this hog effortless.

The first couple of cuts proved effortless, and Brad paused to give me a look of surprise and then a grin formed on his face. He then got to work, his pace increased as did the smile on his face. He accelerated as if to prove how fast he could skin a hog with the right tools. I usually help out to speed the process up, but soon found that it wasn’t necessary and that I would only get in the way, and impede progress. The Havalon Piranta proved to be the right tool for the job. The only “problem” we ran into is that we skinned out the hog expecting to change blades and we never got to the point where it was necessary.


What’s not to like about the Havalon Piranta? I have to warn the uninitiated that this is one very sharp implement that will remove a digit with minimal effort. As with every knife, exercise extreme caution, but exercise a bit more with a Havalon knife.  The guide liked it so much I gave it to him.

We got the meat on ice on time, but I had to add ice a couple of hours later. I would have to stop on the way home a couple of times to dump water and add ice. In this weather, meat is subject to spoiling in short order, so you’ve got to keep checking your ice and add as necessary.

The next few hours were spent in a coma while the day quickly heated up. At least the hunt was a success. All I can say is that I am grateful that deer and bear seasons are in the fall!

SHOP HAVALON KNIVES

What’s your experience hog hunting? Have you used a Piranta to field dress and skin a hog?  Tell us about it here.

7,433 total views, no views today

Posted in Ask Havalon, Field Dressing Tips, Guest Writers, Hog Hunting, Hunting & Fishing Equipment, Reviews of Havalon Knives, Skinning Knives, Uncategorized | Tagged , , , , , , , | 4 Comments

Muskie Fishing Tips ~ by Bernie Barringer

Muskie Fever – Getting Started in Muskie Fishing

The muskie is known as the fish of 10,000 casts, but it doesn’t have to be. Here are a few tips for the beginner that will cut down the learning curve.

Muskies #1A

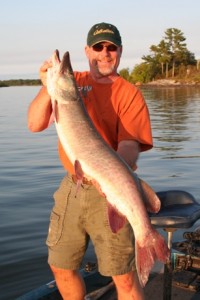
It's a thrill to catch a muskie.
They are elusive and large and each one is very rewarding.

Muskie fishing is not for everyone. It is a difficult and often frustrating endeavor. In fact, you could make a case that serious muskie hunters are a little off-balance. Are there any other outdoor sports in which success is counted in the number of quarry “seen” rather than the number “caught?” Ask a muskie angler how his day went and he might say, “Terrific, we released one, moved three, and had one roll up on a topwater.” That’s muskie lingo for a pretty good day of fishing.

Muskies are elusive and fascinating, and muskie fishing is addictive. In fact that’s why serious muskie hunters call it Muskie Fever. If you are thinking about getting into muskie fishing, consider yourself forewarned. Once you go down this road, it’s
difficult to turn back.

Get Educated

One of the most important keys to being a successful muskie angler is knowing as much about the quarry as possible. Muskellunge are an elusive fish and very little is known about them. State DNR’s are doing more and more studies on them and have shed some light on their patterns and movements, but they still remain mysterious. With the advent of tiny radio tracking devices planted under the skin of some fish, we have learned a few things about their daily habits.

Muskies #2A

Muskies are often active in the last hour of daylight. If a fish is sighted, it may be possible to go back and catch it at prime time.

One of the most important things we have learned is that muskies tend to be an ambush predator, lying in wait and striking out at any available meal that comes by. They tend to set up shop in a handful of key areas. If you have a muskie that follows your bait to the boat, but turns back, you can be reasonably confident that you will find that fish at that location again in the future. Savvy muskie hunters have learned to make a mental–or a GPS–note of these spots and return again during peak periods, such as moonrise, the last half-hour of daylight, or just in front of an approaching storm.

One of the primary appeals of the muskie is that they get big. Every serious muskie fisherman has a story about the fleeting glimpse of one that took his breath away. Muskies of about 40-inches are nothing to brag about, and it takes a 50-incher to really make an angler feel like he has arrived. In fact, the length restrictions in most states are either 48 or 50 inches, but a tiny percentage of fish this size are kept. Muskies are just too valuable to be reduced to possession, and biologists make decisions about muskie management on the assumption that nearly 100% of them are returned to the water. The die-hards are so extreme in this belief that several fish that almost certainly would have topped a state record, have been put back without being weighed because of the risk of having the fish die.

Muskies #7A

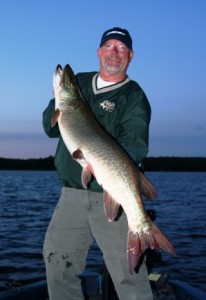
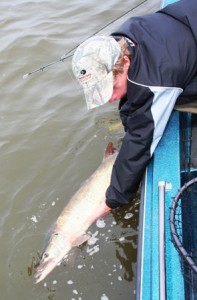
Releasing muskies is key to keeping a healthy population. Muskies are never abundant and the vast majority of them are turned back to be caught again.


The joke is that muskies eat most anything that doesn’t eat them first. While their diet is very diverse, and includes everything from muskrats and ducks to 5-pound bass, the truth is that muskies very much prefer soft-finned prey such as suckers, ciscoes and whitefish. In fact, biologists agree that less than 10% of a muskie’s diet is gamefish. Keep that in mind when choosing your lure selection.

Get Geared up

If you are just starting out in muskie fishing, you will learn quickly that the tackle you are using for other species will be entirely inadequate for bringing a muskie to the boat, not to mention, it will be very fatiguing to cast all day with the wrong equipment. Back in the day, muskie anglers were using short, stiff rods that resembled a pool cue, but that’s all changed. Today’s muskie tackle is built around a long rod. The average length is about eight feet, but some use shorter rods, like 6.5 feet, for working jerkbaits, and rods as long as 10 feet for casting crankbaits. For starters, I would suggest a rod of about 7.5 to 8.5 feet for an all-around tool if you are only going to buy one.

Muskies #3A

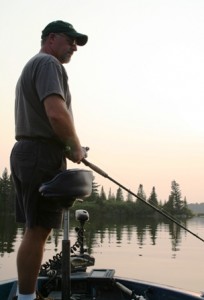
It's essential to remain focused even after a long day on the water. Watch behind the lure on every cast in case you may need to make a maneuver that triggers a follow into a strike.

The advantages of the longer rods are their ability to relieve strain on your shoulders and arms when casting huge baits, and the ability to make a wide, sweeping figure-8 maneuver when a big fish follows your bait to boatside. There’s no doubt that a large figure-8 triggers more strikes, especially from big fish, which cannot make sharp turns. Muskie baits come in a wide range of sizes and weights from about two ounces, up to a pound. The majority of baits that a beginner will use would be from two to four ounces. A good compromise would be a rod in Heavy or X-Heavy action. Eventually, you will want to add an XX-Heavy rod for throwing mega-sized baits that are six ounces or more. Expect to pay about $100-$150 for this rod, unless you really want to go for a high quality rod, which can run over $500.

You’ll need a good baitcasting reel such as the Revo Toro by ABU Garcia, you can find this reel on sale for just over $200 and it will serve you well for muskie fishing with a wide variety of baits. Once again, there are plenty of $500 reels out there and they are soooo sweet, but for an everyday workhorse reel that will last and do the job well, expect to pay between $200 and $300.

Spool your reel with 80-pound braided line such as Sufix, Berkely FireLine Braid or Power Pro. Big muskie will rough you up if you do not have the right tackle, and your line is the most vital link between you and the fish of a lifetime. Use a 100-pound leader of steel, titanium, or fluorocarbon at all times.

Get Hooked Up

Look in the garage of most muskie nuts and you will find several thousand dollars of lures and baits. It’s a manifestation of the addiction. That’s what muskie addicts do, they buy baits. They must have the latest and greatest… the hot new colors… two of this and three of that. But if you ask them to be honest with you, the majority of them will say they have about a half-dozen go-to baits. So before your addiction goes full-blown, let’s take a look at the basic bait categories and help you pick out a couple of each. But before we get started, here’s another caveat: Muskie baits are expensive and average well over $20 piece, and the custom made models can cost you twice that.

Muskies #8A

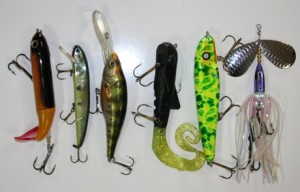
A few examples of the top muskie lure categories: Whopper Plopper Topwater, Jake shallow crankbait, Kopper’s Live Target Deep Diver, BullDawg, Phantom jerkbait, Muskie Maverick spinner

Muskie baits are divided into basically five categories, topwaters, bucktails, crankbaits, jerkbaits and soft plastics. Here are the basics on each of them. Topwaters are prop type baits and things that make noise. They are prefect for calm evenings and the strikes are often explosive. This is one of the most fun categories to fish since it is so visual and adrenaline charged. A few good topwater choices would be the Whopper Plopper, Creeper, Hawg Wobbler and the Jackpot. Basically, use dark colors on dark days and lighter colors on bright days. This contrasts with either a dark blue sky or the gray of an overcast day.

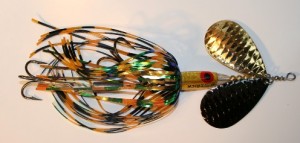
Bucktail spinners are excellent muskie lures because their hooking and landing percentages are very good, and when fish are active during the warm-weather months, they strike spinners. Some good choices are the Muskie Maverick, the Cowgirl, the larger Mepps, and the Harasser. Choose bright colors like chartreuse and orange in darker water and natural colors like baitfish imitations and chrome in clear water. Retrieve them fast and cover water when the fish are active. These are great search baits, and often move fish that you can come back for later with a slower-moving bait and catch them at a more opportune time.

Crankbaits can be used casting or trolling. They work well when the fish are deeper, such as when they are set up on the deep edges of the weed beds or along breaklines. There are muskie crankbaits that will dive to 30 feet, which is where some of the bigger fish will be found in the fall. And late fall is a time when many muskie anglers take to trolling. Once again, choose natural-colored lures for clear water and bright colors for stained or darker water. Examples of crankbaits include Jakes, The Depth Raider, and the Believer.

Muskies #6A

Muskie lures can be expensive, but high quality baits like the Muskie Maverick are worth the coin because they really catch fish.

Jerkbaits have taken a lot of muskies over the years. Baits like the Suick and the Reef Hawg are standbys in every tackle box. Newer baits like the Manta and the Phantom are effective too. They are worked with a twitching action and they are a great bait to use when you know a fish is in the area, and you want to cover the area thoroughly with a bait that will stay in the strike zone a long time.

Soft Plastics like the BullDawg, Red October Jigs, and other plastic-bodied lures are great summertime baits for fishing weed edges and breaklines. They are very simple to fish, just swim them up and down, keeping them within four feet of the bottom.

Get Going

Now that you have the bait and tackle you need, you will have to get out there and find a muskie. There are many variables of course, but muskie location can generally be summed up in two words: Weeds and rocks. So it stands to reason that if you find a combination of weeds and rocks, you are on a good spot. Early in the season muskie will be relating to emerging weedbeds that have warm water. Bays and shallow weed flats are key areas. As the spring progresses in to summer, muskies often move a little deeper and set up ambush points on the deep edges of weeds. If you can find a breakline with a distinct weed edge, there’s a good chance that a muskie has backed into the edge and is waiting for an easy meal to come by.

Muskies #4A&5A (b)

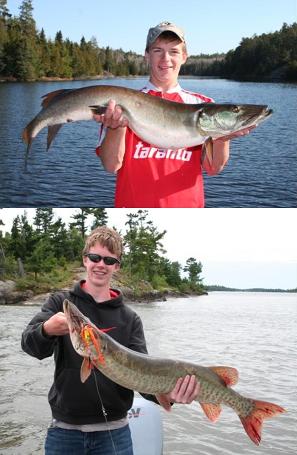
Even youngsters can catch muskies if they are in the right place at the right time with the right equipment.

By mid-summer, they are found on rock humps and weed/rock combinations where the baitfish are actively feeding. Reefs and isolated weedbeds can be key areas during the evening hours when muskies tend to be most active.

In the fall, look for them along steep rock walls and over open water where they are chasing baitfish that have schooled up. This is prime time to catch a trophy if you can find a school of ciscos and get a crankbait down to the predators that are often hanging around these bait balls.

Well, I have tried to warn you about muskie fever, but if you insist on forging ahead, at least now you have some basic information that will help you to be successful. “The fish of 10,000 casts” doesn’t have to be that hard, but it’s certainly hard enough to catch one, that it is very rewarding when you do. And that’s where the addiction really takes hold.

Bernie Barringer has been addicted to muskie fishing for 20 years and is the former editor of MUSKIE magazine. He also helps his son with his lure business, which can be found at www.hotmuskielures.com

Do you have a muskie story? Let us know, we’d love to hear from you.

9,490 total views, no views today

Posted in Ask Havalon, Bernie Barringer, Guest Writers, Hunting & Fishing Equipment, Muskie Fishing, Uncategorized | Tagged , , , , | 1 Comment

Fishing Smallmouth River Bass ~ by Darl Black

Summer Bite on a Smallmouth River

04-stuffed-with-crawdads-B

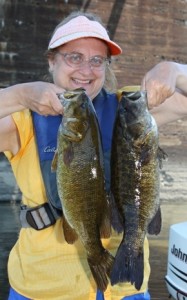
These smallmouths were stuffed with crawdads.


“You get a line and I’ll get a pole, we’ll go fishin’ in the crawdad hole, honey, baby mine.”

Every time I hear that line from the Crawdad Song, my mind immediately visualizes my favorite summer pastime.

Although smallmouth bass never comes up in the song, just the mere mention of an olive-colored crustacean stimulates an auto response in this Yankee that goes like this: Crayfish + Rod + Summer = River Smallmouth Bass Fishing.

Ironically, river smallmouths rarely inhabit the type of muddy creek hole described in the song. Instead, bronzebacks in the summer are found primarily in relatively shallow, relatively strong current sections of a river or large creek. The bottom substrate will be comprised of rock, gravel and sand rather than mud. It’s also the same environment that northern crayfish species inhabit.

While crayfish certainly comprise a portion of a river smallmouth’s diet, there are additional prey species which must also be considered. Without question, insect larvae of stoneflies and mayflies as well as winged adults are consumed by smallies. One particular bottom critter which smallmouths love to gulp down is the hellgrammite, the 3″ to 4″ leathery larvae of a dobsonfly.

In any river or major creek, there are a wide assortment of minnows, dace, darters, shiners, chubs and madtoms (stone cats) that are critically important. Depending on the bait species, they may be found along the shallow rocky bottom, suspended in current seams or milling around eddies just off the faster moving water. With the exception of shiner species, most river preyfish species are darker in color than the typical silver patterns most fishermen imagine for baitfish.

05-three-anglers-A

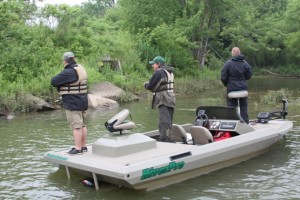
These three anglers cast crankbaits to the
flooded shoreline during a high water
period during the summer.

Throw in frogs or even the occasional small mammal that falls into the river and you have a good insight into a river smallmouth’s diet during the summer. As you can see, it is rather extensive – far beyond simple crayfish.

Now, don’t fret. To consistently catch summertime smallmouth’s does not require a specific, detailed lure to imitate each different prey. Unlike our fly-fishing friends who believe they must have precise bug representations of 50 or more insect species in order to catch trout, flowing-water smallmouths are not so discriminating.

Bronzebacks see food, and if hungry, they eat it. Sure, a lure must give the illusion of familiar prey in terms of size, action and perhaps color – but it does not need to be an exact replica. Heck, there are times when non-feeding smallmouth strikes the odd lure simply because they find it irritating.

How many readers remember the “Name That Tune” game show on television? Well, in my version of that game, I’ll state that: “I can catch summertime riverine smallmouth with only six lures.”

Here are My Choices ~ Plus Where and When to Fish Them

01-six-lures-A

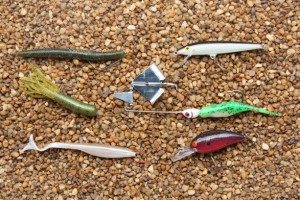
The author has sufficient confidence in these six lures to catch creek & river smallmouth all summer long.

Tube Jig – The ultimate universal river bait is a 3″ to 4″ tube lure on an insert head. A dark colored tube with its multiple-strand tentacle tail represents a wide variety of bottom-dwelling creepy-crawlers and baitfish. Keep in mind there are more dark-colored preyfish in
a river smallmouth’s world than
shad-colored bait.

Whereas an external jighead is likely to lodge in a rocky crevice on every other cast, by inserting a teardrop jighead into the body cavity, the thick, soft plastic head of the tube greatly reduces hang-ups. Select a jig weight (1/16, 1/8, 3/16 or 1/4 oz) that allows the bait to trickle along the bottom rather than becoming anchored.

Hop and drag a tube on hard substrate, swim it slowly like a minnow, or in certain instances streak a tube just under the surface – it is truly the most versatile lure in your river arsenal that can be fished in current seams, pocket eddies, tail-outs of pools, riffles and dredge holes.

In a river or creek, I fish tubes on 6 or 8lb test Gamma Edge fluorocarbon line and 6.5′ to 7′ fast action spinning rod.

Stick worm – Touring bass pros sometimes refer to this bait as a heavy worm or sinking worm – but to me, this blunt-end worm is more appropriately named a stick worm. For river fishing, I use a weightless stick worm as drift-bait, relying on the lure’s own slow-sink design to meander to the bottom in the downstream flow.

02-db-stickworm-A

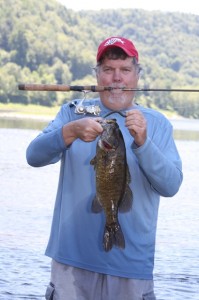
Darl Black happily lifts a smallmouth taken on a stick worm.

In strong current situations, smallmouth typically set up an ambush point in a slackwater pocket waiting for a dislodged crayfish, hellgrammite or disoriented minnow to drift by. It’s the best way to secure a meal while conserving energy. I rig a 4″ Dinger (my favorite of the many stick worms on the market) Texposed on a 2/0 Mustad Mega Lite Hook.

I fish a stick worm on a spinning outfit spooled with 10lb Power Pro Braid and a 3′ leader of 8 or 10lb fluorocarbon. The braid helps to float the worm while also acting as a visible bite indicator, even when slack forms during the drift – i.e. a bobber built into the line!

Soft Jerkbait – These slow-sink 4″ to 6″ soft plastic lures feature a representative baitfish profile. This bait delivers the best return on rivers when fished in areas with current.

Soft jerks can be fished both aggressively and passively on the same retrieve. Following a cast, apply a series of sharp rod snaps to make the bait dart just under the surface. This gets the attention of nearby smallmouth. Then incorporate a long pause in the retrieve as the bait drifts freely, acting like an injured baitfish.

Using a rod and reel with braid helps insure long casts and positive hook-ups. In stained water, I typically go with 15lb braid on a baitcasting outfit and tie direct to 5″ soft jerk rigged Texposed on a 3/0 Mustad Mega Lite Hook.

But for low, clear water more typical of summer fishing, I use spinning gear with 10lb braid and a 3′ fluorocarbon leader. In this instance, I tie on a #1 VMC drop-shot hook and nose hook a 3″ to 5″ soft jerkbait.

03-marilyn-wading-A

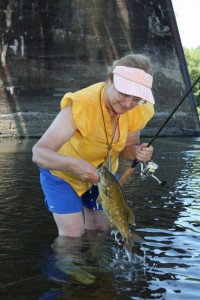
Marilyn Black lands a smallmouth from near a bridge while wading.

Hard Minnow Bait – I would feel incomplete in my flowing-water tackle selection if I did not have Original Floating Rapala. I caught my first river smallmouth on this bait as a youngster, and I’ve continued to count on it over the next five decades. In particular, it is my go-to choice for the smaller waters – a smallmouth “creek” versus a “river”.

I can twitch the Rapala to make it dance on the surface in place of a topwater bait along a quiet water bank; fish it more aggressively with long pulls and pauses in faster moving riffle water; or use a steady retrieve. Forget all the fancy new colors – just use the original silver or gold pattern. A moderate action spinning rod with 6lb co-polymer line (rather than fluorocarbon) is the proper outfit for this bait.

Buzzbait – I’m willing to bet that few river anglers fish a buzzbait in the manner that I learned from Kevin Turner, famed Upper Mississippi River smallmouth angler and owner of River Pro jet boats. After one trip with Kevin, I became a believer.

Select a 3/8 or 1/2oz buzzbait, such as Booyah Buzz with the extra ‘clacker’ blade. Strip off the silicone skirt and substitute a 3″ or 4″ soft jerkbait or simply a piece of plastic worm. (Substituting soft plastic body for the skirt increases casting distance considerably.) Tie direct to 30lb Power Pro Braid on an outfit with a high-speed casting reel.

Select a river section featuring extremely fast flow with lots of current breaks (created by rocks, sunken logs, etc.) for smallmouth to hold. Make long casts to the shore and return bait with a steady retrieve at 90 degrees to water flow. Oh yes – hold on tight! Executed properly in fast flows and you’re catch rate for smallmouth will climb dramatically.

06-crankbait-success-A

Crankbait success!

Crankbait – When the level rises and a normally clear-water river becomes dirty from heavy summer rains, established patterns will change. Most of the above baits become less effective. Fortunately, feeding bass tend to move shallow with the rising water and spread out more along somewhat slack water areas. It’s cranking time!

In the dingy water, the vibration and bolder colors of a crankbait will draw vicious strikes from bronzebacks that normally would find such a presentation unappealing. You should be targeting shorelines with slower moving water but with some type of cover – large rocks, logs, grass beds or eddies formed by inflowing tributary water.

In most instances I’ll select a crankbait which dives to no more than 4′, preferably with a square lip to deflect off submerged cover. However, if confronted with a particularly steep bank where water depth may be 6′ to 10′, a crank that dives into the 6′ plus depth is desired. Fish it on 10lb test co-polymer or fluorocarbon line.

I typically go with a crayfish pattern – something dark brown, black, red or with strong chartreuse in it. Bomber Model A, Cordell Big O, or Bandit Series are among my picks. Cast and retrieve, and keep moving to find the scattered bass.

Now Go Fish!

Bass Stew

Here’s a recipe from long-time fishing buddy Worth Hammond, who is no longer with us. Normally, I would not keep bass to eat, but on this occasion we were on a fishing trip to the Ottawa River near Pembroke. Our menu called for fresh walleye each day for a week, but walleye were less than cooperative. So we found it necessary to substitute the plentiful 12″ to 14″ smallmouth from the river. When Worth and I went on an extended fishing trip, we packed all necessary ingredients to prepare meals from scratch.

  • 2 pounds skinned and boned fish fillets cut into chunks
  • 1 medium onion, diced
  • 2 cloves garlic, diced
  • 1 bay leaf
  • 2 tablespoons of crushed basil
  • 1 teaspoon parsley flakes
  • Salt and pepper
  • 1 carrot, sliced
  • 2 stalks celery, diced
  • 3 potatoes, diced
  • 2 cups chopped cabbage
  • 1 quart water
  • 1 cup tomato puree
  • 1 ounce Cajun-style hot sauce
  • Cover the bottom of a 4 quart pot with cooking oil. When the oil is hot, add fish chunks. Stir and break fish into smaller pieces as it cooks. Remove any remaining bones. Add onion and garlic, stir for one minute, then add bay leaf, basil, parsley and 2 cups water. Simmer 5 minutes. Add carrots and celery. Simmer 15 to 20 minutes. Add all remaining ingredients, using only enough water to make a soupy-stew thickness. Salt and pepper to taste, Continue cooking until vegetables are all tender.

    Have you fished smallmouth river bass? What was your experience?
    Let us know, we’d love to hear from you!

    12,535 total views, no views today

    Posted in Bass Fishing, Darl Black, Guest Writers, Uncategorized | Tagged , , , , | 5 Comments