Processing Deer: How To Age Your Deer Meat

Aging Is The Key To Great Tasting Venison

By Pat Carrothers

Venison actually contains many of the same enzymes as beef, such as lactic acid.  Venison, however, has a different taste and it is much lower in fat.  You can get an even better flavor from your deer by aging the meat in the proper manner.  Aging deer is a simple process, but it needs to be done with care to save the meat for consumption.

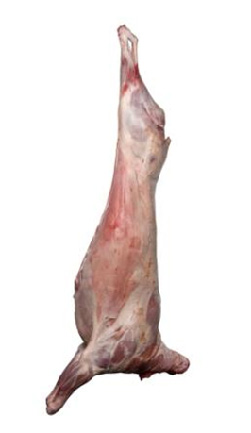
After the deer dies, it enters the rigor mortis stage.  This stage usually lasts about a day.  How to Age Your Deer Meat Image 1During that stage, the muscles contract and the meat is tougher to butcher and hard to cook and eat.  You don’t want to freeze the meat during this stage.  You can either hang the skinned deer in a very cool spot, or quarter the deer and store the meat in a very cool environment.

In order to allow the meat to age without decay, keep the meat at a temperature ranging from 32-35 degrees.  Make sure the meat never gets any warmer than 40 degrees because at that temperature, bacteria can begin to grow and the meat will rot.  Aging deer can take place over a period of 3 to 10 days or more.  There is no specific time.

The general rule of thumb is that the younger the deer, the less aging it needs.  If you have a mature buck, you may want the meat to age for 7-10 days in order for it to become tender.  Younger deer usually only take 3-5 days.  You will have to work in a trial and error type of way.  The aging deer process will depend on many different factors including the environment, the type of deer and many other things.  Whatever you do, make sure you have proper storage facilities with proper temperatures.  Anything outside the right temperature range will allow meat the chance to spoil.

After the aging process is complete, you want to freeze the venison to use later at your disposal.  It is a good idea to freezer wrap each piece of meat in moisture free wrappings.  You may want to use vacuum packaging to ensure that you get all of the air bubbles out.  This will keep the meat fresh for longer in the freezer.  If any moisture gets into the meat, it will have a much more “gamey” taste and it can become tough.  Venison can usually be stored in freezers at 0 degrees for anywhere from 6 to 12 months.  Make sure you label each package with the date so you can keep track of it’s age.  If you are an avid hunter, you may also want to label the package in a manner so you can tell from which deer the meat comes.  Try it out and enjoy that tender venison!

Next post: The Best Ways To Cook Deer Meat

For more information on deer processing, click here.

8,555 total views, no views today

Posted in Deer Hunting, Deer Processing, Uncategorized | Tagged , , | 1 Comment

Processing Deer Meat On Your Own

You Don’t Have To Be An Expert To Butcher A Deer Safely

By Pat Carrothers
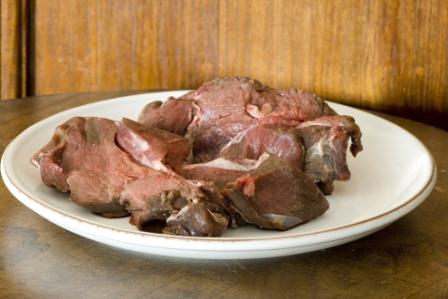


processing-a-deer-venison-steaks

The keys to success in processing deer meat are keeping the meat cold and dry.

The best thing you can do for the deer processing portion of hunting is make sure that the meat does not spoil.  This is true whether you plan to take the deer to a professional or do it yourself at home.  Take the right actions while you are still in the field.  That means right after you kill the deer, you need to gut in a reasonably short period of time.  Once you get the meat ready to move, keep it cool, clean, and dry.

Venison meat, like any meat, can spoil quickly if it is not kept in the right conditions.  It is a good idea to have all of your tools ready and sanitized before you begin deer processing so you can ensure that the meat can be prepared before it begins to spoil.

Many deer hunters don’t enjoy the butchering process and prefer to have someone else do it.  We think it’s just a factor of getting used to it by experience.  It’s a little intimidating for those of us that didn’t grow up in a family where butchering was commonplace.  But you don’t have to be an expert to butcher a deer safely. Anyone who enjoys hunting should also learn the basics in butchering.

As always, you need to keep the meat in a cool, dry environment.  If it is warm and sunny outside, you want to take the deer home as quickly as possible so the meat does not get too hot and begin to spoil.  You may have heard about the meat aging process, but even that process needs to take place at a temperature just a few degrees above freezing.  Hot weather can ruin everything fast.  If it is hot, throw an ice bag into the cavity after gutting.

It is helpful to hang the meat before beginning the butchering process.  When you hang the deer, make sure it is in a controlled environment that’s cool and dry.

Butchering Basics

In order to butcher a deer and secure meat that is safe to eat, make sure the venison is transported to a cool, clean, dry location quickly.  Have we said this enough yet?  You will need to have several things on hand anytime you hunt in order to do this when you make a kill.
-10-15′ rope
-Sharp skinning knife (nothing’s sharper than our Havalon)
-Knife sharpener (if you’re very old school)
-Cutting board
-Hacksaw
-Paper towels
-Plastic bags
-Rubber gloves

Quartering Your Deer

After the game has been killed and you field dress the animal, deer processing can be done in one of two ways.  You can take the deer to a commercial processor, or you can do it yourself.

Plenty of hunters simply take their kill to a commercial processor.  It is convenient and these companies are able to make special items from the meat such as jerky, deer sticks, and sausage.  Other hunters like to do the deer processing themselves.  Some gather with other hunters and process more than one deer at a time.  Others simply enjoy finishing what they started and completing the project on their own.

No matter what form of deer processing you choose to use, make sure you follow the basic rules.  You will need to:
-Keep the carcass clean, cool, and dry at all times.
-Bone out the meat.
-Avoid cutting through the brain or the spinal column with any of the processing equipment.
-Store the meat until test results are available if the deer needs to be tested for CWD.  If the deer has the disease, dispose of the meat.

If you choose to carry out deer processing at home, you will need to know the methods well in order to save as much meat as possible.

Cleaning
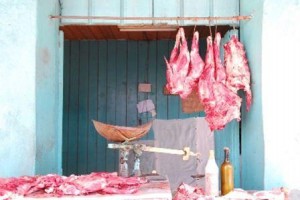
processing-deer-cooler-spaceYour work space does not need to be fancy, just clean, cool, dry and sanitized.  Your knives need to be cleaned frequently during the process.  Clean them in hot, soapy water and rinse regularly between cuts and make sure the work area is regularly cleaned.  It’s a good idea to keep bleach water solutions on hand to keep everything sanitized.  Bleach is serious stuff and has some hazards to it.  Do some research and get to know the different ways to make a sanitizing solution.  You can find good info at the Center for Disease Control site:  http://www.bt.cdc.gov/disasters/bleach.asp.   Be sure to follow all safety guidelines regarding concentration of bleach and ventilation.

Deer processing can be narrowed down to three main steps: skinning, boning, and wrapping.

Skinning

There are great videos of how to skin a deer on the web.  Everybody does things a little differently but the basics are the same.  We hang the deer by its head.  Many others hang the deer head down for skinning.   Either way, you are trying to avoid contaminating good meat with gutshot meat or spinal fluid. We’ve already discussed where to cut in case you are planning to mount a trophy.   Skinning is not difficult, especially on a somewhat warm animal.   It gets difficult if left on the animal for more than a few hours.  If it’s frozen, forget about it until it thaws out.  Cut the lower legs off and be sure to keep the carcass cool, clean, and dry at all times.

Boning

Take the hind quarters, loins, neck meat, and inner tenderloins off of the carcass while it is still hanging and put them into a cooler.  You can then go back and remove the gristle and fat from each piece one at a time.

Wrapping

In order to preserve every piece of meat, double wrap the meat in freezer paper and get rid of any air pockets.  Label the packages with the type of cut and the date.

Deer processing can take a significant amount of time, especially for someone who is new to the game.  If you can keep things clean and orderly, your meat should taste great and be safe to eat.

Enjoy The Traditions

One of the best things about hunting and processing your own meat is taking part in ancient traditions.  If you’re one of the lucky ones, you learned your skills from your father and mother.  They learned theirs from your grandfathers and grandmothers.  And on and on back through the years.  If you’re a typical suburban American, this tradition has been lost for quite a few years.  If you’re reading this, you’re probably hunting and taking your deer to a processor.  But why not get yourself a teacher and learn how to put your own meat on the table?

In this era of total electronic distraction, make sure to pass on these traditions to your children.  They won’t like it now when you interrupt their TV shows and video games.  But they’ll appreciate it someday when they know they can put meat on the table for their own family.

What tips do you have to share on processing your own deer meat?


18,296 total views, no views today

Posted in Beginners Guide, Deer Processing | Tagged | 2 Comments

Deer Processing – Part 1

Tools For Processing Deer Yourself

By Pat Carrothers and Paul Schwartz

Once you’ve harvested the deer of your dreams, you then have to work on field dressing the animal. After that is behind you, you have to think about deer processing. Many hunters take their deer to processing companies that can make certain cuts of meat for them. It is possible however, to do the deer processing on your own. If you want to complete the cycle from hunting to processing yourself, there are many different tools you can use. What you need will depend greatly on the types of meat you wish to produce.
Some of the things you may want to consider, depending on how many deer you plan to process and what types of meat you intend to enjoy, are the following items:
● grinder
● band saw
● tenderizer
● dehydrator
● coolers
● refrigerators

Tools For Processing Deer Yourself Image 1The Basic Necessities

The basic deer processing necessities are much more simple. Every hunter will need a clean place to work and sharp knives sitting right alongside knife sharpeners. The work space should be cleaned with a water and bleach solution before any meat touches it. It is also a good idea to re-clean the space often while the deer processing is taking place.

Some hunters like to use their favorite knife and take frequent breaks to sharpen the device. Others will keep several similar knives on hand so they do not have to stop deer processing to sharpen the knives as frequently. Sharp knives are definitely the most valued asset when it comes to deer processing. We’re learning that our Havalon Baracuta with XT127 fillet blades and XT115 hunter’s blades are really good for trimming down meat from large to smaller sizes and for removing unwanted fats and connective tissue.

Meat Grinder

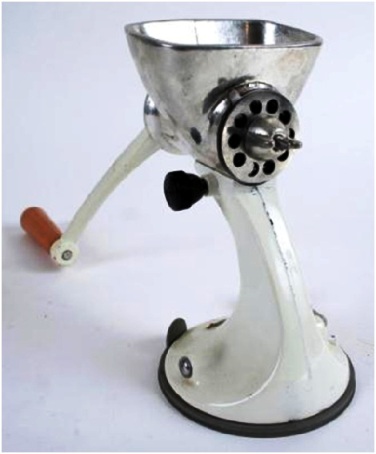
Meat grinders come in many different versions including hand crank products or products with electric motors. If you will be grinding a lot of meat, electric meat grinders are worth the cost. The grinder should come with a few cutting disks to aid with coarse or medium grinds. Coarse works best for jerky while medium is good for anything.

Cubers

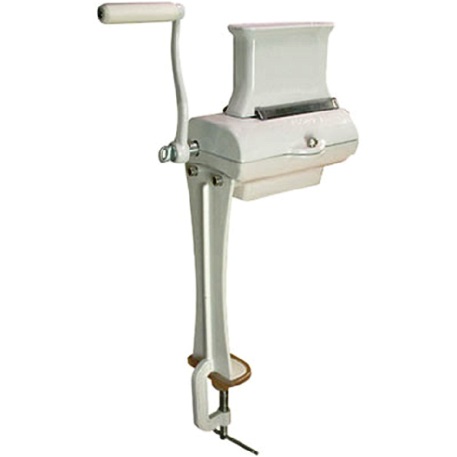
Tools For Processing Deer Yourself Image 2You can purchase tenderizer and cuber attachments for most meat grinders, but the hand crank cubers are something to consider. All you have to do is drop the steak into the cuber, rotate the crank, and watch the cubed steak drop out. You can even pass the venison through twice to cut the meat in two directions.

Dehydrator

Generally, grinders and cubers will get the average hunter through the deer processing event. However, if you plan to make a lot of jerky, you will also want to add a dehydrator to your list. Whenever you dehydrate, you will want to make sure you are careful that the drying process does not run too hot or too cool. You can end up with jerky that is not dry enough and jerky that is too dry. When it comes to venison meat, you do not want to waste anything.

Next: Processing Your Own Deer Meat

For more information on deer processing, click here.

4,786 total views, 1 views today

Posted in Deer Hunting, Deer Processing, Hunting & Fishing Equipment, Uncategorized | Tagged , , , | 1 Comment

Field Dressing and Processing Your Deer Meat

Field Care of Your Deer Affects What You Taste

By Pat Carrothers and Paul Schwartz

If you have any experience in hunting you know that making the big kill is really just the beginning. After you have your prize, you then have to take care of the meat in the field. What you do at this point will affect what you taste later.

Field Dressing You DeerField dressing deer properly is the most important aspect of a successful hunting venture. Deer and many other animals make wonderful meals if the game is well processed out in the field. The flavor of the eventual meat greatly depends on the care and timeliness of the field dressing. Many animals are wasted, or not as
tasteful, because hunters do not follow good meat handling rules.

Every time you hunt, expect to make a kill and travel with the tools you will need to complete deer processing.

Those tools include:
• knife
• cooler
• ziploc bags
• disposable gloves
• cutting board
• marker

There are several guidelines you should follow in the field in order to take care of the game meat in a timely manner. These guidelines will allow you to gain access to tasty meals later at home.

Guideline 1
Always work on deer field dressing immediately after the kill. Never let it sit for a long celebration (but high fives and war whoops are in order).

Guideline 2
If your knife is not sharpened, don’t even bother to start deer processing. You will damage the meat and waste a lot of time (use a What tips do you have so new deer hunters out there can protect their meat?

Check Out The Best Knives For Deer Field Dressing

5,162 total views, 1 views today

Posted in Beginners Guide, Deer Hunting, Field Dressing Tips, Uncategorized | Tagged , , , | 4 Comments

Which Trail Camera? Part 2 – Setting Up

Five Tips For Setting Up Your Trail Cameras

By Steve Sorensen

which-trail-camera-perfect-pose

A common mistake is to place the trail camera too high. Set up a little above knee high and you should get perfect poses like this.

1. How to consider lighting – Taking pictures can be defined as capturing light, and bad lighting ruins many photos. So, set your trail cameras with that in mind. If you point them into the rising or setting sun, your images will be degraded by glare. Point them north or south for the best results.

2. How high off the ground – A common mistake is to place trail cameras too high. Deer aren’t as big as many people think. A little above knee-high is perfect wherever the ground is flat. If you need to adjust the angle up or down, wedge a short stick behind the camera.

3. How to aim for best results – Don’t make the mistake of setting up trail cameras perpendicular to the trail. Deer will walk by before the camera is triggered. It’s better to aim your camera down the trail so the deer is in the camera’s view long enough to activate the camera and trip the shutter.

4. How far from the subject – Ideally, if a deer is five to fifteen feet from the camera, you should get great photos. Digital photos cost nothing, so set your trail cameras to take multiple-shot bursts. You’re more likely to get the deer right where you want him.

5. How to stop the deer – Scrapes, licking branches, food sources such as apples or corn, mineral licks, they’re all places where deer stop. Deer usually hesitate just before jumping a fence or entering a clearing. You’ll get sharper, clearer photos when the deer has a reason to pause.

Digital cameras are a lot more expensive than the spool of thread Grandpa used, but so is everything else. Today, the least expensive digital trail cameras are as good as or better than more expensive cameras of a few years ago, so the time to buy is now. They’re fun, they’re extremely reliable, and they take very good quality photos when used properly.

About Steve Sorensen…

Outdoor writer and speaker Steve Sorensen has been a fan of knives since he was six, when he began begging his dad to take him hunting. His articles have been published in Deer and Deer Hunting, North American Whitetail, Sports Afield, and many other top magazines across the USA. Invite Steve to speak at your next sportsman’s event, or follow his writing on his website, EverydayHunter.com.

Which trail cameras do you like?  What is your experience?  Leave a comment below.

3,350 total views, no views today

Posted in Beginners Guide, Deer Hunting, Guest Writers, Hunting & Fishing Equipment, Steve Sorensen, Trail Cameras, Uncategorized | Tagged , , | Comments Off on Which Trail Camera? Part 2 – Setting Up