What To Look For In Binoculars – II

Seven Questions to Make You a Smart Bino Buyer

By Steve Sorensen


The operative principle for most of us – buy the best you can afford.
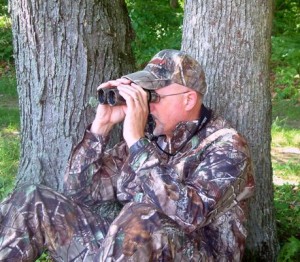
“Hey four eyes – whaddaya see across the valley?” My brother wasn’t teasing me for wearing glasses. He was making reference to the binoculars I had been staring through for the past hour.

binoculars-give-you-four-eyes

Having a good pair of binoculars is like having four eyes , and they’ll make you a more successful hunter.

Having a good pair of binoculars is like having four eyes – our natural peepers for close-up tasks like loading a gun, and optical assistance for finding a buck across the valley. But for many of us, buying a pair of binos is like walking into a valley full of fog. Answers to these seven questions should clear most of the fog away.

  1. “How Much Should I Spend?”
    Some think that unless it’s a top European brand, it’s not good enough. If that’s true, most people have to be satisfied with inferior optics because few budgets can accommodate $2,000-plus binos. Yes, for some – professional hunters, outfitters, or other specialists in the field – the best is a necessity. Their principle is the more you use a set of optics, the better those optics need to be. I agree.

  2. If you’re not a professional user, and you have the cash, go ahead and spend it. But don’t look down your nose at someone who simply buys the best he can afford. That’s the operative principle for most of us – buy the best you can afford.

  3. “How big should I buy?”
    “Big” could mean power. Or it could mean size and weight. Regarding power, 7 or 8 is best for all-around use; 10 is the highest power most of us can hold steady without extra support. Regarding size, you won’t use binoculars with lenses too small to let much light in, or so large that they’re cumbersome. Get a feel for several sizes, and go with a size and power you’ll use.

  4. Also consider where you’ll use them. If you keep them in the car or beside the kitchen window, big binoculars won’t be a problem to carry. Nor will you need waterproof binos. For outdoor use, bulk is an issue, and waterproof is a must.

  5. “I hear a lot about brightness – can you explain?”
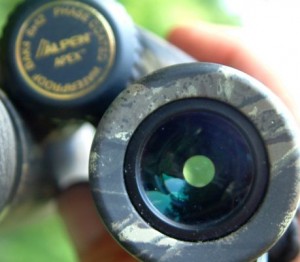
    Brightness relates to several things. One is “exit pupil”. You can see the exit pupil – just hold the binoculars away from your eyes, and toward a light source. The exit pupil is the little circle of light coming out of the ocular lens (the lens nearest your eyes).

  6. binoculars-showing-exit-pupil

    That dot of light? It’s called the “exit pupil”.

    Exit pupil is the product of simple math. For an 8 x 24 binocular, divide 24 (the size in millimeters of the objective lens) by 8 (the power). That’s an exit pupil of just 3mm, smaller than your iris opens in low light. In daytime that’s OK, but it’s not so good at the edges of darkness. An 8 x 42 pair of binoculars will give you an exit pupil of more than 5mm (42÷8), better suited to low light.

    The other main factor in brightness is how much of the light entering the objective lens goes all the way through without being reflected away, and actually enters your eyes. Here is where anti-reflective lens coatings are critical. The words coated, fully coated, and multi-coated are not enough. Insist on “fully multi-coated.” All three words mean all lens surfaces inside and out have multiple anti-reflective coatings. It makes a huge difference in brightness.

  7. “What brand should I buy?”
    Not every brand is equal, but thanks to computerized optics engineering, intense competition, and a global marketplace, some names you haven’t heard of yet are producing great quality for the money. Do some research. Just as price is not an absolute guide to quality, neither is brand.
  8. “What about country of origin?”
    Randy Wakeman (RandyWakeman.com), noted reviewer of all things shooting, has this to say: “There is no basis extant to automatically assume that quality of assembly of a scope is better (or worse) based
    many-binocular-brands

    Here are just a few of the many optics
    brands to choose from.

    on the nation in which a scope is assembled. It does not hold true in electronics, cars, cameras, video equipment, or computers.” So, don’t base the quality/value proposition on geography. Even if you have concerns about buying foreign-made goods, don’t assume foreign automatically means low quality.

  9. “How important is a guarantee?”
    Choose binoculars from a manufacturer who will stand behind the product if it fails. In a highly competitive field, reputable companies aren’t afraid to guarantee their products. The best companies have a no-questions-asked replacement warranty. Alpen Optics is a good example.
  10. “When is buying binoculars like buying shoes?”
    Speaking of Alpen Optics, “the shoe question” is the question Alpen Vice President Vickie Gardner asks. Her answer is “Always.” She knows that buying an optical instrument is always a personal decision. Like shoes, binoculars come from many companies, and in many sizes, styles and price ranges. As in every personal decision, what might be best for your buddy might not be best for you.


  11. ***

    About Steve Sorensen

    steve-sorensen-head-shotAward-winning outdoor writer and speaker Steve Sorensen has been a fan of knives since he begged his dad for a hunting knife when he was six years old. His articles have been published in Deer & Deer Hunting, Sports Afield, and many other top magazines across the USA. Invite Steve to speak at your next sportsman’s event, and follow him at www.EverydayHunter.com.


5,630 total views, 1 views today
Posted in Binoculars, Guest Writers, How To, Hunting & Fishing Equipment, Steve Sorensen, Uncategorized | Tagged , , , | 1 Comment

What To Look For In Binoculars

By Ron Spomer

A Pro’s 10 Tips on Buying and Using Binoculars

Most of us know we should use a binocular. Few of us know how. Took me half a lifetime to figure it out. Perhaps my “trial by errors” can save you the trouble and significantly increase your game sightings.

The “bang for your buck” beauty about binoculars is they increase the number of bucks and bulls you bag. You can’t shoot ’em if you can’t see ’em. With the right binocular used the right way, YOU’LL FIND MORE GAME – Guaranteed.

different-bino-options

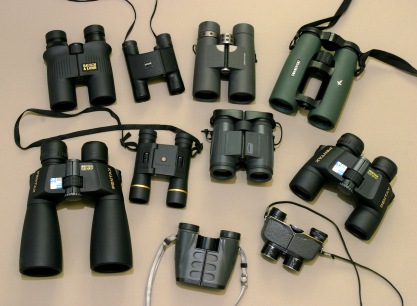
Binoculars are built in many shapes and sizes but just two basic “formats”: Porro prism or roof. Prisms bend the light in order to reduce overall length of the binocular. Roof prism versions, like the Swarovski in upper right, have straight barrels because the two prisms sit directly atop one another. Optical quality is easier to obtain with Porro prisms, so they cost less, but roof prism models are smaller and more durable, thus more popular.

When buying binoculars:

  1. Spend more than you can afford. You needn’t splurge on a Swarovski (www.swarovskioptik.com) but you won’t go wrong if you do. Pro-rated over a lifetime, the best binoculars cost just pennies a day. More significantly, they encourage you to use them because everything is so big, bright and crisp. You’ll love the view. I’d rather spend $1,800 on a binocular and $400 on a rifle than vice versa. Plenty of $400 rifles shoot minute-of-angle. But a dim, blurry binocular is nearly worthless. Bino prices are falling, but spend at least $150 on a Porro, $200 on a roof prism. Any amount you stretch beyond that will serve you well.

  2. Decide on prisms. Roof and Porro refer to the prism inside the instrument. Porros have the old-fashioned, dog-leg shape. It’s easier to get optical perfection in a Porro, so they’re cheaper than roof prisms of similar quality. But roofs are more compact
    and rugged.

  3. Phase correction. In a roof prism, insist on BaK-4 prism glass and phase-coating. Phase-coating weighs nothing but significantly improves sharpness by lining up the different colored light waves into one phase. Porro prisms don’t need phase coatings.

  4. Invest in coatings. Anti-reflection lens coatings add more to brightness than do huge objectives. Insist on fully multi-coated lenses – all three words. That means every air-to-glass lens surface has several anti-reflection coatings. Light goes through instead of bouncing off.

  5. Don’t overpower. You’ll find more game with a 6X than a 10X because the lower power “sees” a larger area. This is especially critical in woods. Best all-around power is 7X or 8X. Don’t go overboard with objective lens size either. A 40mm to 42mm objective works beautifully until 45 minutes after sunset. High-quality 32mms do nearly as well and are a lot smaller, lighter and easier to use.
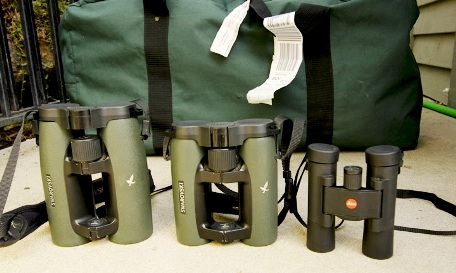
  6. binocular-sizes

    Tiny binoculars like the Leica’s on right sacrifice brightness, but an 8x32mm bino like the Swarovski EL in the center work fine until at least a half-hour after sunset — and usually much longer. Step up to a 42mm objective as shown in the largest 8x42mm bino on the left and you may gain about 2 minutes more viewing time over the 32mms. A 50mm objective may add another 2 minutes of useable
    brightness over a 42mm, all else being equal.

    When using binoculars:

  7. Read instructions. I’m dumbfounded by hunters who don’t know how to adjust lens diopter to match their eyes. Basically you focus the non-adjustable barrel with the center wheel, then adjust the diopter wheel until the same image looks equally sharp through the other barrel. Once both are adjusted, the center wheel controls both barrels. Unless your eyes change or you loan your binos out, you never have to adjust for your own eyes again.

  8. Shorten the strap. Binos will be more comfortable if they ride on your chest instead of stomach. Less annoying bounce, easier to lift and use. Or make the strap long and wear cross-shoulder. Push the bino behind your back for protection, slide it up
    front for use.

  9. Throw away the case. Seriously. The objective lens covers, too. You bought the bino to use, not baby. You don’t hunt with your rifle in a case, do you? But do keep quick-detach eyepiece covers on. Train yourself to pop them off as you lift the bino. The easier that bino whips into action, the more you’ll use it.

  10. Look before you leap. The classic mistake is to grab the bino after you think you see a deer. This is a great way to see waving tails. The biggest advantage a binocular provides is Superman vision. We might not run faster than a speeding bullet, but we can see 8 times better! Raise the glass and study every bit of cover in front of you. Scan left to right. Then turn the focus wheel in and out. This makes close objects blur in and out of focus like you see in the movies. The first time a blurry branch sharpens into a buck’s antler you’ll gasp. I’ve had it happen as close as 20 yards. A buck was hiding “in plain sight” just 20 yards away and I didn’t see it until I focused my bino on that
    brush pile.

  11. Scan the far edges. What looks like a wall of trunks to the naked eye turns into long tunnels and openings deep into the forest. Many of these openings are interrupted with deer walking through or standing there, chewing cud. Glass, glass, glass and see them before they see you. Then shoot. Your binocular has just gotten you another one.

***

About Ron Spomer

ron-spomer-hunter-writer

Ron is rifles/optics columnist for Sporting Classics and North American Hunter magazines and host of Winchester World of Whitetail on NBC Sports.


Learn more at (www.ronspomeroutdoors.com)

For more expert advice on hunting and fishing equipment, click here.

4,032 total views, no views today

Posted in Binoculars, Guest Writers, Hunting & Fishing Equipment, Ron Spomer, Uncategorized | Tagged , , , | 1 Comment

7 Gun Safety Rules You May Not Have Thought About

By Steve Sorensen

The Wrong Hands for Guns

I’ve never been shot, but maybe I’ve been lucky. A close call came many years ago when I was walking up the trail along a local trout stream with a buddy. He tripped, and as he lurched forward to catch his balance he jammed the barrel of his .22 rifle into the soft spot right behind my earlobe.

hunter-carrying-gun-safely

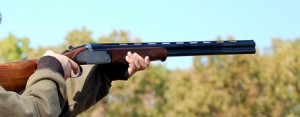
For safety’s sake, it matters where you point your gun.

Like I said, maybe I was lucky — if there’s such a thing as luck. I was lucky his finger wasn’t on the trigger. If his finger was on the trigger, I was lucky he didn’t pull it when he instinctively tightened his grip as he stumbled. If he did pull the trigger, I was lucky the safety was on. The lesson? With guns in our hands, never, ever depend
on luck.

Years later I met a local eye surgeon in the woods. He looked at the shotgun I was carrying and said, “Guns scare me. I’ve seen what they can do.” I’ve also seen what guns can do, and they scare me, too.

Guns by themselves don’t scare me, but guns in the wrong hands do.
What are the wrong hands?

  1. Careless hands are the wrong hands for guns. Careless hands are hands attached to an unthinking mind. On the day my friend jammed the barrel of his gun behind my ear, he was carrying the gun in a cross-body position. Had he (or I) been thinking, he would have been pointing the gun the opposite way. Think! Should the gun in my hands be cross-body, or shouldered, or pointed down and forward, or up
    and away?
  2. youth-hunter-in-safety-vest-433x457

    The hands of a person who doesn’t respect guns are the wrong hands for guns, this has to be taught.

  3. The hands of bullies and show-offs are the wrong hands for guns. Some people are victims of their own machismo. In their own minds they’re as invincible as Muhammad Ali in his prime. Ali is said to have told a flight attendant when refusing to buckle his seatbelt, “Superman don’t need no seat belt.” She calmly replied, “Superman don’t need no airplane either. Now buckle up.” It doesn’t hurt to be reminded, especially when around firearms, that none of us is Superman.

  4. The hands of an angry person are the wrong hands for guns. A chip on your shoulder is best left home when hunting or target shooting. A fight with the wife or the boss isn’t a good prelude to shooting. Anger sometimes clouds judgment. Firing guns to blow off steam is a bad idea. Better to head for the golf range.

  5. The hands of a person influenced by alcohol are the wrong hands for guns. Excess alcohol impairs judgment, and handicaps a person’s ability to assess his impairment. I’m bothered when I see lots of alcohol consumed at a hunting camp. It’s not a matter of opposing alcohol. It’s the same issue as beer cans on the floor of a car – alcohol can unintentionally weaponize a person.

  6. The hands of a criminal are the wrong hands for guns. Poachers and felons lose their gun rights for good reason. Lawbreakers can be motivated to attack those who might expose their lawlessness.
  7. hands-holding-gun

    Are your hands the right hands for guns?

  8. The hands of a person who doesn’t respect others are the wrong hands for guns. The inability to consider the rights of others, the lack of common courtesy, and the notion that anyone who is in the woods is in my way reveals attitudes that invite trouble.

  9. The hands of a person who doesn’t respect guns are the wrong hands for guns. People must be taught respect for guns. In a day when young people see thousands of murders on television, in video games, and in the movies, we’re desensitized to the seriousness of firearms. We need gun safety to be mandated in our schools. But now I’m beginning to dream.

No, guns don’t scare me as much as hands scare me. It’s the hands that are unpredictable. In the proper hands, a firearm is a tool that can bring enjoyment. It can accomplish honorable goals. It can protect people. In the wrong hands, it can bring needless suffering and tragedy.

Next time you handle a gun, ask yourself, “What kind of hands are mine?” Make sure they’re not the wrong hands for guns.

***

About Steve Sorensen

steve-sorensen-head-shotAward-winning outdoor writer and speaker Steve Sorensen loves the Havalon knife, and has been a fan of knives since he begged his dad for a hunting knife when he was six years old. His articles have been published in Deer & Deer Hunting, Sports Afield, and many other top magazines across the USA. Invite Steve to speak at your next sportsman’s event, and follow his writing on his website, www.EverydayHunter.com.


For more articles on gun safety, click here.
And for more articles by Steve Sorensen, click here.

7,210 total views, no views today

Posted in Guest Writers, How To, How to Hunt, Hunting Ethics & Education, Hunting with Kids, Steve Sorensen, Uncategorized | Tagged , , , | 1 Comment

How to Cook Bluegill: Easy Bluegill Recipes

By John Jameson

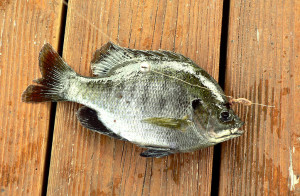
picture of bluegill fish caught during a day of fishing

Bluegill is a common fish that is easy to catch, and with an abundance of these freshwater fish at your disposal, easy bluegill recipes can help you make your way through your daily catch and onto an excellent meal quicker than you think.

Bluegill have tiny, brittle bones that can easily cause problems for the chef and the person eating the fish, so before you start cooking, it’s a good idea to either descale or debone and fillet your fish, being careful to remove all of the tiny bones that may break off in the process. The easiest way to get the job done is to use a sharp knife, like a Havalon knife, to facilitate the filleting, descaling or deboning of your fish. Once your bluegill are free of bones or scales and ready to be turned into your next favorite meal, you will have plenty of recipes to choose from to cook your fish, but only a handful are easy bluegill recipes.

Grilled Bluegill

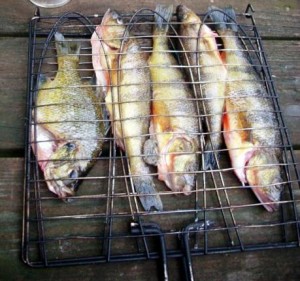
bluegill-and-perch-in-grill-basket-how-to-cook-bluegillFillets – As the name suggests, in order to make this dish, you’ll need to start by using a sharp knife, like a Havalon knife, to fillet your bluegill. Start by marinating your fish fillets in Italian dressing for four to six hours, or overnight if possible. Off to the side, create a basting liquid from butter or olive oil and additional Italian spices like Rosemary and Thyme. Choose herbs that you find flavorful and add only a hint to the butter or olive oil. While the fish fillets are in the grill basket, use a basting brush to spread the butter mixture over the fillets. Turn the fillets once they begin to flake and remove when
both sides are a crisp golden brown.

Whole Fish – For some people, filleting a bluegill takes a bit too much time. Or, if you prefer to eat your fish with the skin on, filleting may also not be right for your grilled fish. If either of these are the case, then you can create the same recipe without completing a fillet. You will still need a sharp knife, like a Havalon knife, to assist you in descaling your fish and cleaning it. Once you are finished with this task, you will follow the same marinating, basting and grilling instructions, but you will watch for the skin to lighten up as the surface basting becomes golden brown.

Grilled Bluegill Fajitas – In order to make this American take on a Mexican favorite, you’ll need to fillet your bluegill and cut it in strips that are still large enough to lay across the grill. Shake your fillet strips in a bag along with a teaspoon of fresh cilantro, a pinch of freshly ground salt and pepper and a tablespoon of limejuice. Let the fillets sit in the bag after shaking to soak up the flavors. Then grill the strips using a grill basket to keep them from falling into your grill. Roll your strips into corn tortillas and add some additional limejuice along with lettuce, avocado and tomatoes.

Fried Bluegill

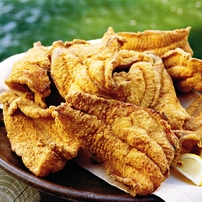
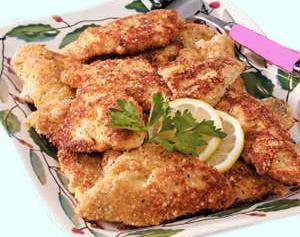
fried-bluegill-filletsFillets – Unlike many other fried foods, fried bluegill fillets are quick and easy to make. To bread the fish, pour one cup of crushed breadcrumbs or croutons into a bag with pepper, salt and lemon pepper. Coat the fillets in egg and shake them in the bag to coat with the breading. Fry the bluegill fillets in a pan with a small amount of canola or olive oil. If you don’t have any dried breadcrumbs or croutons handy, you can make this easily. Simply put some bread in the toaster and toast to a deep golden brown.

Whole Bluegill – If you decide to fry your bluegill whole, you will need to be sure to descale your fish with a sharp knife, like a Havalon knife, and to properly clean it. In order to make the breading stick you will need to generously coat your small fish in egg product and roll them in a bowl of breading rather than shaking them in a bag of breading product.

Baked Bluegill

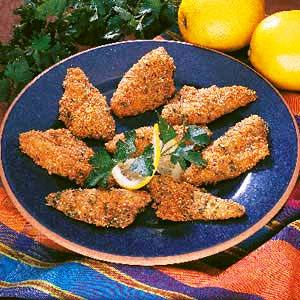
crispy-baked-bluegill-filletsParmesan Bluegill – Much like the fried bluegill, to make this recipe you will need breadcrumbs, salt, pepper and lemon pepper. In addition, you will also add Parmesan cheese to the bag. Coat the fillets in egg and toss in the bag to fully coat each individual fillet or fish. Place your fillets or whole fish in a greased, glass baking dish and bake for about 20 minutes at 375-degrees or until the crust becomes golden brown and the fish begins to flake.


Never forget to properly clean your fish, whether you choose a fillet or whole fish recipe, and in the case of whole fish, remember to properly descale before cooking. Each of these easy bluegill recipes can be modified to fit your our taste and need for adventure. Simply change out the spices and herbs and create your take on easy bluegill recipes.

Do you have a recipe for bluegill? If so, share it with us here,
and for more articles on cooking your catch, click here.


Enhanced by Zemanta

62,823 total views, no views today

Posted in Bluegill Fishing, Cook Bluegill, Fillet Knives, Fresh & Saltwater Fishing, How To, Uncategorized | Tagged , , , , | 2 Comments

How to Cook Bluegill

By John Jameson

Bluegill-Filets

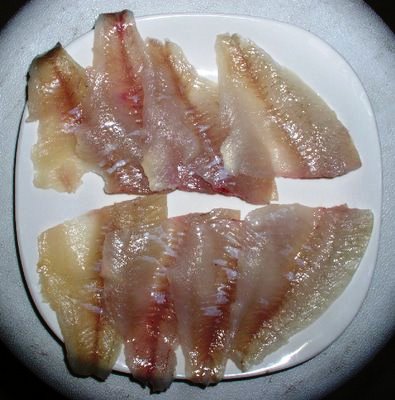
Bluegill fillets, ready for seasoning and cooking.

Heading out on a fishing trip can be a rewarding experience until you return home only to discover that you do not know how to cook bluegill. While bluegill are smaller fish, once they have been properly cleaned and deboned, they can be the perfect centerpiece for any meal. In order to properly clean and debone your bluegill fish, you will need a sharp knife, like a Havalon knife, to slice open and fillet your fish. While cleaning your bluegill, the most important thing to remember is that the bones of this fish are very brittle and may break off into the meat, so you must always exercise additional caution when cleaning, deboning and filleting your meal, and double your fish before cooking.
When you are learning how to cook bluegill, you will find a multitude of different recipes and methods available to you including deep frying, pan frying and baking. Some of these methods may suggest that you cook the fish whole, though this is not advised unless you have used a sharp knife, like a Havalon knife, to carefully clean and debone your fish.

Fried-Bluegill-Fillets

Fried Bluegill Fillets

Once you have cleaned and deboned your bluegill, you may choose to bread and fry your fish. Because of the small size of these fish, a standard fish fry breading is recommended over batter. A battered fish fry will clump up on these small fish and you may end up with more breading than fish, taking away from the taste of your catch. A crispy fish fry coating will provide just enough spice and crust on the outside of the fish to complement the taste
of the fish.

In order to deep fry your bluegill you will need a deep fryer. You will drop the breaded fish, whether filleted or whole, into the deep fryer and remove them after the breading has turned a medium golden brown. If you elect pan frying, you will flip the fish every two to three minutes, cooking each side until it has turned a medium golden brown and any visible skin has begun to flake.

Baked-Buttered-Bluegill-Fillets

Baked Buttered Bluegill Fillets

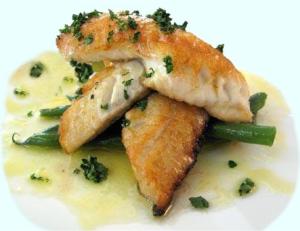
Another favorite option amongst anglers for preparing bluegill is to bake the fish. This can be done either with a flour-tossed breading, or by stuffing the fish with a bread mixture or other stuffing of your choice. The most common and safest way to prepare bluegill for baking is to fillet the fish using a sharp knife, like a Havalon knife, and remove all of the bones and skin. After the bones and skin have been removed, the fish can be breaded and baked in the oven at 350-degrees until the breading turns a warm golden brown and begins to flake. If you elect to stuff your bluegill, one of the best stuffings for this fish is a mixture of Parmesan cheese, bread crumbs and basil or oregano. This mixture should be made to taste and stuffed liberally into the fillets.

There are many different recipes and methods for cooking fish and there is no one standard method for how to cook bluegill to perfection. This will be based upon your preference and you should try multiple different methods to find the one that suits your taste. Most importantly, when you are learning how to cook bluegill it is essential to ensure that the fish is thoroughly cooked before eating by checking the internal temperature.

Once you have learned to cook bluegill and tried many different methods, you’ll have no trouble deciding how to cook all the other fish you catch on the lake as well.


For more tips and ideas on cooking fish, click here.
And for the best fillet knife, click here

10,831 total views, no views today

Posted in Bluegill Fishing, Cook Bluegill, Fillet Knives, Fresh & Saltwater Fishing, Guest Writers, How To, Hunting & Fishing Equipment, Uncategorized | Tagged , , , , | Comments Off on How to Cook Bluegill