Make These Four Mistakes And You Can Forget About

Early Season Bow Bucks

By Bernie Barringer


Here is where most hunters blow it. Opening day
arrives and the wind is not quite right –
but you’ve created the perfect setup.

Any serious whitetail hunter spends some time glassing fields on late summer evenings, admiring the whitetails that are so visible at that time of the year. They’re fairly easy to pattern because their movements are predictable. Excitement builds as the opening day of bow season draws near.
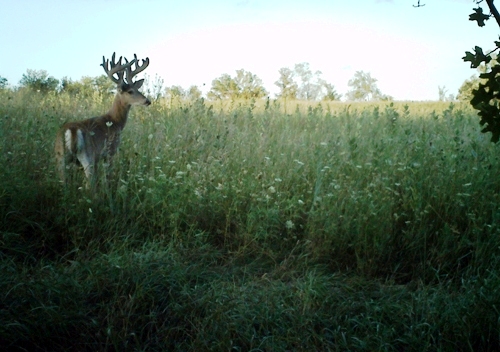
velvet-buck-moving-into-field-500x352

This is what we all want to see, a big velvet buck
moving out in to a field on a late summer evening.

So why is it that so few of those mature bucks are actually taken by bowhunters in the first few days of the early archery seasons? I believe many bowhunters make four primary mistakes which ruin their chances of bagging one of those bucks during early fall. Let’s take a look at them so you can avoid these mistakes.


Mistake #1 – Watch the Clock

bucks-wait-till-dark-640x480

Once the velvet comes off, bucks will often hang up back from the field edge and wait until dark to expose themselves.

Summer days are long, especially in the northern half of the US. It’s common to be seeing whitetails in the hayfields or soybeans in broad daylight at 8:30 or 9:00 in the evening. What many hunters don’t realize is that daylight hours get shorter by 4-5 minutes per day. That’s about a half hour per week. Of course, half of that time is in the evening, so every week the sun is going down 15 minutes earlier.

When deer are coming out at the same time, but it’s getting dark earlier, many hunters interpret this as “starting to go nocturnal”. Yup – the buck standing in the last rays of sunlight at 8:30, is three weeks later standing in full darkness at the same exact time. Failing to take this into account can cost you a chance at a big buck, which leads to mistake number two.

Mistake #2 – Stick with Your Stand Location
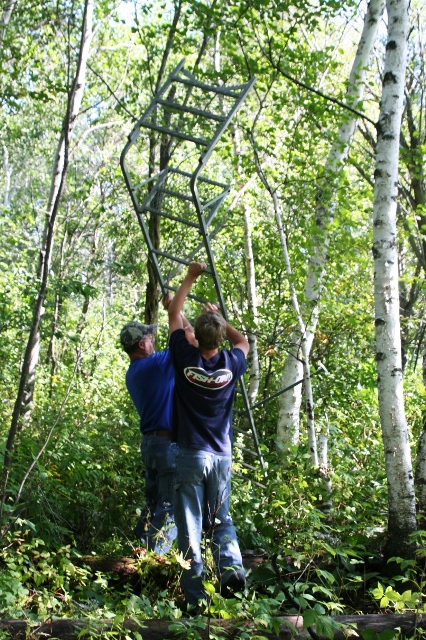
placing-a-stand-426x640

Getting stands up quickly and getting out is critical. Placing a stand back away from the edge of the field offers the hunter a better chance of seeing a buck
during shooting hours.

Too many hunters set up on the edge of the field expecting to get a shot at one of the bucks they saw a few weeks ago. In reality, those bucks aren’t likely to appear in the field during daylight. Not only is it getting dark sooner, but as the velvet comes off, the buck’s disposition begins to change. Subtle seasonal changes are beginning to happen, and he notices. He responds by becoming more cautious about showing himself, and he begins to hang up back in the woods for a while before warily moving into the open field.

If your treestand is right at the edge of the field, you may not encounter him until darkness prevents a safe and ethical shot. By moving your ambush point back 50 yards from the field, you have a much better chance of getting a shot with enough daylight to see your sight pins. Follow the entry trail a ways back and look for sign: droppings, rubs, tracks milling about, and nibbled plants. These are indicators of the area where the bucks are biding their time before making a move. That’s the spot where your stand belongs.

Mistake #3 – Fail to Trim Shooting Lanes
 
Many a buck has escaped with his life because a hunter didn’t trim one little branch. In the early season, leaves on the trees and shrubbery or other vegetation at ground level can mess up your shot or prohibit getting a shot at all. Be ruthless when cutting lanes. Deer are not alarmed by limbs and cuttings lying on the ground, so trim away. Try to have at least 3 or 4 good, clear shooting lanes.
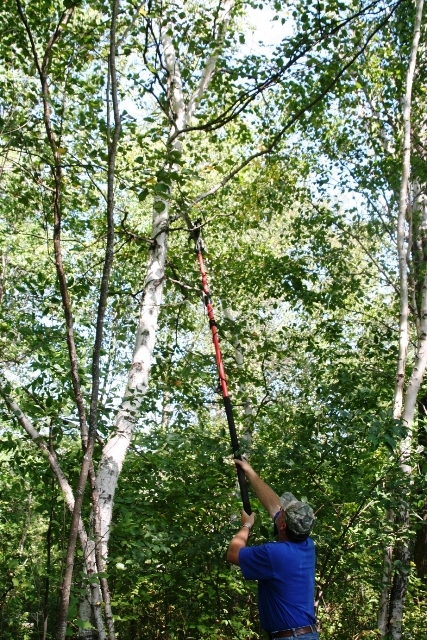
trim-shooting-lanes-427x640

Trimming shooting lanes is important. During the early season, there are a lot of things to get in the way of a shot… be ruthless in cutting openings.

Use a long pole saw to trim high branches and a clipper to nip saplings and large weeds along the ground. Wear gloves, boots and long pants to limit human scent. Try to do it at least a week before the season opens.

Mistake #4 – Hunt the Wrong Wind
 
Now you have a stand in position, the bucks are in a predictable pattern and you can’t wait to get in there and get it done. But you should wait!

You may only get one chance and here is where most hunters blow it. Opening day arrives and the wind is not quite right – but you’ve created the perfect setup. What difference can a little issue with wind direction hurt – right? After all you are using good scent control and have the latest sprays and scent-control clothing.

An overly optimistic reliance on scent control has saved the lives of a lot of deer. No matter what the marketers would like you to believe, there is no such thing as scent elimination, only scent reduction.

More important than reducing scent is reducing the temptation to hunt the stand when conditions aren’t perfect! You’ve been working for weeks on what may be only one chance. Don’t make your move until the time is right. Then, go get it done. You’ll be glad you waited. I promise. Listen to the voice of experience.

Now, get your binoculars and go find a nice buck. If you avoid these four mistakes, your chance of giving him a ride in your pickup just went way up!

***

About Bernie Barringer:

bernie barringer 204x173Bernie Barringer hunts a variety of species in several states and Canadian provinces. He has published more than 400 articles in two dozen outdoor magazines and authored ten books on hunting, fishing and trapping. He is the managing editor of Bear Hunting Magazine, and blogs his hunts on his website www.bowhuntingroad.com.


For more articles by Bernie Barringer, click here.
And for the best deer skinning knife, click here

3,481 total views, 1 views today
Posted in Bernie Barringer, Big Game Hunting, Deer Hunting, Guest Writers, Uncategorized | Tagged , , | 1 Comment

How to Take Inventory of the Bucks in Your Area

By Steve Sorensen


Trail cameras and pre-orbital scent –
a new summer time scouting method.

If you want an opportunity at a mature buck this year, the biggest step you can make toward that goal is to begin scouting now.

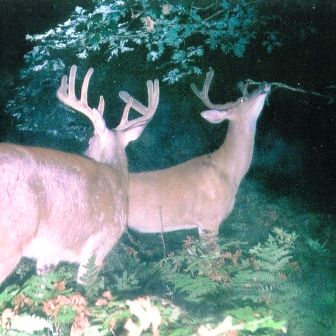
bucks-in-line-for-licking-branch

The licking branch has such a powerful draw that often, trail cameras will show bucks waiting in line for their turn.
Photo by Jim Riggle

Yes, I know the heat of the summer is an unpleasant time to be in the woods. Yes, bugs are abundant and ready to eat you alive. Yes, dense foliage makes visibility impossible. And yes, it’s hard to evaluate bucks that don’t have fully developed headgear. So why bother?

Here’s why. Because spring and summer gives you a unique opportunity to join a buck in bachelor groups. Ever wonder what’s going on in those bachelor groups? And how buck groups differ from doe groups?


How Are Bucks Different From Does? 
Does travel in family groups – a mother and her fawns, maybe a friend and her young, possibly a grandmother is included. These females invest their energy in nourishing, teaching and protecting the young.

Whitetail bucks invest their energy in macho stuff. (No surprise there!) They hang out with the guys. They do some sparring. They establish a pecking order. And the mature bucks, the ones that have been through the rut before, are sizing up their competition. They have a unique way of doing that. By spreading their scent around they’re saying, “I’m in the game.”

How Do Bucks Communicate Through Scent? 
Hunters know deer interact at scrapes – places where they paw the ground and deposit scent. The problem hunters have is that until rutting activity begins to ramp up, we don’t find many scrapes.

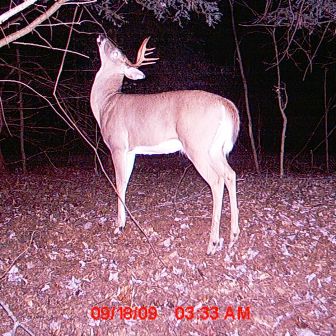
 8point-putting-pre-orbital-gland-on-branch

This 2½ year old eight-point is putting his pre-orbital gland on the licking branch. Photo by Steve Sorensen

Here’s what most hunters don’t realize:what’s more important than the scrape on the ground is the “licking branch” above it. Bucks use licking branches year ’round, whether they’re scraping the ground under them or not.

A study by Josh Braun at Missouri State University showed that even during the rut, the majority of a buck’s activity at a scrape involves contact of the licking branch to the scent gland in front of his eye, the pre-orbital gland. So the key to scent communication for bucks isn’t in the urine they deposit in scrapes. Urine dissipates quickly. The key is in what’s on the licking branch above the scrape.

When a buck applies his pre-orbital scent to the licking branch he’s alerting other bucks to his presence. Even young bucks, who aren’t yet sure what the game is, are instinctively driven to apply their scent to the licking branch.

How Can A Hunter Join The Bachelor Group? 
Find a licking branch. Put a tiny amount of pre-orbital gland lure on it (I get mine from a West Virginia lure maker named Smokey McNicholas, www.SmokeysDeerLure.com). Then, set up a trail camera, and watch the bucks get interested.

When a buck visits a licking branch you’ve “doctored” with pre-orbital lure, he’s doing two things. He’s asking, “Who’s the new guy?” And he’s saying, “I’m in the game.”

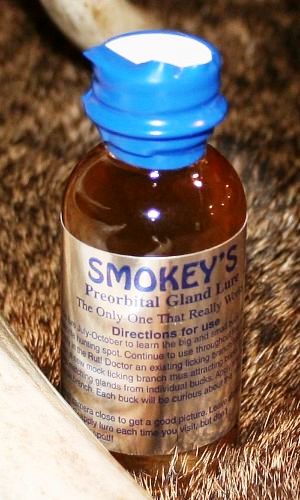
Smokeys-Pre-Orbital-Gland-Lure

Pre-orbital gland lure is a concoction made from the buck’s pre-orbital glands and secretions. Each bottle contains scent
from one individual buck.
Photo by Steve Sorensen

It doesn’t matter if you can’t find an established licking branch, because you can start your own. Just select a live branch with a tip the thickness of a pencil about 5 feet off the ground over a deer trail. Or, make your own licking branch by tying a limb to a tree and letting it hang over a trail.

When other bucks show up at the licking branch, they’ll put their nose on the branch and catch a whiff of other bucks that have been there. Then they’ll apply their own scent, each one leaving his calling card, his unique identifying scent, on this bachelor’s club bulletin board.

And, the more mature the buck, the more likely he is to take an interest in the scent you place, because he wants to know who he’s competing with for breeding rights.

All you do is collect the photos, and review them on your computer. This is a great low-impact summer scouting method. Because pre-orbital gland scent is not water-based, it has staying power so you can reduce your visits to the site. Once every week to 10 days, swap-out your camera memory cards and reapply the pre-orbital gland scent.

If you want to take an inventory of the bucks in your area, join a bachelor group by using pre-orbital gland lure on licking branches in front of your trail cameras. You might be surprised at the bucks you see.

I covered this scouting method in detail in the August, 2011 issue of Deer and Deer Hunting magazine, and in the September, 2012 issue I talk more about how to make your own mock licking branches. Try it, and while most hunters are looking for bucks with binoculars, you’ll be intimately acquainted with your local buck bachelor group.

***

About Steve Sorensen

steve-sorensen-head-shotAward-winning outdoor writer and speaker Steve Sorensen loves the Havalon knife, and has been a fan of knives since he begged his dad for a hunting knife when he was six years old. His articles have been published in Deer & Deer Hunting, Sports Afield, and many other top magazines across the USA. Invite Steve to speak at your next sportsman’s event, and follow his writing on his website, www.EverydayHunter.com.

For more articles by Steve Sorensen, click here.
And for the best deer skinning knife, click here

5,496 total views, no views today

Posted in Big Game Hunting, Deer Hunting, Guest Writers, Hunting & Fishing Equipment, Steve Sorensen, Trail Cameras, Uncategorized | Tagged , , , | 3 Comments

Bass Fishing:
The Where-To & The How-To of Shaky Head Fishing – Part 2

By Darl Black


How You Can Use The Latest Pro Technique
To Land More Bass!

If you’ve read Part 1 of this article, you understand where the concept of shaky head bass fishing came from, how it evolved, and why it’s so successful. Now, here’s how to put it into practice.

offshore-smallmouth-bass

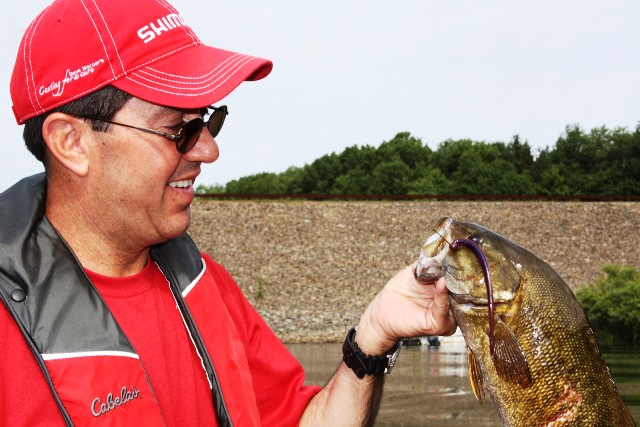
Offshore smallmouth bass fall for the same shaky head presentation.

Aspects of Location

Guidelines on where to fish a shaky head are fairly broad but the focus is mainly on relatively clean bottom areas – at depths from four feet to as deep as you care to go. Possible locations include:

    • inside weedlines
    • outside weedlines
    • docks, ramps and marina basins
    • mid-lake humps
    • gentle contour breaklines

The shaky head approach is particularly effective on sections of shoreline or deeper flats which appear to lack bottom cover – some fishermen refer to these as “nothing banks.” In reality, these areas likely host some inactive bass which are holding tight to isolated cover like a large rock, outcropping of gravel, a sunken tire, a half-buried log, etc. The shaky head presentation helps you find those bottom features and entice a strike.

Elements of Presentation

Whether you’re fishing shallow or deep, and regardless the soft plastic trailer choice, the retrieve is pretty much the same. It should involve these six elements:

  1. Cast out and allow the shaky head jig to find bottom.
  2. Engage line – take up slack line as you lower the rod tip in the direction of the jig.
  3. Begin slowly reeling the bait, maintaining contact with the bottom at all times.
  4. When the jig encounters resistance from a bottom object such as a single large rock, small area of cobble or gravel, a small ledge, a log, branch or whatever – stop reeling but maintain light pressure on the jig.
  5. With the shaky head/bait pinned against an unknown object, begin to lightly shake your rod tip. At this point you don’t want the jig to dislodge from the object, so don’t shake too violently. The goal is to maintain the lure’s position while having the soft plastic worm or creature bait dance with its tail in an upward position.
  6. After a brief period of shaking, pause and then shake again. If a fish does not pick it up, gently lift the shaky head over the object and continue the bottom crawl until it encounters the next object, and repeat the process.

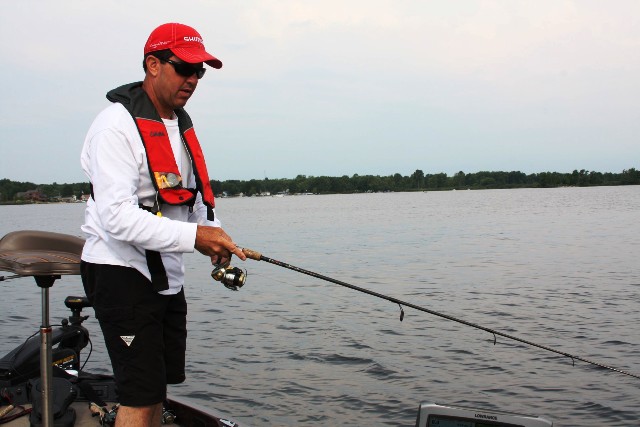
    angler-bryan-stuyvesant

    Shaky head fishing is a favorite summer technique for angler Bryan Stuyvesant. Note he keeps his rod low as he slowly retrieves a shaky head along the bottom attempting to intercept a piece of cover – then the shaking begins.

Two Ways to Respond to Pick-Ups

When shaky head fishing, you have to be ready to set the hook, but not every strike will be the same. You’ll need to get a feel for how to respond.

    • Sometimes strikes may be a detected with that distinct tick of an aggressive bass, which generally requires a quick snap hookset before the bass spits the lure.
    • At other times the bite may be so light that it goes undetected except for unusual pressure on the line or sideways movement of the line as the bass moves off with the bait. These pressure bites are best handled with a less aggressive hookset – simply reel quickly and forcefully pull upward.

Once you start having success at shaky head fishing, you’ll start catching bass others can’t, filling your livewell more often, and shaking your own head in amazement.

***

About Darl Black

darl-black-image
A lifelong freshwater angler and veteran writer/photographer, Darl tackles a wide variety of fishing related stories for print publications and websites. Of all fishing, angling for smallmouth bass is his favorite pastime. He may be reached for assignment at darlblack@windstream.net.


For more articles by Darl Black, click here.
And for the best fillet knife, click here

6,778 total views, no views today

Posted in Bass Fishing, Darl Black, Fresh & Saltwater Fishing, Guest Writers, Hunting & Fishing Equipment, Uncategorized | Tagged , , , | Comments Off on Bass Fishing:
The Where-To & The How-To of Shaky Head Fishing – Part 2

Bass Fishing: Ever Hear of Shaky Head Fishing? – Part 1

By Darl Black


Why “Shaky Head” Fishing Has Pro Bass
Anglers All Shook-Up!

In today’s high-tech angling, one newly popular presentation is uncomplicated – shaky head fishing. Rig a soft plastic worm on a lightweight jighead, cast it out, let it settle to the bottom and begin shaking your rod tip.

Well, that’s the Cliff Notes version, but the complete story of shaky head fishing is much richer and full-bodied with plot twists not covered in the quick summary.

Shaky Head History

largemouth-bass-target-for-anglers

Largemouth bass are a frequent target of
shaky head anglers.

While the present day shaky head technique hit its stride within the last few years, the back story can be traced to the 1970s and 1980s as similar small worm techniques developed in various geographic areas. In Tennessee, southern gentleman Charlie Brewer was promoting his Sliderheads and 4-inch Slider Worms with a light-line technique he called “polishing the rock.” He’d slowing drag the jighead/worm along the bottom, and crawl it over each object. In the upper Mid-West, bass anglers were using a small worm on a lightweight mushroom jighead to feel where hard bottom meets the deep weed edge on natural lakes. Meanwhile, light-line West Coast bass anglers were using small worms on darter jigheads in a bottom dancing presentation they call California shaking.

The melding of these regional approaches occurred on the national level during B.A.S.S. and FLW tournaments as pro anglers sometimes struggled to find techniques to catch pressured bass in “used water” under less than ideal fishing conditions. It was back-seat competitors (i.e. riders) who most often made headlines with the small worm/jighead shaking-dragging technique.

The Technique Evolves

shaky-head-lures

Examples of Shaky Head lures, including samples of rigged baits and individual shaky head jigheads.

When fishing offshore water, the back-seat tournament angler doesn’t have the luxury of viewing possible lake bottom targets on the sonar like the front seat guy does. However, dragging a worm on the bottom allows them to independently locate isolated targets, and tease a bass into striking. Soon the pros also realized the effectiveness of shaky head fishing, and that’s when specifically designed worms and leadheads began showing up.

Today, manufacturers who offer soft plastic all have shaky worms in their lineup, and jig manufacturers have their own particular styles of shaky head jigs. I’ve witnessed shaky head fishing while accompanying pro bass anglers and regional experts around the country. Everyone does it a slightly different way, and the technique continues to evolve.

Shaky Head Designs

Shaky heads come in various shapes – round, football and wedge. But the specific design of these heads has the line tie coming off the nose or forward part of the leadhead at roughly a 45-degree angle, as opposed to the top center of a traditional leadhead. The design creates a pivot point allowing the jig to rotate forward when it encounters a small object on the bottom of the lake. That pivoting of the leadhead causes the soft plastic trailer to stand nearly erect while pressure is maintained on the jig.

Typical head weights range from 1/8-ounce to 1/4-ounce on 6- to 8-pound line, but heavier heads are now being used on deep structure. Head design may include a spike or coil to provide for weedless rigging of the shaky bait, or anglers may rig with hook point exposed.

Shaky Head Examples
• Jewel Bait Squirrel Heads
• Gambler Giggy Heads
• Yum Pumkin’Ed Jighead
• Booyah “Big Show” Shaky Head Jigs
• Strike King KVD Premier Jighead
• Rapala/VMC Dominator Shakey Head Jig

Shaky Bait Designs

Shaky baits typically are flexible, thin-body worms usually 5- to 6-inches in length. With the technique evolving however, some anglers are now using much longer worms for extremely deepwater jigging. And the trailer is no longer limited to worms. Anglers are shaking ’craws, creatures and shad-shape soft plastic lures. The shaking presentation mimics either shad or minnows feeding on the bottom with head down and tail up, or the defensive position of a crayfish – take your pick.

Shaky Bait Examples
• Gene Larew 5″ Salt Head Shaky Worm
• Gambler Giggy Stick and Shakey Shad
• Yum Shakalicious Worm
• Strike King KVD Finesse Worm
• Lunker City Ribster Worm
• Berkley Power Shaky Worm
• Skippy Fish 4″ Shad

Now that you understand what shaky head fishing is, and what tackle you need, stay tuned for Part 2 – The Where-To and the How-To of Shaky Head Fishing.

***

About Darl Black

darl-black-image
A lifelong freshwater angler and veteran writer/photographer, Darl tackles a wide variety of fishing related stories for print publications and websites. Of all fishing, angling for smallmouth bass is his favorite pastime. He may be reached for assignment at darlblack@windstream.net.


For more articles by Darl Black, click here.
And for the best fillet knife, click here

9,427 total views, no views today

Posted in Bass Fishing, Darl Black, Fresh & Saltwater Fishing, Guest Writers, Hunting & Fishing Equipment, Uncategorized | Tagged , , , | Comments Off on Bass Fishing: Ever Hear of Shaky Head Fishing? – Part 1

Bear Hunting: Three Essentials to Success

By Steve Sorensen


A Bear, With a Bow, From a Deer Stand…

steve-wally-dick-audrey-with-bear

Steve, Wally, Dick, Audrey and her bear.

“Honey, I just saw a bear!” Dick Zimmerman whispered to his wife over the cellphone. It was quitting time for Audrey, who was bowhunting deer from a treestand.

“I saw one too,” Audrey whispered back through a big smile, “and I shot it!” Audrey was hunting in New York’s Chautauqua County, where archery bear season overlaps with archery deer season.

Shooting a bear while archery hunting for deer can be serendipitous. Game managers call it an incidental harvest, but if you expect to connect when a bear shows up at your deer stand, certain things must happen.

Food — Bears Gotta Eat

considering-the-variablesFood is an important factor where the majority of bears are taken, so if you hope to take a bear while deer hunting, make sure you capitalize on food. In Audrey’s case, Dick had planted a cornfield for wildlife not far away. He planned to leave it through the winter so the deer and turkeys would have a food source during the lean months. Trail camera photos proved it drew bears, too.

If you’re hunting deer, focus on deer. Set your deer stands where you’ll see deer – in apple orchards, oak groves on hardwood ridges, or between crops and cover. In Audrey’s case, the cornfield and a recent clearcut were several hundred yards apart. So, she set up along a high-percentage deer trail between the two, hoping for a shot at a nice buck, but knowing a bear will have a reason to walk by, too.

Accuracy — You Gotta Shoot Under Pressure

Audrey is a championship 3D archer, competing professionally in the Archery Shooters Association and the International Bowhunting Organization. She knows how to shoot.

But an archery shot at a bear from a deer stand is a bigger challenge than a 3D archery target standing broadside, at a fixed yardage, with a visible 10-ring. Bears will usually appear suddenly, at an unknown distance, and at an angle. They’re likely to be moving. She had enough time to range a tree the bear was headed toward – 28 yards. Thanks to flinging thousands of arrows, Audrey’s form was great, her release was well-timed, and she was confident. Considering the variables, and a heart exploding with adrenaline, it was no chip shot. But it was good enough.

Her arrow entered the rib cage, skipped back through the abdomen, skewered the bear’s liver, and stopped at his off-side hip. It wasn’t a complete pass-through, but he was bleeding out both sides.

Persistence — You Gotta Keep Going

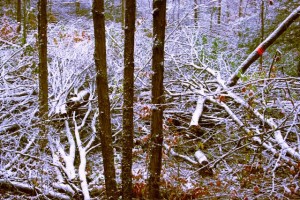
bear-hidden-in-clearcut

There’s a bear in there!

Dick called to ask me to join in the search, but the truth is that Audrey had a much better chance of recovering her bear because Dick also called another buddy, an expert tracker named Wally Ciukaj (pronounced Choo-k-eye.)

The night was pitch black. The farther we trailed the bear, the more we struggled to find blood. Sometimes drops were no bigger than a pinhead. Several times we lost the trail. When I suggested we might be better off with a good night’s sleep, fresh eyes, and morning’s light. Wally insisted we soldier on.

The blood trail eventually led us to the clearcut. Everywhere we shined a light, we saw shadows. Wally struggled to climb over the web of twisted limbs. As if on cue, coyotes added an eerie ambiance with their yipping and howling on the hillside.

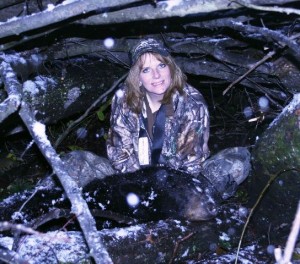
audrey-zimmerman-with-bear

At the end of the trail, Audrey under
the treetops with her bear.

The bear could be hiding behind any limb, in any shadow. Fifty yards into the clearcut Wally shined his flashlight under a log, squinting to see anything in the jumble. Then he whispered. “There he is” in a tone of voice that made us all freeze.

The bear had hidden himself well, and had turned to watch his backtrail. When Dick’s flashlight hit the bear, he blinked. Wally realized he was just seven feet from a wounded bear, and he slowly backed away.

We decided to mark the spot and return in the morning. Fifty yards from the clearcut we heard a loud moan, and recognized it as the “death moan”. It was impossible to dig him out of the tangle of treetops in the darkness, so we headed home with plans to return at first light.

After a few hours of fitful sleep we awakened to fresh snow that would have made following the blood trail impossible. We hiked to our marked spot and found Audrey’s bear lying stone cold dead, right where he was when he blinked at Wally.

***

About Audrey Zimmerman

audrey-zimmerman-champion-3d-archerFor Audrey, archery is not just about shooting 3D targets in shirtsleeve weather. It’s about knowing the woods as well as she knows a 3D course. It’s about sitting in a tree from daylight ’til dark. It’s knowing food sources and travel routes, shooting under pressure, and pushing on. Lots of bucks, and now a bear under her 3D championship belt, prove she doesn’t quit.

About Steve Sorensen

steve-sorensen-head-shotAward-winning outdoor writer and speaker Steve Sorensen loves the Havalon knife, and has been a fan of knives since he begged his dad for a hunting knife when he was six years old. His articles have been published in Deer & Deer Hunting, Sports Afield, and many other top magazines across the USA. Invite Steve to speak at your next sportsman’s event, and follow his writing on his website, www.EverydayHunter.com.


For more articles by Steve Sorensen, click here.
And for the best bear skinning knife, click here

4,994 total views, no views today

Posted in Archery Hunting, Bear Hunting, Big Game Hunting, Guest Writers, How To, Steve Sorensen, Uncategorized | Tagged , , | 3 Comments