How to Get Crappies for Christmas

By Bernie Barringer
(Photos courtesy of Kevan Paul)

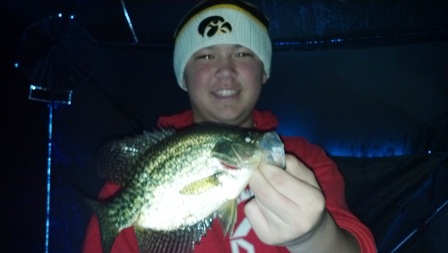
An expert shares his secrets to catching winter crappies. 

No matter where you live across North America or what you fish for, every species of fish has peak times. Spawning time makes for easy pickings during the spring for many species, crappies included.

photo-by-kevan-paul-2012-01-25-448x253But across the northern half of the USA, there is a second peak period for crappie fishing; we call it “First Ice” around here. Crappie anglers anticipate that first safe ice of the winter because the crappies are in predictable locations and they are quite aggressive.

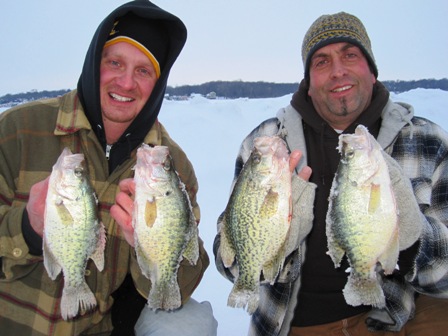
Here in North Central Minnesota, first safe ice usually happens within a week or so of Thanksgiving. In areas father south, the first safe ice fishing takes place around Christmas. The entire month of December, if you can safely get on the hard water, is prime time for crappies.

Whenever I talk ice fishing for crappies, I think of my friend Kevan Paul, a fishing guide in northern Iowa. He’s a premiere panfish guide both on the open water and the hard water. I gave him a call and asked him to help me pass along some advice about those first ice crappies.

Secret #1 – Focus on Shallow Water

photo-by-kevan-paul-2012-02-09-448x253“In late fall the fish will be off the deep breaklines in at least 18 feet,” Kevan explains. “But when the lakes ice over, they start to move toward the shallows.”

Kevan says they can be found is as little as 3 to 4 feet as the winter wears on, but the best early-ice locations are breaklines and bars with weeds on top in 10-13 feet of water, depending on water clarity.

Secret #2 – Look for Weeds

“The place to start is right in the deepest weeds you can find in the lake.” Weeds are the key to finding crappies, and Kevan uses an underwater viewing system to find the greenest, tallest patch of weeds he can find and then he looks for crappies located near them. “The crappies that you find near the bottom of the weed patches are not very active, but the fish you can easily catch are those that are out off the edge of the weed patches and well up off the bottom.”

Secret #3 – Seek Active Fish

photo-by-kevan-paul-2012-01-27-448x253If he doesn’t see active crappies, Kevan simply drills another hole and drops the camera down again. No sense targeting fish that are not likely to bite. First spend the time to find the active fish, and only then start fishing.

These crappies move along in loose schools and once you find a school of active fish, the action can be terrific. They roam from one weedy area to the next. Often lakes have weed patches that are more like clumps. Some of them may be as small as the hood on your car. If you find crappies relating to one of these weeds, you can catch them quickly because they are concentrated in a small area.

If the action dies down, simply start moving from weed clump to weed clump until you find another pod of active fish. By now you can see how important an underwater viewing system is to a successful trip.

Secret #4 – Use These Surefire Techniques

photo-by-kevan-paul-2012-01-29-448x253Once you find the schools of active fish, Kevan has some suggestions for catching them.

(1) Minnows – He likes to use a slip bobber with a minnow and a bare hook. You know how deep they are because you have seen them on your depthfinder or your camera. “Keep your bait a little above the level of the fish,” Kevan explains. “Crappies feed up and you will catch a lot more fish if you position your bait right above them.”

(2) Plastics – While the simple minnow and sliding float method is his go-to technique, he says some days they seem to like plastics better.  When this is the case, he uses a tiny jig with a Berkley GULP! Minnow and keeps it moving slowly. Crappies move very slowly in cold water and often just suck in a bait, then just sit there.

photo-by-kevan-paul-IMG-1809-448x336(3) Spring Bobbers – These bites can be so hard to detect, in fact, that every one of his crappie rods has a spring bobber on the tip to help him determine when a crappie has sucked in his bait. Sometimes, he says, all you see is that the spring bobber is loaded up a little more and then you set the hook.

(4) Colors – “It’s hard to beat pink for crappies,” Kevan says when he talks about colors. In clear water Kevan stays with the more natural colors such as motor oil and brown. But in the more dingy water he might go with brighter colors such as chartreuse.

So when the ice is safe to venture out this winter, head out to a place where you can find deep green weeds near the open water basin of the lake. You’ll find the active crappies there and if you take your time and target these finicky speckled fish the right way, you are well on your way to a delicious winter fish fry.

***

About Kevan Paul

kevan-paul-100x100Kevan Paul guides fisherman in northern Iowa, and can put you on a bite most anytime. He can be reached at 641-529-2359, or visit his website at www.paulsfishingguide.com.


About Bernie Barringer

bernie-barringer-fishing-303x236Bernie Barringer is a lifelong angler who has competed in professional walleye tournaments. He has published more than 400 articles in two dozen outdoor magazines and authored ten books on hunting, fishing and trapping. He enjoys fishing for all species and writing about his experiences for many outdoor magazines, and on his blog at www.bowhuntingroad.com.

4,979 total views, no views today

Posted in Bernie Barringer, Crappie Fishing, Fishing Tips, Fresh & Saltwater Fishing, Guest Writers, How To, Ice Fishing, Uncategorized | Tagged , , , , | Comments Off on How to Get Crappies for Christmas

After the Shot – 6 Ways To Avoid Mistakes

By John Trout, Jr.

What follows the shot could decide the outcome!

It’s no big secret what happens to you at the moment you shoot at a deer. Your heart races. Adrenaline flows wildly throughout your body. Your mind runs wild with anticipation.

bret-swiertz-shooting-ground-300x448

When the moment of truth arrives, anticipation and excitement immediately follows.
(Photo by John & Vikki Trout)

Despite these natural, exciting and overwhelming reactions, we must somehow remember to follow through – taking note of important facts and making decisions that could determine whether or not you recover the deer. You’ll get no “second” chance, no instant replays. As they say, “It ain’t over till it’s over.” You must do it right the first time, despite your enthusiasm and eagerness. Here are six concerns you must not overlook:

1. Staying Focused – I will be the first to admit that it’s not easy staying focused upon releasing an arrow or squeezing a trigger. “Buck fever” is but one way to lose focus. Surprisingly, it’s not always beginning hunters that suffer the syndrome. And it’s not always caused by a big buck – deer fever is just as bad. Veteran hunters often lose their focus when a shot is taken.

It is vital that you stay focused right through the moment you shoot, and continue for at least the next 60 seconds. In fact, it’s that first minute that counts the most – the period when you collect essential details about what lies ahead.

2. Analyzing Shot Reactions – Most hunters fully realize that many deer don’t drop upon being hit with an arrow or projectile. Nevertheless, most deer give a definite reaction to being hit. Studying the deer’s reaction could help you to determine not only whether you hit the deer, but also where the animal is hit.

stay-focused-on-deers-reaction-448x298

Staying focused on a deer’s reaction following the shot could help you recover the animal. (Photo by John & Vikki Trout)

Many deer hit through the vital lungs and/or heart will typically lunge forward and run hard with the tail tucked. However, a muscle wound could result in a similar response. A deer shot through only the abdomen often runs away slower. Some will stop and stand after traveling just a short distance, appearing hunkered before finally walking off.

These reactions are not carved in stone, however. Some deer shot through the vitals could show no reaction to being hit, and leave the scene at a slower pace with their tail flagging.

3. Pinpointing the Spot – More than likely, a hit deer that runs away will quickly disappear. How long you can see the deer will depend solely upon your visibility. However, if you have binoculars with you, use them if time allows, and pinpoint the precise spot where you last saw the deer. I will say, though, don’t take your eyes off the deer to use binoculars and risk losing sight of him. They’re beneficial only if the deer stops.

remain-at-ambush-site-after-shot-300x448

After shooting, remain at your ambush location and avoid the temptation to search for the deer immediately. (Photo by John & Vikki Trout)

Pinpointing the last spot you saw the deer could benefit you when the tracking begins. Some deer might not bleed until they have traveled a certain distance. The spot you pick could be a tree, thicket, or another natural part of the landscape that’s identifiable when tracking.

4. Identifying Shot Location – After you have watched the deer for as long as possible, make it a point to identify the shot location. This is not always easy, even if you shoot a short distance of 20 yards.

From my treestand, I often mark the precise location where the deer stood. In some cases I use my binoculars to see if I can find scuffed marks in the leaves or soil, and to take notice of blood nearby. Blood is usually not readily visible from a treestand, but I can at least mentally mark a bush, tree, or something else that will provide valuable information saves time and helps in follow-up.

5. Staying Put – Never leave your ambush location immediately after the shot. Your anxiety will make it tempting, but “patience is a virtue.” Leaving your treestand or ground blind too quickly could send a wounded deer farther away.

Even when I’m comfortably sure that my arrow or bullet passed through the vitals, I make it a point to sit tight. I use this time to ponder over the previously mentioned tips and consider how long to stay put. Even if you see the deer is down, watch it for several minutes.

successfully-following-blood-trail-300x448

Successfully following a blood trail to your deer could depend upon how you handled the moments immediately following the shot.
(Photo by John & Vikki Trout)

6. Waiting – How Long? – For eons, the standby rule for many deer hunters is to wait at least 20 minutes before beginning to look for the deer. Today, I still practice this technique. Twenty minutes allows time for everything to calm down, time for me to relax, and often time enough for the deer to succumb.

Exceptions exist, particularly if I feel I’ve hit a deer through the paunch. Liver, stomach and intestinal-shot deer do not succumb within seconds as do deer hit in the vitals. Thus, I often find myself waiting at the ambush site for much longer. If I shoot a deer late in the evening, I often stay put until dusk so I can mark the shot location for the following morning to begin tracking.

I offer dozens of additional suggestions for tracking your deer in my book – Finding Wounded Deer. But the previously mentioned tips are essential before you begin following blood. Moreover, they could provide you with an opportunity to pull out your super-sharp Havalon knife at the end of the blood trail.

***

About John Trout, Jr.

john-trout-jr-236x235Southern Indiana hunter John Trout, Jr. is a full-time freelance writer and photographer specializing in whitetail deer, wild turkey and black bear. He has authored eight books and his work has appeared in nearly every publication in North America. You’ll enjoy a visit his website at www.troutswildoutdoors.com.


Click here for more articles by John Trout, Jr.
For the best deer skinning knife, click here.

8,498 total views, no views today

Posted in Big Game Hunting, Deer Hunting, Guest Writers, How To, Hunting Tips, John Trout, Jr., Uncategorized | Tagged , , , , , | Comments Off on After the Shot – 6 Ways To Avoid Mistakes

Hunting Public Land – Part 2

By Mike Bleech

4 Secrets to Outsmarting Other Hunters
for Public Lands Whitetails

Outsmarting other deer hunters on public land might also be called “third level deer hunting”. While you may see novice hunters on public lands, a good share of hunters will have intermediate skills. Even though the essence of deer hunting is competing with deer, still a large part of it is competing with other hunters for the deer. That should be plenty of reason to elevate your deer hunting skills to the third level.

outsmarting-deer-and-hunters-do-both-298x448

Which is most important when hunting whitetails on public land – outsmarting deer, or outsmarting other hunters? You gotta do both. Dan Stimmell grew up hunting in a national forest and his record indicates he is more successful than over 95% of public land deer hunters. (Photo by Mike Bleech)

Various surveys have shown that a large share of deer hunters gravitate to public lands, so hunting pressure is a constant consideration there. Even if more hunters do hunt on private lands, public lands concentrate hunting pressure more than most private lands. This affects everything involved with hunting deer.

Secret #1 – Learn to use your tools.

Do not just carry maps, a compass and a GPS – learn how to use them. At the very least you should be able to navigate through the woods with a compass and a topographic map. Learn to do that even before buying a GPS. A GPS does not replace either topo map or compass. Knowing how to use them will greatly enhance your use of a GPS.

Topo maps usually are available at sporting goods stores near public lands, sometimes at offices of public lands, through the mail, or from websites.

Topo maps are valuable tools not just for finding your way around, but also for planning hunts. Deer movements very often relate to terrain. They tend to avoid using very steep slopes. They tend to walk along benches, which are relatively level sections along otherwise steep slopes, and they tend to cross ridges at places where it’s an easier climb over the ridge.

think-you-need-to-outsmart-deer-theres-more-to-it-than-thatWhile scouting, make accurate notes directly on your maps about information you find. Include what you discover while on foot, and also things you learn while driving. Combining this information may reveal patterns that point to good hunting. As an example, by noting where most other hunters enter the woods, you can position yourself where the deer will likely go.

GPS units are not compasses. Some may possess compass capabilities, but only compasses are compasses. Carry a compass within easy reach to frequently check the direction you’re traveling. On the other hand, nothing can replace a GPS unit for creating a virtual map of your movements, for marking specific locations where you have been, and for getting back to those locations. In addition to making notations on maps – on your GPS, plot significant spots, such as good places to stand.

Maybe most important of all, be sure to plot the location of your vehicle or camp to make it as easy as possible to get back at the end of the hunt. This can be a virtual lifesaver if you are dragging a deer.

Secret #2 – Know where deer go.

keep-hunting-after-others-quit- 298x448

A great way to end a deer season – a deer on the last day. One way to outsmart other hunters is to keep hunting after they quit. (Photo by Mike Bleech)

Making good use of maps will help you determine what may be the single most important information a hunter can know. It can help you determine where deer go. This usually is a lot more important than knowing where they are, although knowing where they are is the first part of knowing where they go.

Heavy hunting pressure is usually the norm on public land. This can be a big problem, but savvy deer hunters turn it to their advantage. If you know where deer are at any particular time, and you assume that other hunters will get the deer moving, then you have a very good chance of intercepting the deer.

Here are a couple of common examples of putting this to use, even with minimal scouting. Experienced deer hunters know that deer like to bed in clear-cuts, or similarly dense new growth that results from timbering, fires or wind storms. If hunters jump them from thick of cover, and another clear-cut is nearby, that is probably where they will go.

Another example – if deer are pushed either up over, or down from a steep ridge, they will usually run up or down the end of the ridge, or through a cut on the side of the ridge. They tend to use places where the sidehill is not so steep.

Secret #3 – See what other hunters don’t see.

Carry good binoculars, and use them often. Binoculars allow hunters to see farther and more clearly. This helps even the playing field between deer and hunters since deer have superior natural senses.

Think about it. Deer not only see better, they’re also better conditioned to using their senses. By comparison, people have so much external stimulation in the form of television and other things that dull senses.

blind-surrounded-by-natural-cover-298x448

Making the extra effort is key to successful deer hunting. This hunter climbed onto a large boulder to set up his stand. Note that it is surrounded by natural cover. (Photo by Mike Bleech)

A still-hunter moving slowly, cautiously through the woods should stop often, spending more time looking than moving. But human eyes have limitations that cannot compete with the eyes of deer without the help of optics. This is important to hunting more effectively than most other hunters.

When choosing binoculars you need to understand the trade-off you make. Compact binoculars may be light weight, but usually have a narrow field of view and are not as bright. Full size probably is best in forest cover because deer often hide in shadows. Both 8X and 10X are popular magnifications for deer hunting binoculars.

Secret #4 – Take advantage
of natural cover.

Blinds, either in trees or on the ground, are excellent hunting tools but, unless they are placed wisely, deer are likely to notice anything new in their area, just as you would notice an extra foot stool in your living room. Even if you use a blind, use natural cover to make it less obvious. Before you hide in the blind, hide the blind.

That doesn’t mean constructing a blind to hide your man-made blind. Just a fallen tree crossing the blind, breaking up its outline, may be enough to conceal it. Blend it in with the surroundings.

Much of what we have covered involves working with nature. Technology goes only so far. Hunting always comes down to understanding the relationship between deer and their habitat, and being more in tune with nature than other hunters are. That’s what makes you much more likely to use your Havalon knife before you get back to your truck.

***

About Mike Bleech

mike-bleech-outdoor-writerMike Bleech has been a full-time freelance writer/photographer since 1980 with more than 5,000 articles published in more than 100 publications. He is the outdoors columnist for the Erie Times-News and the Warren Times Observer. Over the years he has become an expert at hunting the Allegheny National Forest and other public lands.


To read Hunting Public Land – Part 1, click here.


For more articles by Mike Bleech, click here.
And click here for the best skinning knife, once you’ve gotten your trophy. 

4,564 total views, no views today

Posted in Big Game Hunting, Deer Hunting, Guest Writers, How To, Hunting Tips, Mike Bleech, Uncategorized | Tagged , , , | Comments Off on Hunting Public Land – Part 2

Hunting Public Land – Part 1

By Mike Bleech

5 Mistakes Hunters Make On Public Lands

You may think hunting on public lands means too much competition from other hunters. Yes, hunting pressure does tend to be heavier on public lands than on private lands. However, not every public place gets a lot of hunting pressure, nor do other hunters create the same kind of competition as you often get on private lands. Many of them actually give you weak competition.

You can avoid being weak competition yourself, though, by not making the mistakes many casual deer hunters make. You should always learn from your own mistakes, but nothing says that you cannot learn from the mistakes of other hunters, too. Here are a few mistakes to avoid.

Mistake #1 – Hunting close to roads.

text-box-336x336One particular area I frequently hunt has a reputation for holding very few deer. I hear about it often. When I suggest that hunters get farther away from roads the reply is always the same – they tell me they do get deep into the woods.

I know better. During a normal deer season I see absolutely no tracks in the snow farther than 1/8-mile from the nearest road, other than those of my own hunting companions. Of course, I dare not tell that to anyone who claims to get deep in the woods. Egos get too deeply involved.

Most of the moving that deer do during hunting season results from the movements of hunters. If no one is far enough into the woods to jump deer, usually they bed all day, or most of it anyway.

Mistake #2 – Moving too fast.

small-details-make-a-difference-298x448

Small details can make the difference between seeing a deer before it sees the hunter, or not. By walking in the small depression, this hunter lowers his profile by a couple feet.
(Photo by Mike Bleech)

Of course, by getting deeper into the woods you run the risk of pushing deer to other hunters. This is why you should avoid moving too fast. Moving fast tends to get deer running. Just one hunter moving recklessly can make hunting close to roads almost futile. It is absolutely essential that you see deer before they vacate the area.

Moving slowly, cautiously, tends to just nudge deer along (if you are not shooting at them.) They may make a few bounds, but in many cases they will not move far or fast. It is not unusual for a skilled still hunter to be able to cut ahead of deer by taking advantage of their slow movements when the course of the movement is accurately anticipated. That comes from experience and scouting.


Mistake #3 – Going where other hunters go.

While this may seem only logical to some hunters, to others there is a tendency to assume that other hunters have a good reason for going wherever they go, and so they follow them. Often, hunters park in the same places as other hunters. That’s what I call city thinking. The result is pockets of hunters separated by areas where there are relatively few, in any, hunters.

The reason for not going where other hunters go is simple. Hunting pressure moves deer. Deer generally get away from hunters, then when they get to an area where there are no hunters they stay there. Simple as this seems, it is ignored more often than not.

Mistake #4 – Setting up a stand in wide open places.  

man-made-blind-easy-for-deer-to-spot-448x298

A man-made blind will be easy for deer to spot unless it blends in with the surroundings like this one, which is set in top of a large boulder. (Photo by Mike Bleech)

Open places are generally poor places to set up blinds. Hunters often do just this because of the open shooting it provides. But when pressured, deer avoid open places, so that’s exactly where you do not want to be. Find travel lanes deer use, then keep in mind that the bigger bucks often do not follow the same paths as does, fawns and yearling bucks.

Find a place where your blind blends into natural cover, somewhere it does not stand out. Cover both in front of the blind and behind the blind to make it blend in.

Mistake #5 – Focusing on the show-off bucks everyone else sees.

Simply put, that’s asking for trouble. Those bucks that are frequently seen from roads are seen by many hunters, and many more hunters hear about them. Word spreads fast, and the size of the buck’s rack grows with each telling. By the time deer season rolls around, such a buck is likely to attract a large following.

bleech-examines-buck-rub-298x448

It is not necessary to see a big buck to know it is in the area. Author Mike Bleech is examining a buck rub. By the size of the tree that was rubbed, and by the presence of gouges made by tines, it is a pretty good bet that this rub was made by a big buck.
(Photo by Mike Bleech)

A couple of major bad things happen. First, the root of most other problems, heavy hunting pressure creates a circus atmosphere. You will see hunters in every direction. On top of that, it can be dangerous when a bunch of overly excited hunters are in close proximity. Remember, that buck did not get big, which also means old, by making mistakes. Something about its habits has made killing it very difficult.

If a buck that has been showing its stuff alongside the road gets past the first onslaught on the opening morning of deer season, it will go somewhere that provides it with relative security. Hunters who look for it by the apple trees, crop field, or whatever else was attracting it to that roadside spot during the weeks leading up to hunting season, have scant chance of seeing it again, at least not until the following year when it again becomes a pre-season show-off.

Avoiding these mistakes can save you a lot of time and trouble, but it’s only half the story. To be strong competition for other hunters, you need to choose the best ways to hunt deer on public land. That’s the rest of the story.

***

About Mike Bleech

mike-bleech-head-shotMike Bleech has been a full-time freelance writer/photographer since 1980 with more than 5,000 articles published in more than 100 publications. He is the outdoors columnist for the Erie Times-News and the Warren Times Observer. Over the years he has become an expert at hunting the Allegheny National Forest and other public lands.


For more articles by Mike Bleech, click here.
And click here for the best skinning knife, once you’ve gotten your trophy. 

Click here for Part 2 – Hunting Public Land

4,317 total views, 1 views today

Posted in Big Game Hunting, Deer Hunting, Guest Writers, How To, Hunting Tips, Mike Bleech, Uncategorized | Tagged , , , | 3 Comments

Cajun Spiced Squirrel Stew for Two

Heat Up A Cold Fall Evening
With This Cajun Squirrel Stew

By Cara Hunt

squirrel stew

Cajun squirrel stew is a great finish to a cold fall
day of hunting.

Heading out squirrel hunting? You’re hoping to shoot a mess of tender, juicy bushytails, and when you do you’re in for a tasty treat.

Chef Georgia Pelligrini once shared why she loves the flavor of squirrel meat:
“and after having feasted on a grove of pecans or acorns, their meat is nutty and sweet, buttery and tender.”


Here’s a spicy recipe to warm you up on a late fall evening. Add as much Cajun spice as you prefer. You’ll soon want to be back out in the woods harvesting more squirrels.

Squirrel Stew Ingredients:

  • 4 squirrels cut into serving pieces or chopped
  • 4 quarts of vegetable stock or homemade squirrel stock
  • Commercial Cajun spice mix with cayenne pepper
  • 1 small bag of baby carrots
  • 6 medium red potatoes, cut into small cubes
  • 4 stalks of celery, chopped
  • 1 bay leaf
  • 4 cups of water
  • salt
  • pepper

Cooking Directions:

Bay leaves

Bay leaves (Photo credit: Wikipedia)

Mix water and stock together, add salt, pepper and Cajun seasoning to taste. Pour the stock liquid into a medium stock pot on the stove and turn on medium high. Bring to a soft boil.

Cube your potatoes. If you like potato skins, you can scrub the potatoes clean and leave the skins on when you cube them, or you can peel the potatoes and add the skins to the recipe separately. Alternatively, peel the potatoes and discard the skins before cubing.

Scrub your celery stalks, making certain to remove all dirt, debris and leaves. Chop or slice the four stalks of celery into small or large slices, depending on your taste preference.

Add the celery, potatoes and baby carrots to the stock and let boil 20 minutes.

Cut up the cooked meat of 4 squirrels into quarters or smaller pieces as desired. Be sure to carefully remove all bones and tendons from the meat as you remove it from the bones.

After 20 minutes, place the cut up squirrel meat into the stock pot. Reduce heat to medium, cover the stock pot and allow to slow boil for 1 to 1.5 hours, depending on the age and freshness of your meat. The younger and fresher the squirrel, the more quickly it will cook.

Continue cooking for 30 minutes. Add bay leaf. Once finished, remove the bay leaf. Serve warm with rolls.

Alternative:

Replace the potatoes in this recipe with your favorite chopped apples. Enjoy!

What’s Your Favorite Squirrel Recipe?

Enhanced by Zemanta

6,973 total views, no views today

Posted in Small Game Hunting, Squirrel Hunting | Tagged , , , | Comments Off on Cajun Spiced Squirrel Stew for Two