Napoleon’s Rule of Turkey Hunting

Napoleon’s Rule of Turkey Hunting
By Steve Sorensen

When guys wearing camo are talking at the diner, once in a while you hear one of them say “Turkeys don’t do that!” The guy who hunts by that rule isn’t a serious hunter and for sure isn’t killing as many gobblers as he could. Wild turkeys are wildly unpredictable. That’s why I hunt spring gobblers by what I call Napoleon’s Rule (not the French military man, but the star of the 2004 movie Napoleon Dynamite). If you use Napoleon’s Rule, and if you shoot straight, you’ll kill more spring gobblers.

I’ll tell you what Napoleon’s Rule is, but first, here are five things turkeys are not supposed to do, but they do anyway.

1. They’ll change trees after dark.
My buddy Dick was out one evening with high hopes. I had already killed a mature bird six days earlier, and we thought the bird that had been running with that one might be lonesome and more inclined to come to a call. Dick went out one evening with the goal either to tag that bird or to roost him for the morning. The clock ticked toward darkness and the big gobbler was closing the distance, but not quickly enough. As Dick was running out of time he watched the gobbler back off a little and then heard him fly up into a roost tree. Dick waited nearly an hour, then snuck out of there in the blackness of night without bumping the bird off his roost.

The next morning Dick and I were there well before daylight. Dick positioned himself at the same tree he was calling from the night before, and I was 100 yards away across a rocky ravine. Everything was perfect as first light began to seep over the horizon, but when the gobbler gave his first morning announcement, we realized that the old boy had changed trees during the night. He was gobbling in the tree Dick was sitting by.

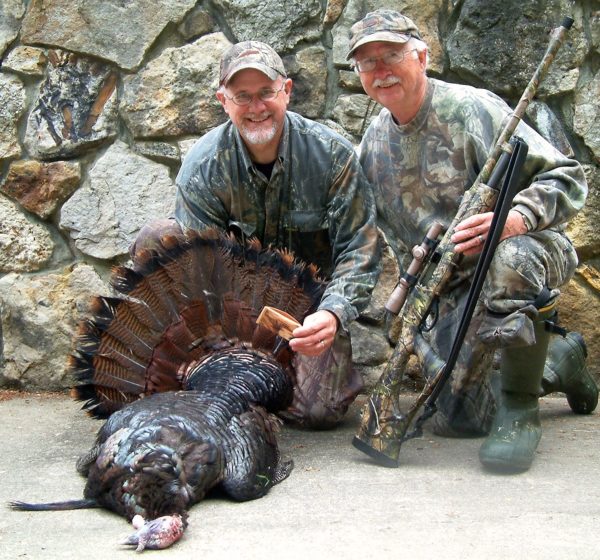
Dick didn’t kill that bird. I did. And if we hadn’t been hunting together, neither of us would have shot him. The lesson is this. We think of turkeys staying put during the night, with heads tucked safely under their wings. If they leave their perch, we figure they were probably flushed by some danger—but sometimes they move on their own. There’s no explaining that.
RoostChanger

This gobbler changed roost trees on his last night in this world. (Photo by Steve Sorensen.)

2. They’ll come in after you leave.
People have places to go and people to meet, so at some point we always need to get out of the woods to take care of business. It’s not that we run out of patience. It’s not that we give up. We just have obligations. One season, at first light, I heard a gobbler on the hillside below. I started calling and he headed my way, but oh, so slowly. I had be at work by 8:00 AM, and he was still gobbling when I left the woods at about 7:30.

The next morning I went back to the same place and sat down to wait for him to gobble. Just as dim light was beginning to brighten the woods, I thought it might be a good idea to answer nature’s call before the gobbler sounded off. As soon as I stood up, I was busted. He flew out of the tree I had been sitting against.

The lesson is that a gobbler might come in long after your pretty hen sounds go silent. We would expect him to find somewhere else to go, some other hen to breed. But no. He must have been monogamous. He wanted that hen, and only that hen. How long will he wait for her? A whole day if he must. Makes me wonder how many times I’ve called gobblers in after I left the woods.

3. They’ll walk away gobbling like there’s no tomorrow.
One evening my brother was fishing and heard a gobbler high on a steep hill. We decided to climb that hill the next morning and when we got to the top that turkey was hotter than the midsummer sun. He carried on a vigorous and lusty conversation, but he wouldn’t budge. He finally decided on a better place to continue that conversation, because he walked away gobbling every few seconds. Between his gobbles, my brother thought he heard another faint gobble.

We thought that if another gobbler was nearby but was intimidated by the first, maybe he’d come in. We set up and sure enough, in a few minutes I heard a soft “cluck” down in a little depression on the hilltop. I raised my Ithaca 37 and he walked in front of the barrel.

We turkey hunters like to find a hot gobbler. We think they’re the easy ones. Turkeys think otherwise. Hot gobblers don’t always come in, but that doesn’t mean a not-so-hot gobbler won’t.
four hour gobbler

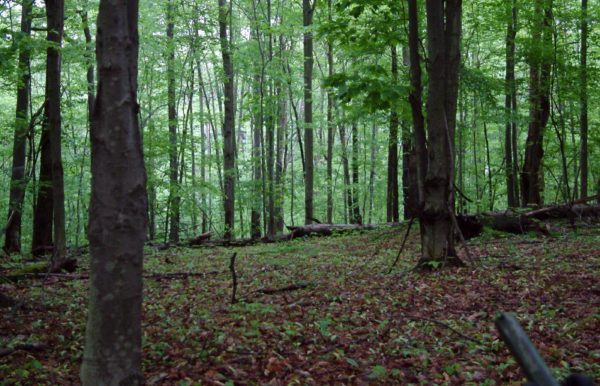
Here I sit, at a perfect set-up, but the 4-hour gobbler won the battle. (Photo by Steve Sorensen.)

4. They’ll talk to you for endless hours.
I was hunting a hot spot back in the ’90s, and it was just a matter of time until I scored. One morning I took off work and had until noon to parlay every bit of patience I could into a successful hunt.

At daylight I had a mature gobbler down a steep hill about 100 yards away. He came off the roost and was coming right to me, but hung up at about 30 yards and wouldn’t crest the hill. He spent the next four hours gobbling at every call I made, but refused to make that last move. In the time I danced with that turkey, four hours passed. I could have gone home, watched “Dances with Wolves,” and come back.

Finally, I heard another gobbler down on the bench from the other direction. I glanced that way and could see him coming 100 yards out. Since visibility was better that direction, I decided my odds were better with him. I made a move to the other side of the tree. When I was halfway there, that four-hour gobbler decided it was the perfect moment to show up. Why did he do that? Maybe the slight sound I made in the leaves did the trick. Maybe he felt competition from the other gobbler. Or maybe, he wanted to make me look like a fool. Yeah, that’s it. But what really matters is that neither turkey got a ride in my truck that day.

5. They’ll leave and then come back.
It’s over. He walked away, so he lives another day. Right? Nope—that’s not always the case. I’ll probably never know why they do this, but it pays to know they do. When a gobbler walks away, the game isn’t necessarily over.

On more than one occasion I have let gobblers leave, and then called them back. One day two mid-morning gobblers came to my soft, sweet, minding-my-own-business purrs and yelps, but they set up their strut zone behind me. That’s where they wanted to be. I couldn’t get them to budge, and I couldn’t move. I decided to go silent for 15 or 20 minutes and when I yelped again, they responded about 100 yards down in the woods.

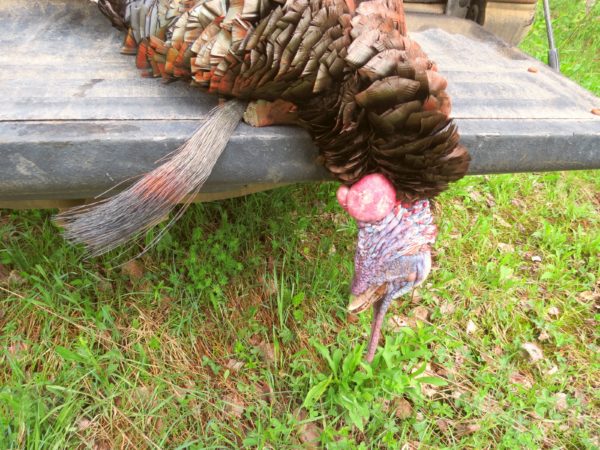
I quickly moved to the other side of the tree and issued a series of yelps. They gobbled but stayed put until I turned up the heat. I gave them the deadly fighting purr on the Northern Scratchbox call I make and they came barreling in, not wanting to miss whatever was going on. A little while later one of them posed for some photos on the tailgate of my Ford Ranger.
TailgateGobbler

This gobbler came to my set-up, and then left, but charged back in a second time. Then he posed for a photo on the tailgate of my pickup. (Photo by Steve Sorensen.)

These five hunts, and more, have taught me that “Turkeys don’t do that” is a bad rule to hunt by. Sometimes they do do that. They’re like Napoleon Dynamite in the opening scene of the movie of that name when a kid on the school bus said, “What are you going to do today, Napoleon?” His answer? “Whatever I feel like I wanna do! GOSH!” Napoleon’s Rule of turkey hunting is the one to remember: turkeys do whatever they feel like they wanna do.
***
sorensen-headshot_new2015_edited_415x500
Steve Sorensen has published articles in top magazines across the USA, and won the 2015 “Pinnacle” Award for magazine writing. He also writes an award-winning newspaper column called The Everyday Hunter®, and frequently contributes to the Havalon website. Invite Steve to speak at your next sportsman’s event, and follow him at www.EverydayHunter.com.

2,436 total views, 1 views today
Posted in Ground Blind Hunting, How to Hunt, Hunting Tips, Outdoor Life, Spring Turkey Hunting, Steve Sorensen, Turkey Hunting, Uncategorized | 3 Comments

Tips for Shed Hunting in Late Winter

By Steve Sorensen

Shed hunting experts know these four secrets!

While waiting for this bitterly cold, seemingly endless winter to end, the patience of whitetail hunters is growing thin as they itch to get out and hunt for shed antlers. This year we still have a foot of snow in the woods, and it’s not melting very quickly. With nighttime temperatures in the mid-twenties or even the teens, a forty-degree day doesn’t melt much snow.

YouTube is full of shed hunting videos, and many of them show hunters spotting sheds with tines sticking up through the snow. It looks easy, and it would be if the snow were only two or three inches deep. Fat chance of that here. In fact, I was out today and in some places the snow was still knee-deep.

So, under these harsh conditions, can you, should you, hunt for sheds in the snow? The odds of finding them may be slim if they’re buried under the white stuff. But while searching snow-covered ground, I discovered several reasons to hunt sheds in the snow:

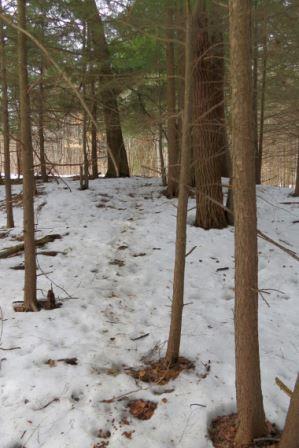
Deer trails can lead to some great shed hunting

This deer trail is littered with droppings, runs through thermal cover and leads directly to a deer bedding area. (Photo: Steve Sorensen)

1. Focus on thermal cover

In order to survive, deer must conserve energy in the winter. To do that, they seek thermal cover — areas where hemlocks or thick pines grow. Thermal cover gives deer at least three advantages. These trees act like a blanket, holding the day’s heat through the night. They also act as an umbrella, catching snow in their limbs, so the snowcover isn’t as deep under them. They also offer a wind break, minimizing the exposure of deer to the biting wind. Southern slopes offer an additional advantage — they’re warmer than northern slopes because the sun’s rays are more direct. These are the reasons deer gravitate to thermal cover in the winter. Snow doesn’t necessarily melt here first. It might actually stay longer in protected areas where the sun doesn’t get through, but look in these areas first and plan a return trip.

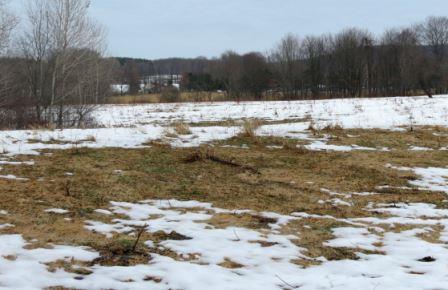
Some windswept fields attract shed antlers

Snow never covers a field at the same depth everywhere. Some areas will be windswept, and the grasses will be exposed there first. These spots will be deer magnets because deer can feed without spending much energy. (Photo: Steve Sorensen)

2. Don’t skip over open fields

Fields are difficult to hunt because they are often large, and the deer might be anywhere. But early hunting while snow is still on allows you to narrow down the area considerably. That’s because most fields have windblown spots, either because of the contour of the land or due to the way the wind blows around adjacent cover. Deer will gravitate to those windblown spots where they don’t need to paw through the snow. Even though snow might still be 10 to 12 inches deep in most of the field, some spots are bare. The exposed grasses and weeds make acquiring food effortless. That’s important to deer because the less energy they use finding food, the less stress they have and the healthier they will be at winter’s end.

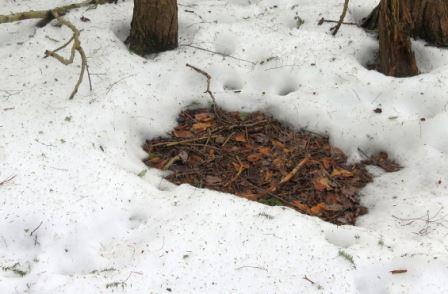
Deer beds equal more shed antlers

Find deer beds and your odds of finding shed antlers go way up. When antlers are ready to fall, the slight jerking motion of a deer getting up or down is enough to make them drop. (Photo: Steve Sorensen)

3. Seek out deer beds

Deer will concentrate their activity in winter. When one deer breaks trail, the others will follow single file. You’ll often find deer droppings in such abundance on those trails that it looks like a barnyard, and they will lead you directly to bedding areas. In severe winter weather deer will use the same beds over and over, and melt the snow right down to the ground. You may not see antlers until the snow around the beds melts, but now that you know where the beds are you’ll know where to look.

Fruit trees like apple trees are a good spot to check for shed antlers

Look under apple trees. They serve a dual purpose for deer. They function as mini-thermal cover, and they offer a food source. (Photo: Steve Sorensen)

4. Look for isolated trees, especially fruit trees

These act as mini-thermal cover. The trunks absorb heat from the sun, and it keeps the snowcover around them to a minimum. Deer gravitate towards them. On apple trees, you’ll often see a browse line where deer consume the tender tips of the branches during winter. The act of biting and jerking these tips will often be just enough to jar antlers that are ready to fall.

The chances of finding shed antlers are low while the ground is still white with snow, but that’s no reason to stay out of the woods. By mid-March most antlers have been cast, and even if snow still covers the ground you might be lucky enough to find the obvious ones — perhaps on top of the snow or maybe in spots where the snow is almost gone. But even if you don’t find them, you’ll know the land better, increase your odds the next time out and cover it more quickly. Finally, you’ll beat other hunters to the punch — your tracks in the snow will make other shed hunters think the area has been covered.


About Steve Sorensen:

hunter outdoor writer steve sorensenSteve Sorensen is the author of “Growing Up With Guns” and “The Everyday Hunter Handbook Series.” He also writes an award-winning newspaper column called “The Everyday Hunter”®, and edits content for the Havalon Post. He has published articles in Deer & Deer Hunting, Outdoor Life and many other top magazines across the USA. Invite Steve to speak at your next event, and follow him at www.EverydayHunter.com.


Had a chance to check out our
Double Folding Knives? See for yourself!
Click here:

Havalon_BlackFriday_DoubleFolders

2,064 total views, no views today

Posted in Deer Hunting, How To, Shed Hunting, Steve Sorensen, Tracking | 1 Comment

Should You Take That Shot?

Should You Take That Shot?
Four shots my dad taught me how to take
By Steve Sorensen

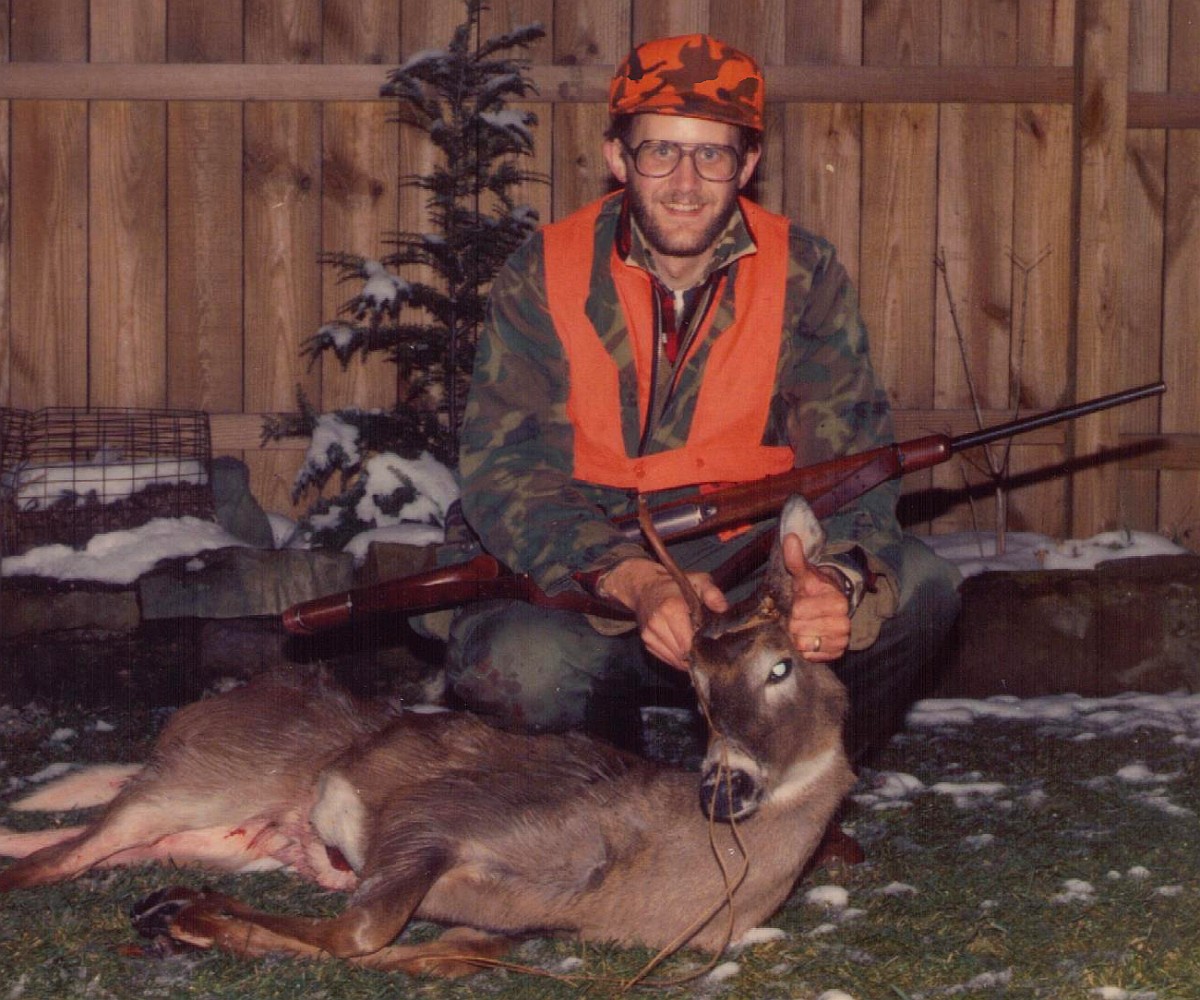
My dad never used a top quality gun, he always had a cheap scope, and I doubt he knew what a good trigger was. But he could shoot. Whether he was punching cloverleaf groups when sighting in from my uncle’s picnic table, or ventilating the boiler rooms of running deer, he could put bullets where he wanted them to go. I can’t recall him missing, but if he ever did he never blamed his gun.

Early on he got me to thinking about shooting under field conditions—how to get the bullet into the deer no matter what the deer was doing. Running flat out? Walking through brush? Sleeping in his bed? 400 yards away?

None of these were a problem for Dad, so I listened carefully when he told his stories. I might have been a slow learner, but I learned from the best. One important lesson he taught me was that you have to think about your shots before you ever take them—long before they ever present themselves. So with that in mind, let’s think about four not-so-easy shots, in hopes you will learn from my dad and make those shots when the time comes.

RunningShot - BLOG 11.17

Shooting this one-antlered spike buck on a flat-out run was exciting, but I’d much rather shoot a buck in his bed (Photo by Steve Sorensen.)

 1. The Running Shot
Some hunters think running shots are unethical because there’s a high probability of merely wounding the deer. Not everyone can hit a running buck, but if you’re a boots-on-the-ground still-hunter, you need to learn or you’ll find out tag soup isn’t nourishing and tastes pretty bland.

Years ago I missed a standing shot at a young buck and the shot propelled him instantly to top speed. Up until that time I had shot a couple of does that were running, but this time I remember thinking “No way I’ll hit this one!” I was wrong because what my dad taught me made my next moves second nature. I locked my eyes on him as I ejected the spent .30-06 round and chambered another. Then I picked out an open spot the deer would probably run through. When he entered my scope I fired. The deer shifted into overdrive. Repeat, repeat, repeat, until the buck was finally out of sight. I gathered my empties and walked to his tracks without much hope—and then I saw all the crimson snow.

I followed the blood trail for about 80 yards to a spot where he made a right turn and headed down the hill. I spotted him about 50 yards away. All four running shots had connected and he had been running on empty.

If you ask hunters how to shoot running deer, you’ll get lots of answers, but the one that works for me is what my dad taught me. Don’t swing the gun—you’ll probably won’t find him in the scope. Just pick out a spot where he’s going to be—probably a gap between the trees—and when he enters the field of view in your riflescope, make a minor up or down adjustment if necessary, and press the trigger. It works. If he’s not running at top speed, you might have a little more time, but to me it doesn’t matter how fast the deer is going if he is running in a straight line. The bullet goes a lot faster.

Before I ever took my first running shot I thought a lot about it. I visualized some of the deer I had shot, imagined them running, and played them on the video in my mind. I’d rather not shoot at running deer but if I do, I shoot with confidence.

JillWithDoe1991- BLOG 11.17

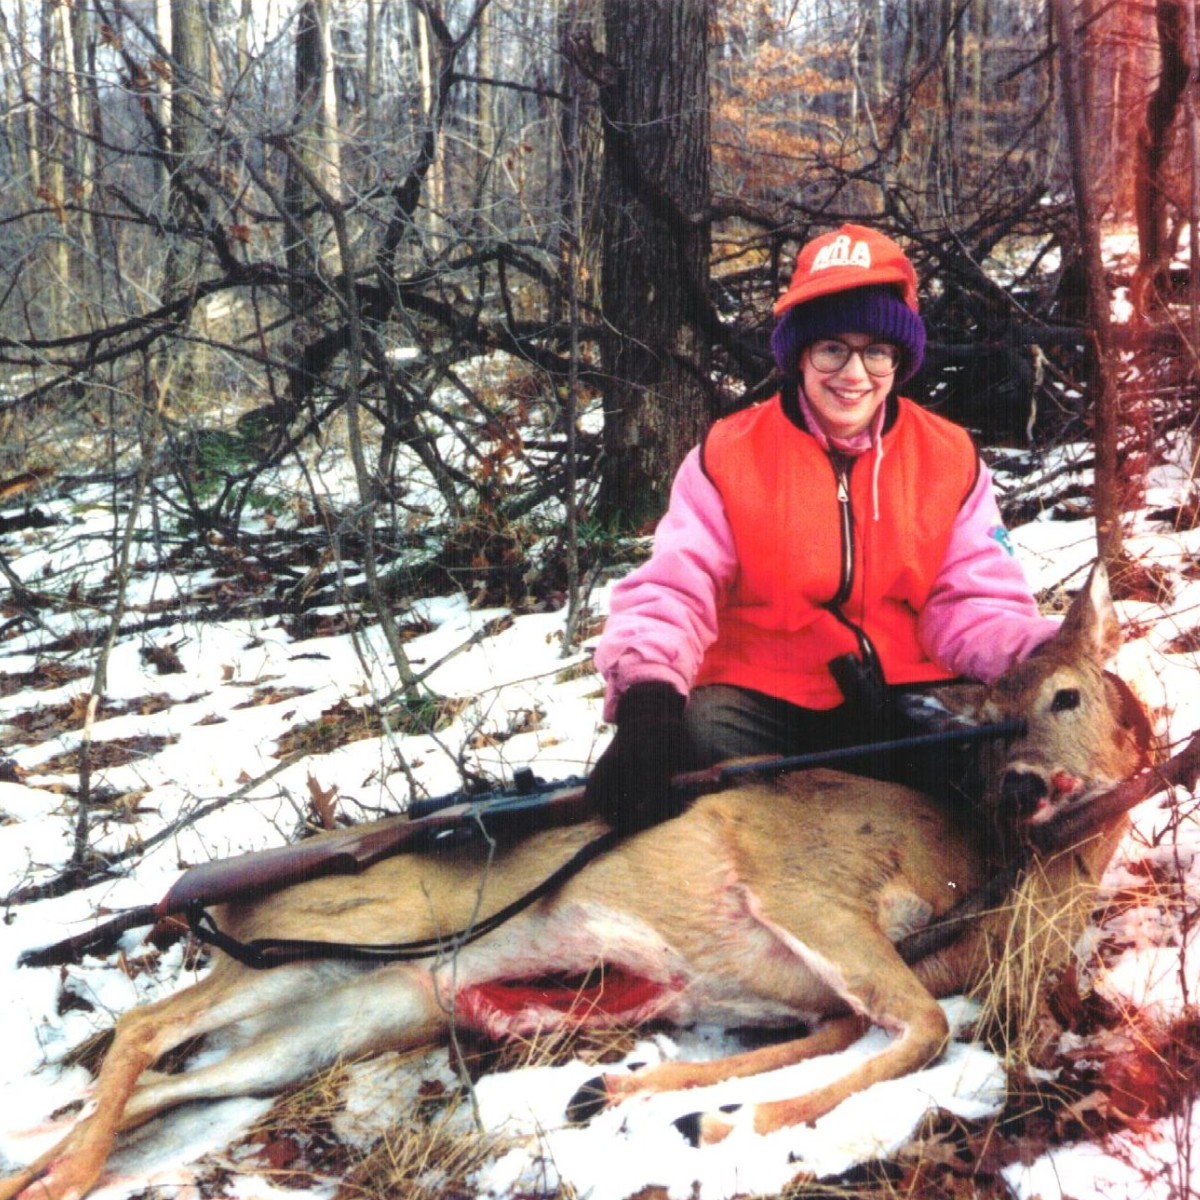
Any shot opportunity in thick brush will be available only for a second or two at most. (Photo by Steve Sorensen.)

2. The Walking-Through-Brush Shot
I had my daughter with me one day during doe season. To keep her interested and warm on that cold day, I planned a series of stands, maybe staying at each one for an hour or so. I was fairly confident I could find a deer

At the second stand I caught movement way down the hill. Three deer were angling toward us, cautiously picking their way through some thick brush. This would be a challenging shot because I was shooting a light cartridge, a .22-250, and if my 70-grain bullet hit a twig or a sapling, it would go anywhere but to the deer.

When shooting in thick brush Dad taught me to watch both the deer and where the deer is going. Thick brush usually has several intersecting trails. If the deer picks up a smell, sound or sight he doesn’t like, he will turn and disappear into even thicker stuff.

In concept, it’s simple enough. You must thread a bullet through a tiny opening in the brush when a vital spot on the deer is in that opening. But any shot opportunity will be available only for a second or two at most. In this scenario you’ll probably get only one shot among several possibilities, so pick one and press the trigger quickly. If you don’t, you’ll have to wait for another opportunity.

It was hard for my daughter to see what was happening, but after the shot we formed a strategy to find the deer. She learned a lot and she was a big help.

3. The Sleeping-in-His-Bed Shot
On another hunt I was easing along a hilltop, watching out ahead. At every step I had to choose between patchy frozen snow and crisp frozen leaves. Despite the unavoidable sounds I made, I spotted a six-point bedded roughly 100 yards away. He was a buck I had passed up several times in archery season. With rifle season waning I decided to take him. I raised the .243 and found the buck in my crosshairs. With nothing to rest the rifle against, I let the crosshairs drift down from above him and when they crossed his spine I pulled the trigger. He got up, but I knew he was hit hard. He ran down the hill and collapsed when he failed to clear a fallen tree.

The biggest challenge when shooting at a deer in his bed is to make sure you can put a shot into his vitals. That’s far more difficult than if the deer is standing broadside or quartering away. A bedded deer will be curled up. Dad taught me that his anatomy will be somewhat contorted and it might be hard to see exactly what you’re shooting at, so take your time and study the deer. Make sure his hind quarters aren’t in the way of a bullet reaching his front quarters. Don’t let a shot to his chest, if slightly high or low, take out only some ribs without ever penetrating the chest cavity. Aim into the spine if the top of his back is toward you, and center of mass if he’s facing toward you. These shots leave a little margin for error.

BulletTree - BLOG 11.17

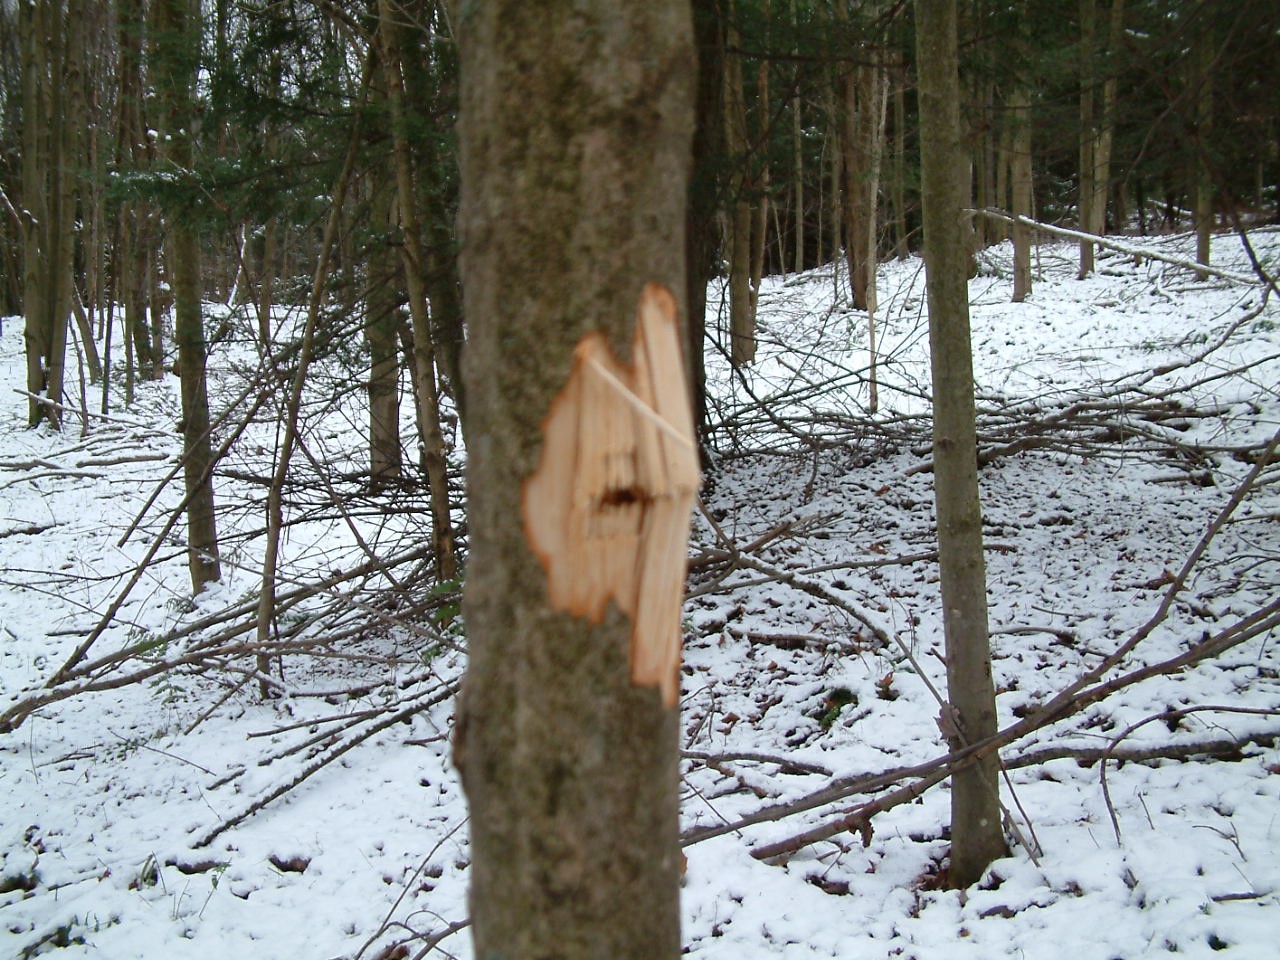
Dad used to say, “There’s a lot more room around a deer than on it.” That accounts for most missed shots, and sometimes a dead tree. (Photo by Steve Sorensen.)

4. The Long Distance Shot
What’s a long distance shot? It varies. I once shot a deer that was at least 300 yards away. My dad shot one that was well over 400 yards away, literally from one hill to another. Here’s how.

My brother Andy and I were heading up a trail with a plan to push deer off the point of a hill where they often bedded. They would likely cross over to the hill Dad was on. We weren’t very far up the trail when Dad spotted a doe stand up, just up the hill from us. She was looking down on is, but we were no threat to her. When we heard Dad shoot we turned around and went back to him, only to learn we had been much closer to the deer than he had been.

The secret for long shots is to find a steady rest. I’m surprised how many hunters take offhand shots, and then blame everything they can think of for missing. The bullet probably hit a twig. The scope must have been knocked out of alignment. They misjudged the distance. The simple fact in most cases is that the barrel of the gun is waving around like a flagpole in a hurricane. The woods offers thousands and thousands of very solid shooting rests, so use one. Rest against a tree and take a calm, stable shot. That’s what Dad did. At that distance he held a little high—right on the spine—and his .308 drilled her through her chest at roughly a quarter-mile.

Dad taught me long ago what should be obvious—that trees are usually only a few steps apart, so you almost always have a rest handy. Even when still-hunting, he taught me to move from one tree to another and spend 95% of my time watching beside a solid rest.

Before you enter the woods this season, anticipate what might happen. Let your mind’s eye create various scenarios and mentally practice them. Get familiar with your trigger, maybe by shooting a lot, or maybe by dry-firing your centerfire deer rifle in your living room. Then when a shot offers itself, you’ve already practiced, you know your rifle, you’ve acquired trigger control, and you’ve envisioned the outcome. It will make you better when you take shots at whitetails.
***

Steve Sorensen has published articles in top magazines across the USA, and won the 2015 “Pinnacle” Award for magazine writing. He also writes an award-winning newspaper column called The Everyday Hunter®, and frequently contributes to the Havalon website. Invite Steve to speak at your next sportsman’s event, and follow him at www.EverydayHunter.com.

sorensen-headshot_new2015_edited_415x500

2,076 total views, no views today

Posted in Big Game Hunting, Deer Hunting, Hunting Tips, Steve Sorensen, Uncategorized | 1 Comment

The Great Sighting-In Debate, Part 2

The Great Sighting-In Debate, Part 2:
Five Reasons Shooting Ability Is More Important Than MOA Accuracy
By Steve Sorensen

The view that you don’t need minute-of-angle (MOA) accuracy from a deer rifle does not mean accuracy is not at all important. Don’t bother hunting with a rifle that throws lead in a pattern that looks like it came from a shotgun. A deer rifle must have a reasonable amount of consistency—defined as reliability and repeatability. That question is, “What is that reasonable amount?” For generations hunters filled their larders with meat using flintlock and caplock rifles that weren’t nearly as accurate as the modern, high velocity bottleneck cartridges our rifles shoot today. How did they do that?

“If I do my part!”
Shooters say it all the time—“My rifle will shoot one-inch groups all day, if I do my part!” What, exactly, does “if I do my part” mean? It means two things. First, as hunters we value equipment that won’t let us down, so we’re assuming the rifle does its part. Second, as humans we know we don’t always measure up, so it’s a way of saying the rifle is more reliable than the shooter. In other words, a machine can perform almost flawlessly; we humans can’t. A running back might zig when he should zag and get pushed away from the goal line when he should have crossed into the end zone. Likewise, a hunter might make any number of mistakes, even if his rifle can shoot MOA groups in a paper target. That’s especially true when the hunter is carrying a rifle he hasn’t picked up since last deer season.

That fact is, you can’t achieve MOA accuracy without doing your part. But even if your rifle can’t perform at MOA accuracy, you can still hit a deer if your bullets land comfortably inside a 6″ paper dessert plate every time at 100 yards. That’s enough accuracy because most shots at deer will be well under 100 yards. It never hurts to strive for tighter groups, but you must take advantage of the rifle’s built-in accuracyf. So shoot a lot. Shoot enough to make shooting become second nature.

3-Dad&Brothers1957

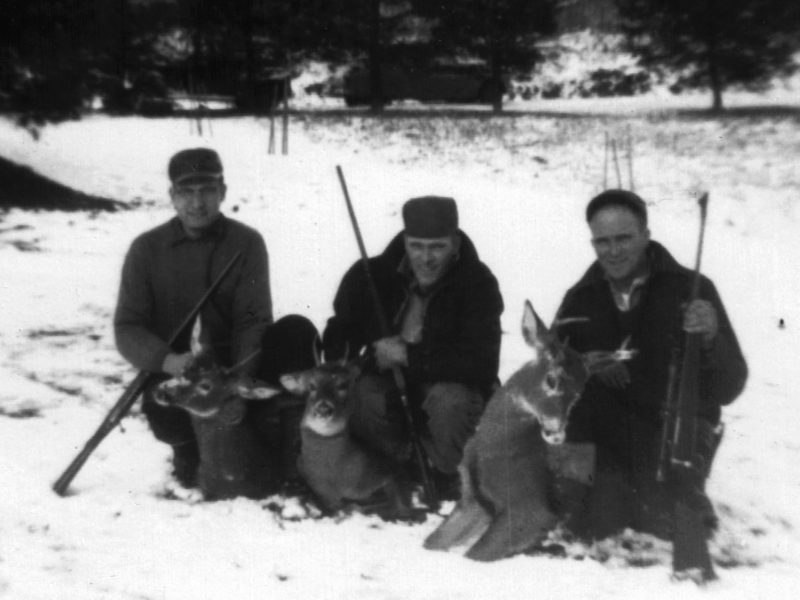
In the 1950s few rifles had telescopic sights and most couldn’t shoot one-inch groups, yet those old timers who carried them didn’t have much trouble hitting deer. (Steve Sorensen photo.)

Here are five things that must happen for you to “do my part.”
1. Sighting in—Know where the bullet hits.
You need to know your rifle, and that includes knowing where your bullets go when you pull the trigger. If you have no idea where your bullets are going, you can’t shoot with confidence. And if they are splattering all over the target, something is probably loose—the stock screws, the scope mount, maybe even the crosshairs inside the scope. Find it and fix it, because some kind of consistent group is necessary if you expect to hit the deer.

2. Target acquisition—Get the gun on the game.
Can you find the deer in your scope? If you can’t, maybe your magnification is too high. Maybe you are left-eye dominant and you’re looking through the scope with your right eye. Maybe you tend to point the gun to the right or the left as you bring it up. You won’t get many shots at deer if you take three or four seconds to find him in the scope. Practice acquiring the target by picking out different objects, maybe a rock, a stump, and a knot on a tree trunk. Make sure your rifle is unloaded, then raise and lower it to practice finding them instantly in the scope, one after the other. Practice at different distances until finding the target in your scope becomes automatic.

Breaking Down a Shot at a Buck
1. You spot antlers—immediately those glands sitting atop your kidneys dump adrenaline directly into your bloodstream.
2. You sighted your rifle in while wearing light clothing and ear protection. Now you’re wearing heavy clothing.
3. At the bench, you had all the time you needed to squeeze each shot off. Now, you have only a second or two, and your anxiety is heightened.
4. You’re not concentrating on keeping your eye in the center of the scope.
5. You forget that the wind is blowing.
6. Other unpredictables come into play. Maybe fog on your glasses or raindrops on your scope. Maybe you’re wearing a glove and you don’t feel the trigger. Maybe you have a nagging feeling that your camp buddies will tease you if you miss again. Maybe you’re looking at buck big enough to turn your legs to jelly.

3. Gun stability—Hold still.
If you’re middle-age or older, you’re probably not as strong as you once were. If you’re out of breath, you can’t hold the rifle still even if you’re young and strong. If the deer is way out yonder, but you’re only comfortable with shorter distances, you’ll have a problem. You will never hit a deer if you’re waving your rifle around like it’s a flag on a windy day. Gun stability is critical. So find a shooting rest, maybe a tree limb, or invest in a good set of shooting sticks.

4. Trigger squeeze—Easy does it, no jerking.
Many, many rifles have very heavy triggers. As you put pressure on a heavy trigger the business end of the rifle begins to move. A bad trigger—whether it’s heavy, or has some serious creep, or breaks unpredictably—has an enormous negative impact on accuracy. If pulling your trigger causes a quarter inch of movement at the end of the barrel, that’s more than enough to miss the whole deer at 100 yards. Knowing your rifle means knowing your trigger. If you think you have problems with your trigger, take it to a competent gunsmith and have him check it. Ask to feel other triggers with various pull weights to find out what you’re comfortable with. And if you need to spend a little money to get a smooth trigger with a clean break, you’ll never be sorry. Most often it’s the first thing you can do to improve a rifle’s accuracy.

4-SightingIn-A

Whether your rifle is capable of shooting minute-of-angle or not, sighting in from a steady rest will tell you how accurate your rifle is. (Steve Sorensen photo.)

5. Breath control—Inhale, exhale, but don’t move.
Breathe in. Breathe out. Breathe in. Breathe out. When will you pull the trigger? After you’ve breathed in, let just a little air out, hold it, and put pressure on the trigger. That’s what you should have been doing at the bench rest when you sighted in, but it’s easy to forget. While dry-firing, imagine a deer in your scope—repetition and visualization helps with the mental aspect of shooting.

Making these five practices into habits is more critical than miniscule groups on a paper target, because if you don’t do your part, you can’t shoot the most accurate rifle well. If you do all of these things without thinking about them, whether you shoot a MOA rifle, or one that groups five shots in a four-inch circle, you’re odds of rendering the boiler room of any whitetail suddenly and permanently out of order go way up.

So it’s not either/or—either an accurate rifle or a good shooter. It’s both/and, two sides of one coin. Although you don’t need MOA accuracy in the deer woods, you do need reliability and repeatability so you have a reasonable expectation of where your bullets go. And you need to do your part—and your part is all the habits and practices that maximize whatever accuracy level your rifle can reach.
***

sorensen-headshot_new2015_edited_415x500

Steve Sorensen has published articles in top magazines across the USA, and won the 2015 “Pinnacle” Award for magazine writing. He also writes an award-winning newspaper column called The Everyday Hunter®, and frequently contributes to the Havalon website. Invite Steve to speak at your next sportsman’s event, and follow him at www.EverydayHunter.com.

2,066 total views, no views today

Posted in Antelope Hunting, Bear Hunting, Big Game Hunting, Buffalo Hunting, Coyote Hunting, Deer Hunting, Elk Hunting, Hog Hunting, How to Hunt, Hunting Tips, Moose Hunting, Predator Hunting, Rifles, Scopes, Steve Sorensen, Wild Boar Hunting | Comments Off on The Great Sighting-In Debate, Part 2

The Great Sighting-In Debate, Part 1

The Great Sighting-In Debate, Part 1:
Five Reasons Your Deer Rifle Needs MOA Accuracy
By Steve Sorensen

My dad and uncle were both clustering their bullet holes into tiny groups on a paper target at 100 yards. Half their holes touched each other. For me, it was sheer random luck when one bullet punched a hole within an inch of another.

We were at my uncle’s picnic table sighting in our deer rifles on Thanksgiving weekend many years ago. Dad had an old Winchester Model 54 in .30-06. Uncle Ken also had a .30-06. I had a Savage Model 340 in .222 Remington. We were all shooting bullets my uncle handloaded. We were all shooting at the same distance, with the same sandbags supporting our shooting irons. I wasn’t measuring up to the shooting ability my elders demonstrated. Although I was only 12 or 13, I was embarrassed, especially since everyone told me the .222 was well known to be an accurate cartridge. But my dad said, “Don’t worry about it. All you need to kill a deer is to put your shots into a paper plate. That’s about the same size as the boiler room on a buck.”

And that was my first exposure to the debate:
Do you need minute-of-angle accuracy
in the deer woods? Or are 4-inch groups sufficient
to place a bullet in the deer’s vitals?

What Is a Minute-of-Angle?
Here’s a non-technical definition. A minute-of-angle (MOA) is a mathematical term. A circle is a 360 degree circle, and each degree has 60 minutes, so there are 21,600 minutes in a circle. One of those 21,600 sections of the arc of a circle is a minute-of-angle. If the perimeter of that circle is 100 yards from the center, the distance of one minute on that arc is 1.047 inches. (A minute-of-angle at 50 yards is half that, and at 200 yards is twice that.)

For convenience, shooters usually round a minute-of-angle at 100 yards down to one inch. Although “one-inch groups” and “MOA” are not exactly the same, this article uses them interchangeably.

Hunters still argue over this. In a way, both sides are right. I’ve learned since I sat at that picnic table that there are reasons you need MOA accuracy, and reasons you don’t.

Five Reasons You Need MOA Accuracy
1. Tiny groups give you confidence in you and your rifle.
Some hunters just like to squeeze all the accuracy possible from their deer rifles, or any rifle. When a hunter maximizes accuracy, he gains confidence in his ability as a shooter. After all, a tiny group of five bullets in the target is the result not only of the rifle, but the shooter maximizing the rifle’s capability. For a shooter to prove himself, he needs an accurate rifle.

2. Tiny groups give you a sense of accomplishment.
When you get a minute-of-angle group of five bullets (what we usually call a one-inch group), you know you have quality ammunition, and achieved the accuracy your rifle is capable of. That’s worth something when you head into the woods.

1-1MOA-Group
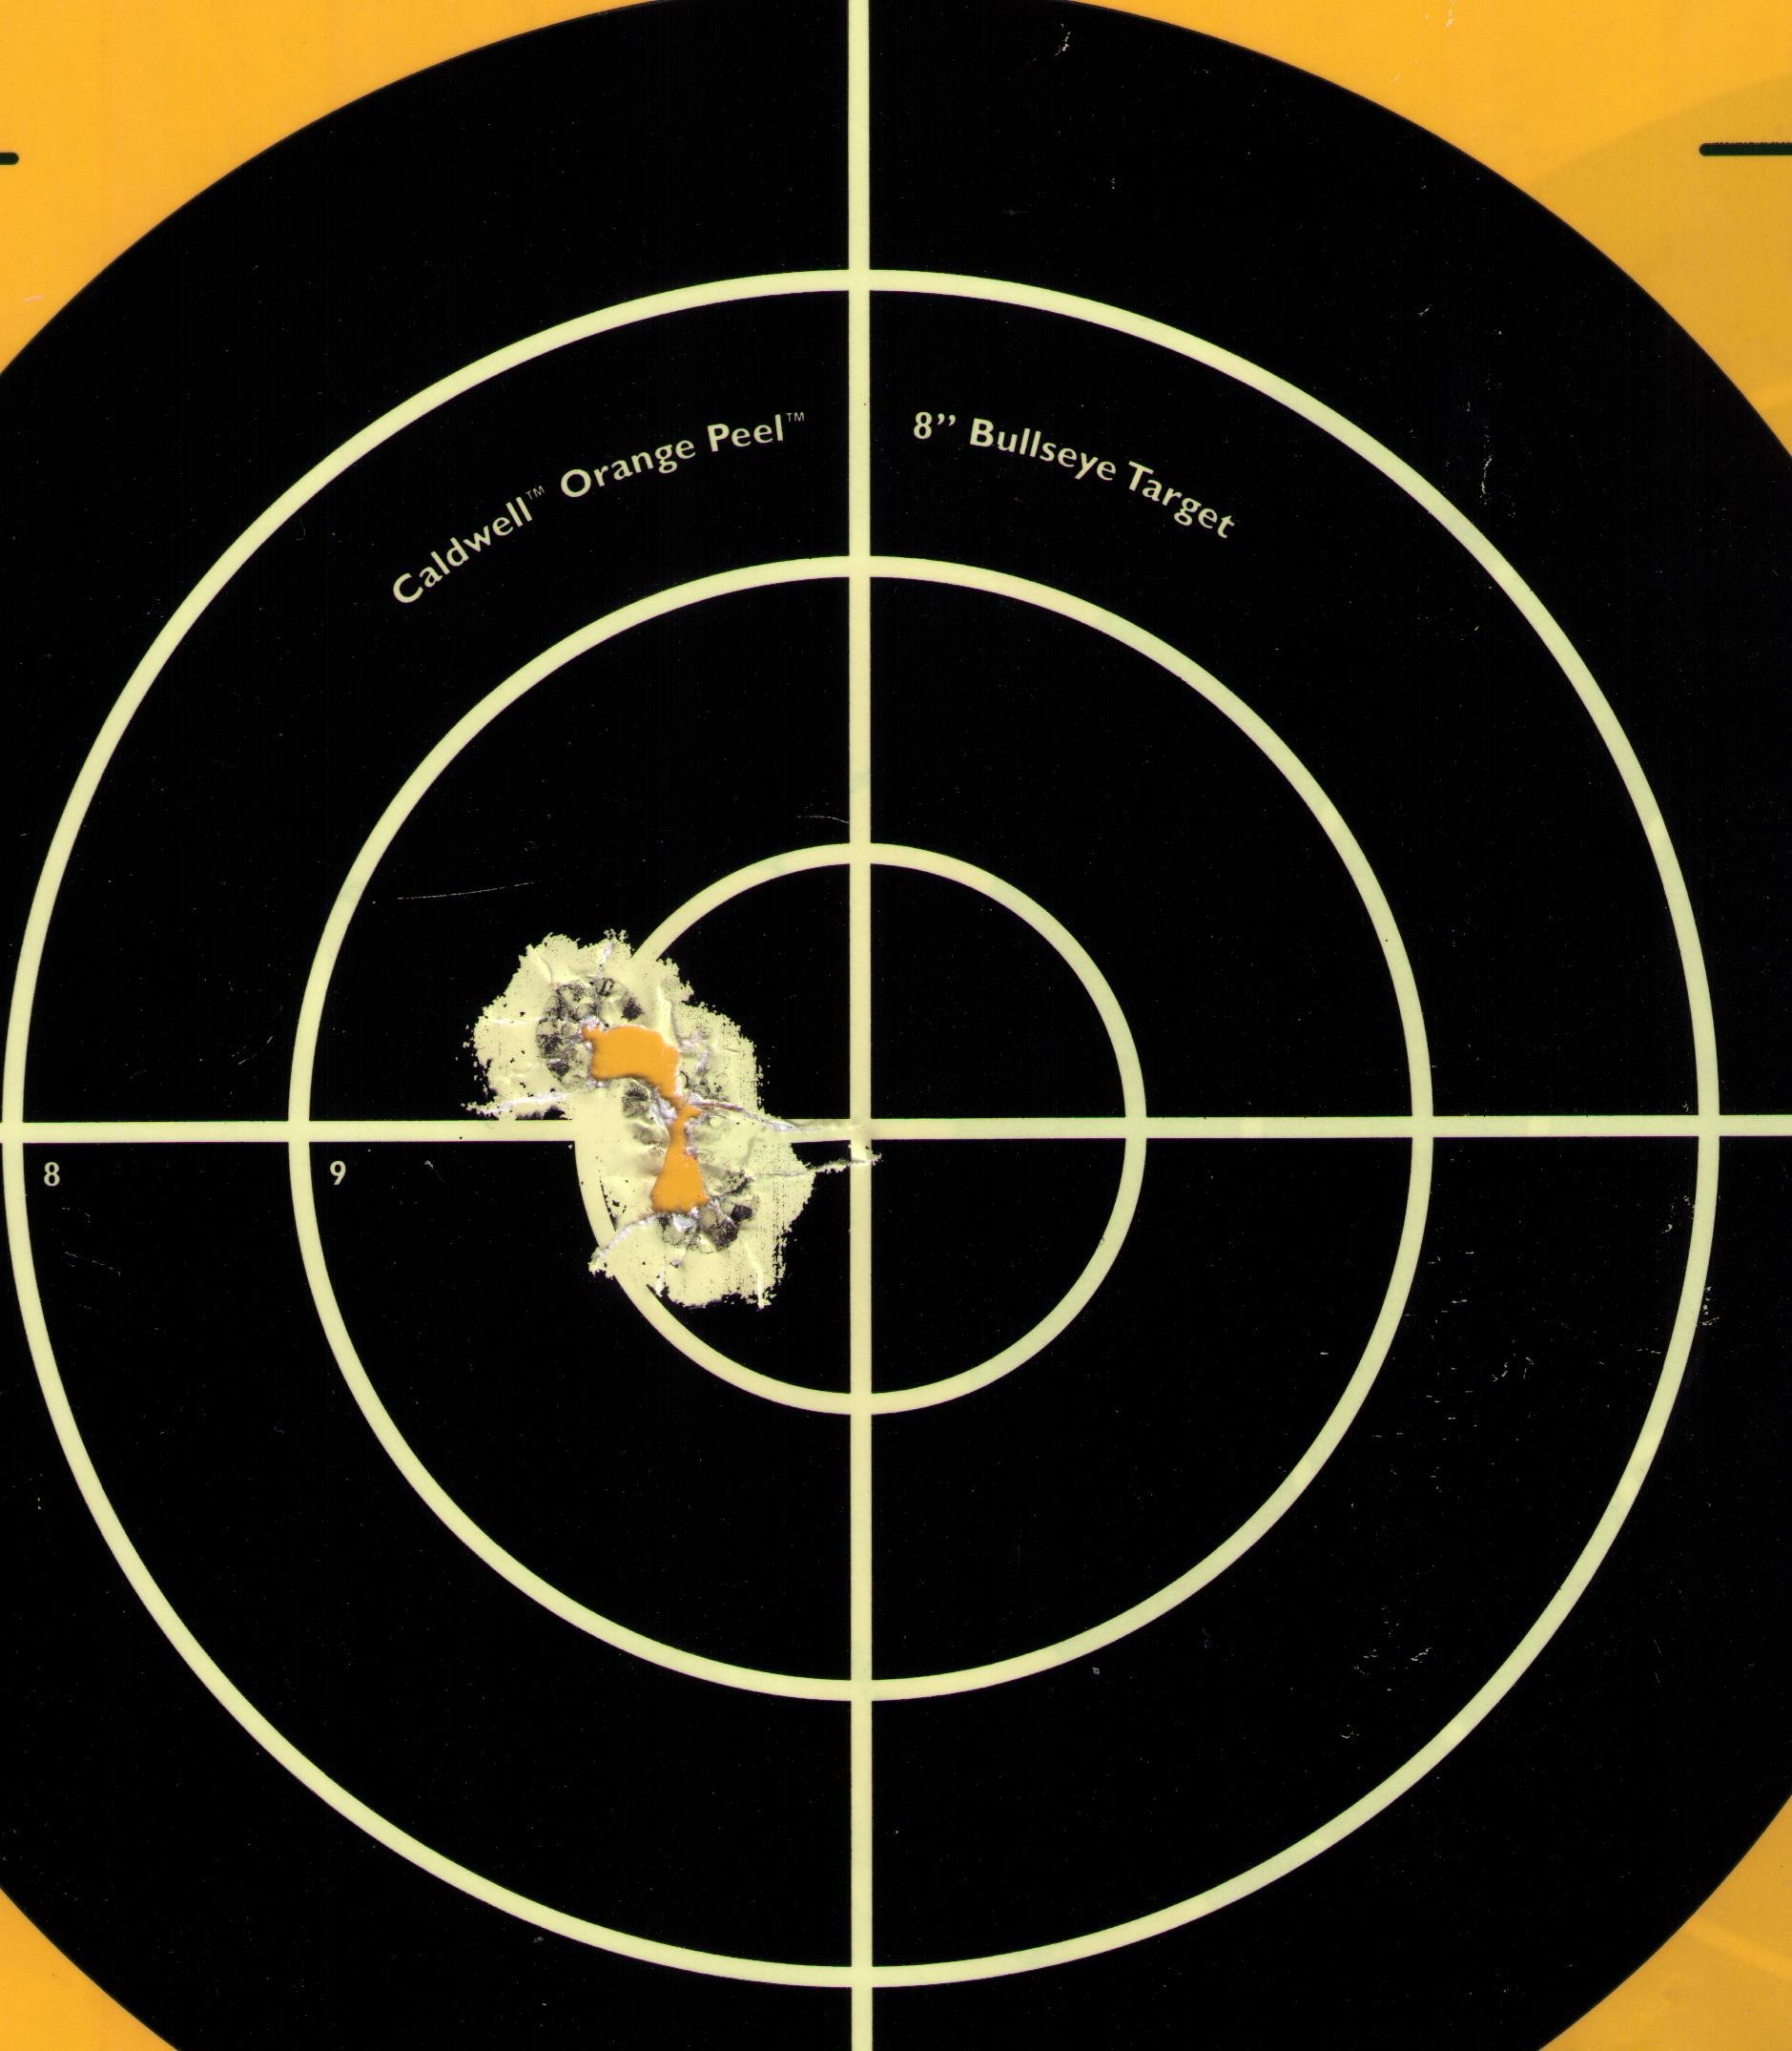
This is what most hunters strive for. If you can cluster your bullets into groups like this, it won’t be the rifle’s fault if you miss a deer. (Steve Sorensen photo.)

3. The more accurate the rifle, the fewer deer you’ll miss or wound.
Shooting one-inch groups from a stable bench rest isn’t anything like shooting from a tree limb or shooting offhand. In the field, your groups will be significantly larger. If you’re shooting MOA groups from the bench, but offhand you shoot 8-inch groups, that’s still good enough to hit a deer in the vitals at a reasonable range. But if you’re shooting 4-inch groups from the bench, and they enlarge to 12 inches in field conditions, that’s not good enough. At the margins of a 12-inch group, you’re likely to miss or wound the deer.

4. The more accurate the rifle, the greater your margin for error.
This is a corollary of the third point. Think of the paper target as having an infinite margin for error—if you miss it, so what? However, the deer has a very limited margin for error—his chest. If you miss that 12-inch target, you fail to fill your tag. Or worse, you spend the rest of your hunt trailing a wounded, suffering deer. The smaller your groups in the target, the less likely either of those things will happen.

5. If you miss a deer you know it’s you, not the rifle.
I’ll let you in in a little secret—if you can shoot one-inch groups from a bench, and you miss a deer, it’s most likely your fault. It’s not the rifle. It’s not the scope. It’s not anything else. Some hunters are so cock-sure of their shooting ability that it could never, ever be their fault—so it must be the rifle’s fault. It couldn’t be the scope. It couldn’t be the wind or the rain. It couldn’t be the shooter! But they miss a deer and blame the rifle. They can’t pawn that rifle off on some unsuspecting nimrod fast enough.

There you are—now you know why you need an accurate rifle, one that can thread a bullet between two hairs on a deer’s shoulder. Or do you? What about using a less accurate rifle, maybe a pump like the deer trackers of New England carry? Or a lever gun like a few of those oldtimers who still roam the eastern woodlands? Their guns aren’t known for pinpoint accuracy, so are they at a disadvantage? Stay tuned.

2-Sorensen-PAbuck-2015-A

A quick high-shoulder shot from the author’s minute-of-angle rifle dropped this buck in his tracks at 140 yards,. (Steve Sorensen photo.)


sorensen-headshot_new2015_edited_415x500

Steve Sorensen has published articles in top magazines across the USA, and won the 2015 “Pinnacle” Award for magazine writing. He also writes an award-winning newspaper column called The Everyday Hunter®, and frequently contributes to the Havalon website. Invite Steve to speak at your next sportsman’s event, and follow him at www.EverydayHunter.com.

hydra-red-cta

2,488 total views, 1 views today
Posted in Big Game Hunting, Deer Hunting, How To, How to Hunt, Hunting Tips, Rifles, Steve Sorensen | Comments Off on The Great Sighting-In Debate, Part 1