Backcountry Meat Care – Cool, Dry & Clean is the Key

By Tracy Breen

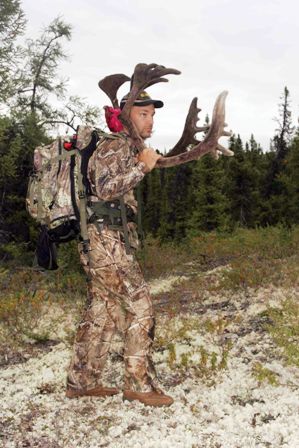
You have a dead elk on the ground – now what do you do?
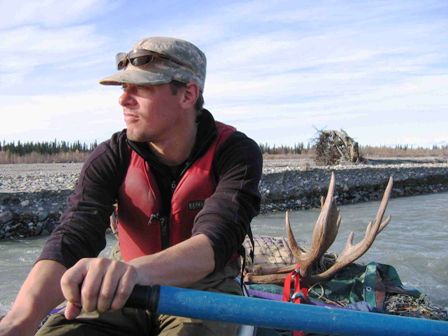
steven rinella eats only wild game 448x336

Steven Rinella eats only wild game. He knows a thing or two about how to get backcountry meat, and how to care for it.

It’s not as easy as picking up a shrink-wrapped steak at the grocery store. The secret to quality wild meat is proper field care – an art that many hunters don’t completely understand.

People who truly understand backcountry meat care know that getting meat home can be an enormous amount of work. Coolers and freezers are miles away from the kill site, adding urgency to the job of getting meat out of the field. Accomplishing that feat and having the meat still edible when cooked is a bigger challenge than shooting a whitetail on the back 40, dragging it home, and hanging it in the garage or dropping it off at the local meat processor. But have no fear—accomplish these three essential tasks and your meat will be a culinary delight.
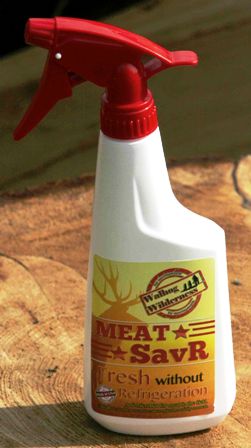
meatsavrspray to keep meat from spoiling 251x448

This spray was designed to keep meat from spoiling. Spraying meat with Meat Savr helps keep bacteria from forming as
quickly on the meat.

1.  Keep your meat cool: You’ve heard people complain that venison tastes gamey. That’s not because venison has an off taste. It’s usually the result of poor meat care. According to Eric Wahlberg from Walhog Wilderness, makers of Meat Savr spray, the most important thing that people ignore is air temperature. “If the air is above 45 degrees or so when an animal is shot, bacteria will begin to grow,” Wahlberg said. “Even if it is cold at night, if it gets warm during the day, meat will begin to spoil. Most hunters know this but they ignore it and think that their meat will be okay for a few days. That is not true. When temperatures are warm, meat starts spoiling. Even if it doesn’t spoil completely, it will surely have an off taste at the dinner table.”

2.  Keep your meat dry: Few people spend as much time in the backcountry as Steven Rinella, the host of the MeatEater television show on the Sportsman Channel. “When caring for backcountry meat, keep three words in mind: cool, clean, and dry. Maintaining these conditions in adverse circumstances can be challenging, but it’s usually possible if you’re adaptive and use your imagination,” said Rinella. “Keep the quarters in breathable game bags and hang them in a shaded area where they can get some breeze. You want to allow airflow between the quarters, so don’t stack them together. If you need to use tarps or plastic sheeting to protect them from rain or snow, put down a buffer of brush to keep the plastic from making contact from the meat. On float trips, the water is often much cooler than the air during the daytime. Think about resting the meat in the hull of a raft or canoe at night, where it’s cooled by the water beneath and shaded overhead by a tarp. Conditions will always vary, of course, but the right frame of mind will help keep you and your game meat in healthy shape.”

breathable meat bags are a must 299x448

Breathable meat bags are a must when hunting off the beaten path.

3.  Keep your meat clean: It’s your meat, so you are responsible for its cleanliness. That means you protect it with game bags, which allow an outer skin to form that seals bacteria out and keeps flies from laying their eggs on it.

Chris Denham from Wilderness Athlete knows plenty about meat care.  Denham is also part owner of Western Hunter TV. As a result, Denham spends a lot of time in the backcountry.  He believes one mistake many hunters make is not deboning their meat. “Packing out an elk quarter with the bone in can be very physically demanding and can make cooling the meat down more difficult.  I always debone the meat, and stuff it in a game bag. When I get back to camp, I will separate the large pieces of meat and put them individually into meat bags so they will cool extremely quickly.” What Denham is saying is that cool and clean go together—you can’t keep warm meat clean because bacteria thrives in warm meat.

Denham believes everyone needs to make a plan. Many hunters don’t think about meat care until they have a dead elk on the ground in front of them. “A question all backcountry hunters must ask themselves is can they handle an 80-pound pack? If the answer is no, they better know the name of a good horse packer,” Denham advised.

packing out meat worth the effort 299x448

Packing out meat is a lot of work, but well
worth the effort.

A few years ago while hunting in the backcountry, my buddy and I knew the name of a good horse packer.  After packing out one elk on our backs, we hired the packer to come pack out our second bull. With temperatures in the eighties during the day, the meat from the second bull would likely have spoiled if we didn’t have a satellite phone and the number of a local packer.

Meat care, whether you are a hundred yards behind your house or ten miles into the mountains, all boils down to being practical, patient and responsible. Keep the meat cool no matter what it takes, keep it dry and keep it clean. To do these three things, you must plan accordingly and bring the right gear with you.  By planning, having good game bags, a tarp, and good knives (nothing’s better than a Havalon for field work) you’ll end up with a freezer full of the best meat that money can’t buy.

For more great articles by Tracy Breen, click here.

***

Tracy Breen - Outdoor WriterAbout Tracy Breen

Tracy is a full-time outdoor writer and consultant in the outdoor industry. He works with a variety of television shows and outdoor brands including Havalon Knives. Learn more at www.tracybreen.com.

8,169 total views, no views today
Posted in Backcountry Meat Care, Big Game Hunting, Elk Hunting, Guest Writers, How To, Hunting Tips, Tracy Breen, Uncategorized | Tagged , , , , | Comments Off on Backcountry Meat Care – Cool, Dry & Clean is the Key

Deer Hunting: A Short Course in Finding More Shed Antlers – Part 2

By Bernie Barringer

Hunt early and often if you expect to find shed antlers.   

Part 2: Four Practical Insights on How to Look

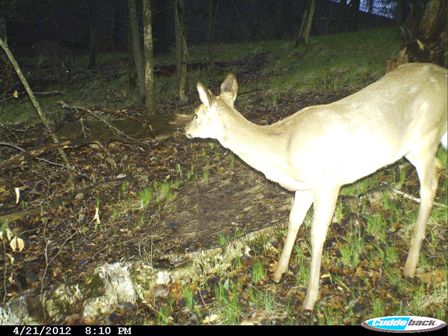
trail cameras help determine shedding 448x336

Many hunters don’t use trail cameras in the spring, but using them can help you determine when bucks begin to shed and when deer begin increasing their activity.

By reading Part 1 of Barringer’s Short Course in Finding More Shed Antlers, you’ve probably thought of some places you should search. Do you know places where deer fed heavily during the winter? Have you thought of some lands that aren’t open to hunting, but might be open to shed hunting? Did you identify likely winter cover where deer spend much of their time? If you have, it’s time to start your search. You may want to begin before the snow melts.

5.  Get There Early

Back in the 1980s there were very few people collecting sheds. Not so any more. Back then I would wait until late March when the antlers were all cast, and the snow was melted before I would go shed hunting. Then one day I was walking a deer trail in a park in central Iowa and I came over a hill face to face with another shed hunter. In his hand was the match to the shed I held in my hand. This was the beginning of the end for the way I shed hunted. Now you must get there early and often if you are going to collect sheds. It’s become a popular sport.

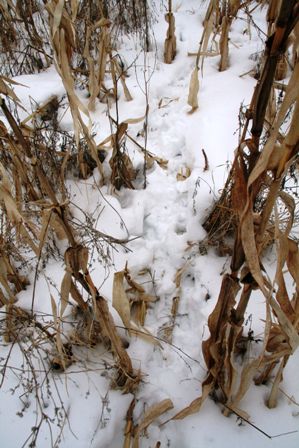
where you find food you'll find sheds 299x448

Deer need high-carb foods to generate body heat and put on fat reserves during the rigorous activity of the rut. Wherever you find food, you’re likely to find shed antlers.

Other people are not your only competition. Woodland critters get in on the hunt. Coyotes will sometimes pick them up and carry them off. Porcupines are attracted to the calcium in them and will quickly gnaw them to nothing. Dedicated antler hunters are out there while snow cover still lingers, but your intensity should pick up as animals begin to increase their movement in the spring. Wait any longer and many antlers will be gone.

6.  Connect the Dots

Of course the deer need to travel between the bedding areas and the food. Trails will develop between these areas and the obvious sign is easy to find and follow. The more snow the better. Get out early before the snow melts and find these trails for later use. A lot of sheds can be found on these connecting trails. Pay special attention to the areas where they have to jump over fences, climb steep creek banks, etc. These areas tend to jar the sheds loose.

7.  Look for the Other Side

Antlers occasionally fall off together, but that’s somewhat rare. I do believe; however, that a mature buck will put quite a bit of effort into getting the other side off because of the lopsided feeling he has with one antler. He shake’s his head, rub the antler on trees and push it on the ground to work it off. If you find a nice shed, put an exhaustive effort into finding the other side. Chances are good that it’s close by.

8.  Set up a Shed Trap

setting up a shed trap 336x341

Setting up a wire “shed trap” is one way to improve the odds that you will find the antlers when they fall.

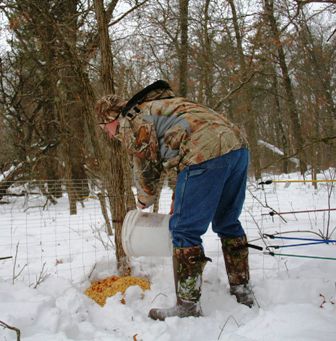
I could do an entire article on creating effective shed traps, but here’s the short version. A shed trap is something that causes the bucks to come back over and over, with an apparatus of some sort that increases the possibilities that the shed will drop at the site. This could be as easy as pouring a bucket of corn in a thick deadfall where the buck has to push his head in to eat. Or you can create elaborate systems of wire or bungee cords fixed above a feeder.

I use a simple system of woven wire in the shape of a V with some feed inside the point of the V. I do not like to use snow fence, bungees or anything that could entangle the antler. It can be dangerous to the deer. The wire simply bumps into the antler as the deer feeds and when it’s ready to come off it will fall off. Watch a short video of my shed trap here.

One caution about shed antler traps. In some states it’s illegal to do anything that will assist deer in shedding antlers. Check your regulations before using a shed trap.

Hunting shed antlers can provide information that will help you with your deer hunting, mostly in the form of an inventory of the bucks that survived the previous hunting season. But more than that, it’s good exercise, good family fun and a great way to enjoy one of the most remarkable things in nature; the amazing antler.

Did you miss Part 1 of Barringer’s
Short Course in Finding More Shed Antlers? Read it here!

 ***

author bernie barringerAbout Bernie Barringer

Bernie Barringer hunts a variety of species in several states and Canadian provinces. He has published more than 400 articles in two dozen outdoor magazines and authored 11 books on hunting, fishing and trapping. The latest is Bear Baiter’s Manual. Bernie blogs his hunts on his website www.bowhuntingroad.com.

5,292 total views, no views today
Posted in Bernie Barringer, Big Game Hunting, Deer Hunting, Guest Writers, How To, How to Hunt, Uncategorized | Tagged , , , , , | 2 Comments

Deer Hunting: A Short Course in Finding More Shed Antlers – Part 1

By Bernie Barringer

Own more bone with this advice for finding
treasures in the deer woods.

Part 1: Four Foolproof Tips on Where to Look

old photo of author with sheds 336x388

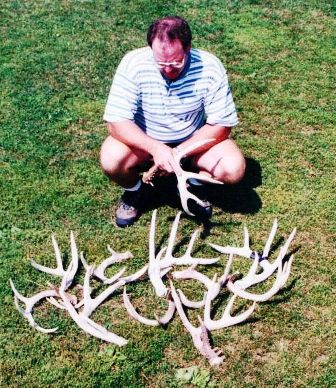
This 20-year old photo of the author shows a big haul from a springtime shed hunt. These days, there is a lot of competition for shed hunting and you must get in the woods early and often to have a chance at collecting matched sets.

I found my first whitetail shed antler purely by accident. I was setting fox traps along a brushy fencerow and there it was, a shed antler which had been lying there for the better part of a year. I picked it up and brought it home. Despite the fact that it was somewhat chewed up, it was clear this antler came from a big 10-point buck. I became fascinated by the amazing phenomenon of antlers. Antlers are the fastest form of animal growth known to man; they can grow more than an inch a day. Every antler is different. Like snowflakes, they all have unique characteristics.

My fascination with antlers led me to become fascinated with the bucks that grew them. Over time I evolved from a bowhunter who wanted to just put some meat in the freezer to someone who appreciated the challenge of shooting a mature buck. Yet I found that the antlers themselves held a curious intrigue in and of themselves. Allow me to offer some tips from a lifetime of experience that will help you find and appreciate the amazing antler.

We’ll take this in two parts – today, my thoughts about where to look for shed antlers. Next time, I’ll offer some ideas on how to look for them.

1.  Forget the Home Range Myth

Because I started hunting shed antlers for the sake of the antlers themselves, I didn’t have any preconceived notions about their importance to my deer hunting. If you have read any articles about shed antler hunting, you have noticed that they all seem to relate back to how to shoot the buck that shed them. Frankly, I believe that the connection between where you find the bucks sheds and where you are likely to shoot that buck the following deer season is way overrated. In fact one of the largest matched sets I ever found was found more than five miles from where a friend shot the buck the following year. It missed making the Boone & Crockett book by less than an inch.

finding the deers food source in winter 299x448

Finding the deer’s food source during the winter is without a doubt the single most important component in the shed hunting puzzle. Deer will rely on food plots with corn, turnips and soybeans, and they’ll bed close to them in winter so they don’t use much energy getting there.

Deer need to eat every day, and they will go where the food is. In the winter when the antlers are dropping, the food may be miles away from where that buck spends the majority of his time in the fall. Which leads us to #2.

2.  Find the Food

Wintering whitetails need high carbohydrate foods and they need them every day. Find the food and you will find the sheds. Make this your mantra: Finding sheds is all about the food.

Figure out where the deer are feeding and then spend the majority of your time divided between their feeding and bedding areas. The antlers are more likely to fall off when they are feeding because they are moving about. Corn, soybeans, milo, turnips and other food plots are key to the winter whereabouts of whitetails.

Pay special attention to windswept hilltops. Snow blows off the hilltops, making any lost grain from farming operations more accessible to deer. The big set of matched sheds I mentioned earlier? I found one side on top of a hill in the soybean stubble and the other side in a thick farm grove 200 yards away.

3.  “No Hunting” Doesn’t Necessarily Mean “No Shed Hunting”

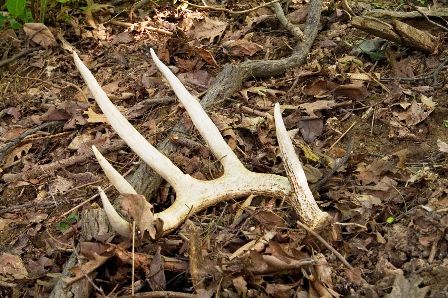
nice shed lying on the ground 448x298

The sight of a nice shed lying on the ground is enough to make the whitetail lover’s heart beat faster.

When I started collecting bone 30 years ago, some of the best shed hunting I found was in state parks where hunting was not allowed. Where these parks bordered crop fields on private land were often gold mines for shed antlers. The deer would feed in the fields and bed in the safety of the park. Surprisingly, most of these parks would have laws against picking any kind of plant, but nothing about collecting shed antlers. The deer would be bunched up there in great numbers during the winters which made them very fertile ground for shed hunting.

Sometimes private landowners who prohibit hunting may allow you to hunt for shed antlers. Other hunters might not bother to ask. If you ask, and he says, “Yes,” you might be on the way to getting hunting permission, too.

4.  Know the Types of Winter Cover

Bucks tend to bed in two kinds of areas during the winter—solar cover and thermal cover. Solar cover is southern slopes that are somewhat open and allow the deer to bed in areas where the sun can warm them during the day. Thermal cover is the thickest, nastiest stuff they can find which they will use during cold, cloudy, windy and stormy weather. If you find these types of bedding areas within a short distance of a good food source, and you have a good number of bucks in the area, finding sheds could be like picking up Easter eggs. You’ve hit the jackpot.

That’s it for the “where.”
Next time, we’ll talk about the “how.”

***

About Bernie Barringerbernie-barringer

Bernie Barringer hunts a variety of species in several states and Canadian provinces. He has published more than 400 articles in two dozen outdoor magazines and authored 11 books on hunting, fishing and trapping. The latest is Bear Baiter’s Manual. Bernie blogs his hunts on his website www.bowhuntingroad.com.

4,487 total views, no views today

Posted in Bernie Barringer, Big Game Hunting, Deer Hunting, Guest Writers, How To, How to Hunt, Uncategorized | Tagged , , , , , | 2 Comments

6 Crucial Tips for Spring’s Earliest Crappies

By Darl Black

What’s a fisherman’s first sign of spring?
The first crappie caught from open water.

Our crappie expert tells you where and how to get that fish.

big rewards are possible 299x448

Big rewards are possible if you follow the six tips to ice-out crappies.

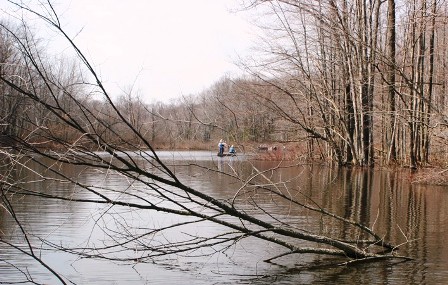
Most people notice the first robin and noisy spring peepers as the harbingers of seasonal change. Fishermen judge the end of winter by that first crappie caught from open water. That’s why the iced-over lakes won’t melt soon enough for northern anglers who prefer soft water to hard water. But with winter’s mid-point in the rear view mirror, every day down is one day closer to spring thaw.

The initial melt in the backwaters of lakes and rivers sends anxious anglers in search of crappies. From the bank, by wading, or in a boat, many fishermen will catch speckled papermouths. Others will not, perhaps mystified why they didn’t. To be successful, each fisherman must have an understanding of several key points for ice-out crappies.

Tip #1: Know the Reason for
Their Seasonal Movement
Some anglers mistakenly believe this early bite is a spawning run. Not so. A more appropriate analogy would be a visit to the buffet table. Early spring crappies are in and out of specific shallow-water locations in a fairly short time, with departure dictated by either receding water level or increasing temperatures which stimulate the food chain on the main lake.

shallow secluded bays are most productive 448x285

Shallow, secluded bays with rich black bottom material are some of the most productive ice-out crappie spots.

Tip #2: Location is
Oh-So Critical
Shallow, dark bottom sites removed from the main body of a lake are the areas of which lose ice-cover first. Typically filled with submerged decaying vegetation, these areas absorb heat from the sun thereby increasing the water temperature above that of the main body of water. This encourages plankton growth, which in turn attracts small minnows as well as crappies. Specific lake sites include marshy seeps, the backs of secluded bays, marina basins and boat canals—sites with water roughly 2 to 4 feet deep (although the channel may be somewhat deeper). On major creeks or larger rivers, the early target areas for crappies are shallow slack-water sloughs, connected oxbow ponds, and flooded tributary stream mouths. Some type of cover is always a prerequisite: flooded shoreline brush, last season’s submerged vegetation, beaver lodges, logs, stumps and dock posts. Often the ice-out bite takes place in areas that fish abandon later in the spring as high water recedes.

anglers probe backwaters for crappie 448x299

As soon as ice cover begins disappearing, anglers should probe the backwaters for crappies.

Tip #3: Timing is Everything
With a couple days of warming sun, black-bottom backwater sites heat up quickly, attracting prey and predators. Crappies are eating but not aggressively chasing. Most hover almost motionless, gingerly sucking in small tidbits including zooplankton, aquatic invertebrates and small minnows. As noted, some of these shallow areas do not maintain enough depth to support fish once high water starts to drop; in these instances the fish may be present for a very short time—measured in days. In other situations, where water level is stable, the “ice-out” bite may extend for several weeks before crappies pull out. Time of day is also a factor; during the winter-into-spring period, crappies will feed stronger in the late afternoon. And there is the impact of the proverbial cold—crappies get a major case of lockjaw when a spring cold front causes water temperature to drop. Factor everything into your timing and plan your fishing accordingly.

crappies often bite best at dusk 299x448

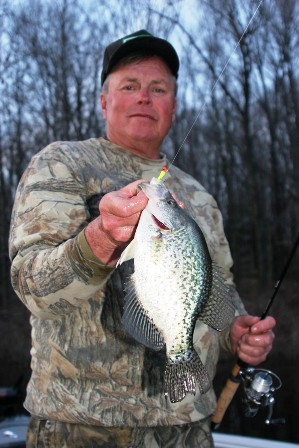
In the early spring, crappies often bite best just as dusk approaches.

Tip #4: Use Fresh Line on Balanced Outfits
It’s the first outing of the open water season, and many fishermen have neglected to change line. Left on the spool over the winter, line takes a serious set which will greatly impede smooth, accurate casts. For smaller diameter spools on panfish-size spinning reels, I prefer monofilament. Four-pound test on a light-action 6′ spinning rod is perfect for casting. A suggested back-up outfit would be 9′ long dipping rod with six-pound test. Because you do not want to disrupt the cover, never go with line so heavy that it cannot be broken easily if solidly snagged.

Tip #5: Your Bait Should Be Tiny
Most fishermen automatically think a fathead minnow is the best live bait for crappies. However, minnows are not the first choice of experienced anglers at ice-out. Instead, a tiny ice dot jig tipped with a live maggot, or a micro-weight leadhead with a small scented soft plastic imitation bug larva are preferred. These baits attempt to imitate zooplankton, aquatic nymphs, scuds and freshwater shrimp. Yes, small live minnow will work but a live maggot or waxworm—more often than not—will out-produce a minnow right after ice out.

a selection of micro jigs and bobbers 448x336

A selection of micro jigs and bobbers used successfully to imitate the small organisms which ice-out crappies prey upon. Small baits rule in early spring, and bobbers are a critical part of ice-out presentation.

Tip #6: Bobbers are Mandatory
Ice-out crappies won’t chase prey around the backwater once they have found cover to their liking. They remain almost motionless, surveying their surroundings while sucking in anything that appears edible when it slowly swims by. Crappies may mosey up to perceived prey that is hovering nearby, and scrutinize it carefully before ignoring it or sucking it in. Without question, the best way to present tiny jigs either stationary or at dead-slow forward speed in shallow water is with a small bobber. Continue to adjust the depth setting of the float every few casts until you hit the magic depth where crappies are holding. The depth of the fish can change from day to day, and even hour to hour as evening approaches.

If you include these six tips in your ice-out strategy, you’ll head home with a catch that says, “Spring has sprung!”

***

author darl blackAbout Darl Black

A lifelong freshwater angler and veteran writer and photographer, Darl tackles a wide variety of fishing related stories for print publications and websites. Of all fishing, angling for smallmouth bass is his favorite pastime. He may be reached for assignment at darlblack@windstream.net.

5,618 total views, no views today
Posted in Crappie Fishing, Darl Black, Fishing Tips, Fresh & Saltwater Fishing, Guest Writers, How To, Uncategorized | Tagged , , , , | 1 Comment

Deer Hunting: 6 Tricks to Put Rutting Bucks in Your Sights

By Bernie Barringer

Spice Up the Scrapes for More Daytime Action

Like all serious whitetail hunters, I get excited when I see an area that’s all torn up with scrapes and rubs. It’s proof that a buck has been there recently.

barringer with buck after visiting scrape with my urine 406x336

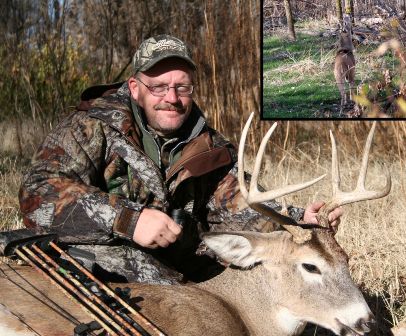
I took a photo of this buck checking a scrape that I had freshened with my own urine right before I shot him.

Several studies have shown that the vast majority of scrape visits by mature bucks are during nighttime, but I have some tricks that turn the odds of daytime sightings in my favor. Try my top six tactics for spicing up the scrapes – each one will increase the odds of getting bucks to the scrapes when you’re in your treestand during legal shooting hours.

1.  Fresh Urine
The first thing I tried was quite offbeat but it really worked. I deposited some of my own fresh urine in a scrape. Don’t laugh. (And erase that picture from your mind!) I’m dead serious.

Most store-bought deer urine has an ammonia smell to it and it doesn’t have the fresh smell that deer expect to find in a scrape. My urine is always fresh and deer are very curious about it. After several years, I no longer feel weird standing over a scrape emptying my bladder. I have killed bucks over scrapes with my urine in them, in one case, less than an hour after I put it there. If you have the guts to try this you will be convinced. I guarantee it.

buck visiting scrape at night 448x336

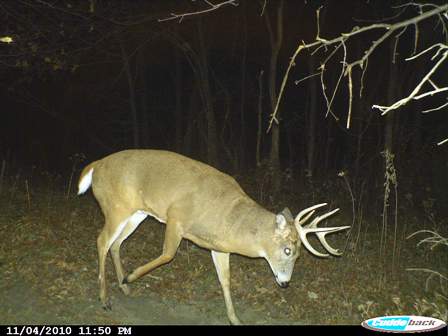
Bucks tend to visit scrapes in the night, especially during October and early November. Using these tactics to enhance the scrapes will increase the odds they will visit the scrapes during legal shooting hours.

2.  Foreign Dirt
Bucks and does alike know all the other deer in their home areas. They communicate throughout the year, mostly with scent. If a different deer moves into the area, they notice right away and focus some energy on learning who this new deer is. I’ve discovered how to capitalize on this behavior.

I carry a few clean zipper-seal bags with me at all times. When I come across a hot scrape in an area where I’m not hunting, I often scoop a bag-full of the musty-smelling scrape dirt and take it with me. When I get back to the area where I have a stand, I dump the bag in a scrape nearby. It’s a calling card deer need to check out.

3.  Add a Branch
Bucks build almost all large scrapes right under an overhanging branch. They lick this branch and mark it with their forehead and pre-orbital glands.

spicing up a scrape and monitoring with camera 359x336

Spicing up a scrape and monitoring it with a game camera is a great way to take an inventory of the bucks in your area.

I like to add a branch to these scrapes by twisting some light wire onto the limb to make an extension. Zip ties work, too. On this added branch I put some doe-in-heat lure. I use a small spray bottle to spray a mist on the branch. Some companies make deer scent in a gel form, such as Special Golden Estrus. The gel helps the scent last longer when globbed on the overhanging branch.

4.  Bury the Scent
One of the problems with using scent right in the dirt is that the smell dissipates quickly. Dump a little lure from a bottle on the ground and it soaks into the dirt, then it gets stirred around by the first buck that comes along. It’s soon so diluted that it isn’t giving off much scent. I overcome this problem by using a small plastic container—a film canister or something about that size.

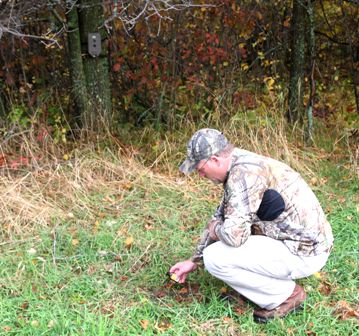
Put two cotton balls in the container and fill it half full of deer lure. Now dig a small hole just large enough for the canister and about a half inch below the surface of the dirt. Put the canister in the ground without the lid, and smooth the dirt back over the top. The buck that comes by gets a more concentrated whiff. You won’t use as much scent, so you’ll even save money!

buck checking scrape with scrape dripper  420x336

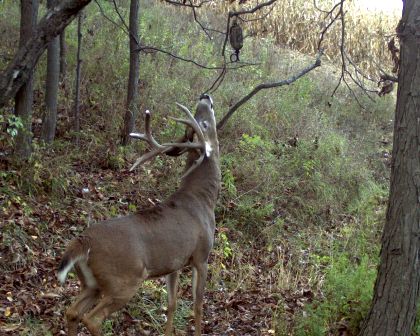
This buck is checking out scrapes during shooting hours. This is what we all want to see! Note the scrape dripper hanging over the scrape.

5.  Use a Scrape Dripper
Wildlife Research Center makes a bottle that you can hang over your scrape called a Scrape Dripper. It has a rubber tube on the bottom that allows the lure from the bottle to drip slowly onto the scrape, continually adding fresh lure. It’s designed to drip more when the temperature rises, so it adds more scent to the scrape during the daytime hours. The idea is to condition the bucks to visit during the daytime and draw them to the scrape when you’re on stand.

6.  Add Mock Scrapes and Rubs
One of the best ways to enhance the area and attract attention of deer is to add some scrapes and rubs to make it look like the area is a hub of deer activity. You can do this without introducing any foreign scent or deer lures, which can be an advantage if you are dealing with a particularly skittish buck.

buck checking enhanced scrape 448x336

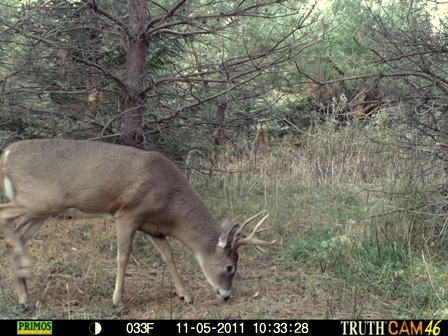
These scrapes have been enhanced and now the bucks are checking them before darkness sets in.

I take out my pocket knife and slice a few small trees down to the white inner bark, making it look like a fresh rub. I often use a knife to freshen existing rubs too. These visible indicators of a buck’s presence really get their attention. It might cause them to come over for a look even when the scrapes alone wouldn’t have been enough.

Choose a site under an overhanging branch, and pull away all ground cover, exposing fresh dirt in an area about the size of a garbage can lid. I like to do it with a stout stick and throw the dirt back from the scrape like it was aggressively worked over. In grassy areas you may need to use the tines of a garden rake to work up the sod.

Conclusion
Don’t be discouraged if all the bucks are hitting the scrapes in your area at night. These six tips can help you activate the scrape clusters and bring out more aggression in bucks. Try some of these tactics this year and I’ll bet you agree that the bucks take notice. At the very least you’ll get more game camera photos of bucks—and at the best you’ll end up in a photo gripping a nice set of antlers!

***

About Bernie Barringer

bernie-barringerBernie Barringer hunts a variety of species in several states and Canadian provinces. He has published more than 400 articles in two dozen outdoor magazines and authored ten books on hunting, fishing and trapping. The latest is Bear Baiter’s Manual. He is the managing editor of Bear Hunting Magazine, and blogs his hunts on his website www.bowhuntingroad.com

6,830 total views, no views today
Posted in Bernie Barringer, Big Game Hunting, Deer Hunting, Guest Writers, How To, How to Hunt, Hunting Tips, Uncategorized | Tagged , , , , , | 1 Comment