4 Ways to Know When to Hold ‘Em and When to Fold ‘Em

By Bernie Barringer

Should I Stay? Or should I go?
How to make deer hunting’s most difficult
decision!

Deciding on a location for deer hunting can be challenging

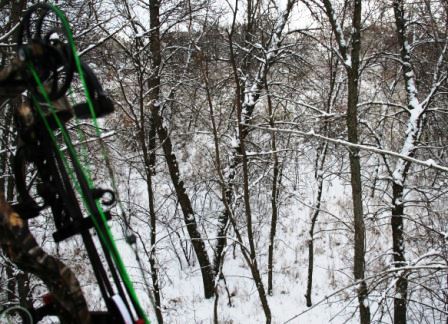
The decision of whether or not to stick it out in a tough situation or bail and move on is often a very difficult decision to make. There are many factors to consider. (Photo: Bernie Barringer)

I’d waited three years to draw this Iowa tag. Daytime buck movement was just starting to heat up, and I was collecting trail camera pictures of nice 140 to 160 class bucks. On October 31 my world was thrown into a tailspin. My wife called to tell me her mother had died. The funeral would be on Saturday.

“If you want me to come home, just say the word.” I meant it, just as much as she meant it when she said she wanted me to stay and hunt. I guess that’s part of why this marriage has lasted 35 years.

This was an extreme case, but you don’t have to find out a family member has passed away to be faced with the most difficult choice in DIY deer hunting away from home: should I stick it out a few more days, or should I bail on this plan and move to potentially greener pastures?

In my 20-plus DIY bowhunting road trips, I have faced that decision on almost every trip and – though I hate to admit it – I often zigged when I should have zagged. Usually the decision isn’t whether to pack up and go home with my tail tucked between my legs. I’m usually choosing whether or not to resort to Plan B – moving to another hunting location I’ve already researched.

Knowing when to hold ’em and when to fold ’em is a decision that’s different on every hunt, and can change at any time. The factors that influence a move to Plan B usually come from four basic influences:

1. The influence of weather.

I left Kansas early one time because the November forecast called for several days with highs in the 80s and southerly winds. Try as I might, I couldn’t find good stand locations for that wind direction. I wasn’t seeing much buck movement during the day, and with hot weather suppressing deer activity, I felt my chances weren’t going to improve and moved on to a better option.

I arrived in North Dakota two days later. The trail cameras I’d planted there earlier showed chasing activity at all times of the day. I had made the right choice.

Long stretches of rainy weather can influence your decision as well, and in some cases, extreme cold or wind can cause deer to hole up for several days.

Harsh weather can affect your deer hunt

Weather changes can significantly help or hinder your chances of success. (Photo: Bernie Barringer)

Since smart decisions often depend on weather, gather as much information as possible to make the best decision. Today’s technology allows you to get an accurate long-term forecast at the touch of a finger. Radar shows what’s coming and when. Some good examples of excellent hunting weather apps for your smartphone are Raindar (for Android), Accuweather and Scoutlook® Weather (my favorite).

2. The influence of hunting pressure.

Hunting pressure is one of the unknowns that are hard to research ahead of time. In some places you’ll get more trail camera photos of other hunters than of shooter bucks. You can call biologists and game wardens to get a feel for the hunting pressure you’re likely to encounter, but their advice is largely speculation and the reality might be quite different than expected.

In one case I almost backed out of a plan because I was told the hunting pressure on an 800-acre piece of public land in Kansas was intense during the first week in November. I decided to battle it out because the property was big and I figured I could snake my way into some deep piece of cover and find a buck. I hunted there a week and saw only three other bowhunters. I guess not everyone has the same idea of hunting pressure.

One time I arrived in Missouri and found the parking lot of a public hunting area packed with seven trucks. License plates showed these trucks were from five different states.

While you can’t predict these situations, there’s no excuse for finding yourself in a crowd due to other hunting seasons. Once again in Missouri, I arrived at my hunting spot before daylight on a Saturday morning, surprised to see a lot of activity. A youth hunting season had opened up that day. I knew the season was opening, but was unprepared for the high pressure a rifle season brings in. A little foresight would have helped me plan a stand site that would use the pressure to my advantage.
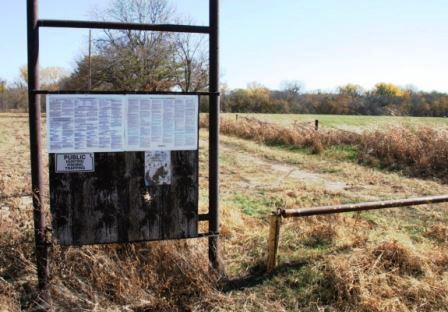
Get as much info as you can when planning your deer hunt location

Hunting public land can hold all sorts of surprises. The advice given here can make a big difference in your success. Gathering large volumes of information in any way you can really does help make the decision more clear. (Photo: Bernie Barringer)

3. The influence of trail cameras.

You can never have too much information, so game cameras are a huge part of deciding if you should stick it out through tough times or bail.  They offer a lot of information not only about deer movement, but hunting pressure and even the presence of predators. I’ve seen where a pack of coyotes constantly worked a bedding area, and the deer just won’t put up with the harassment. Without trail cameras, I would never have known what was going on.

Deer patterns can change quickly when a crop field is harvested or, on an early season hunt, the acorns drop. Trail cameras are great for figuring out when deer behavior changes.

4. The influence of random factors.

I once had big plans to hunt an out-of-state property and had all my spots marked out on Google Earth. I called a local biologist a few days before leaving to ask him what kind of crops were in the food plots on this public hunting area. He told me they were going to do a controlled burn on several hundred acres of switchgrass the same day I planned to arrive. Because of this, I had to put a Plan B into place rather quickly. Sure glad I made that call.

Sometimes a hunting area just goes dead for no apparent reason. It will happen when coon hunters work an area. The noise, scent and chaos of hounds running through during the night can move the bucks out for a few days. If you aren’t observant, you’d never know an army of hunters and hounds invaded soon after you got out of your stand in the evening. I’ve learned to look for clues in the parking areas to determine if a lot of activity goes on when I’m not around.

Knowing when to hold ’em and when to fold ’em is always a tough call. Most often it’s a combination of subtle clues from a variety of different sources that will help you make the right decision.


About Bernie Barringer:

bernie-barringerBernie Barringer hunts and fishes for a variety of species in several states and Canadian provinces. He has published more than 400 articles in two dozen outdoor magazines and authored 11 books on hunting, fishing and trapping. The latest is The Freelance Bowhunter: DIY strategies for the travelling hunter. He is a recognized authority on DIY hunting, and blogs his hunts on his website www.bowhuntingroad.com.


Make sure you have the perfect deer hunting
knife for whatever comes your way.
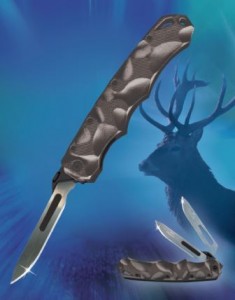
The Havalon Piranta Black Stag –
the easiest decision you’ll ever make!
Click here:

Black stag hunting knife and skinning knife

2,539 total views, no views today

Posted in Bernie Barringer, Big Game Hunting, Deer Hunting, Guest Writers, Hunting Tips | Tagged , , , , , , | Comments Off on 4 Ways to Know When to Hold ‘Em and When to Fold ‘Em

Bullets, Ballistics and Gun Cartridges, Oh My! Those Amazing 6.5mms

By Ron Spomer

What’s the best whitetail deer cartridge?
Listen to our shooting expert –
and win that perennial deer camp debate!

Would you believe the all-around best cartridge for deer hunting is also the best for most other North American big game? Actually, it’s several cartridges, and odds are you’ve never seen or shot any of them. But you ought to.

If you want to see an ordinary gun cartridge (the 308 Winchester) enter the phone booth and emerge as Super Centerfire, make sure you study the .260 Remington.

hunting cartridges-deer cartridges-bullet ballistics

Here are the mild-recoiling, flat-shooting, hard hitting, short and efficient 6.5mms. L-R: 6.5 Creedmoor, 260 Remmington, 5.5×55 Swede, 6.5-284 Norma. With the right bullets, each is capable of handling any North American deer, including moose. (Photo: Ron Spomer)

What’s a 6.5?

This mild, unassuming short-action cartridge was created by necking the 308 Winchester down to .264 caliber. It functions through light, short-action rifles, stands just 2.8-inches tall, burns a paltry 46 grains of powder, throws a 140-grain bullet at 2,700 fps, kicks up only 14 foot-pounds of free recoil energy in a 7-pound rifle and runs neck and neck with the famously flat-shooting .270 Winchester – which is arguably the best deer cartridge in history.

To appreciate the .260 Remington, consider that the .270 Winchester stands 3.34″ tall, must run through a standard-length rifle action, burns 59 grains of powder to push a 150-grain bullet 2,900 fps and jolts you with 20 foot-pounds of free recoil in a 7-pound rifle. Here’s what the ballistic performance of both bullets looks like:

Drop/Energy/Wind Drift comparison, both zeroed at 240 yards, 10 mph right angle wind

deer cartridge comparison-hunting rifle ballistics chart


These numbers tell the practical deer hunter two salient facts: ballistic performance between the two is virtually undetectable, especially in field conditions, and the .260 Remington won’t kick as hard. That means you’ll probably shoot it more accurately, and everyone knows shot placement puts meat in the freezer and antlers on the wall.

hunting cartridges-deer cartridges-bullet ballistics

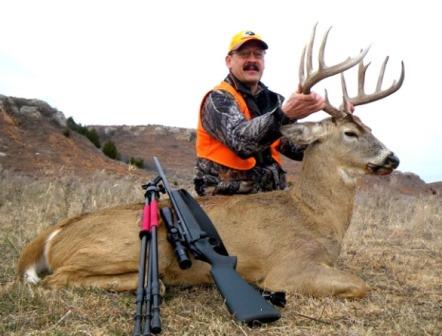
Here’s a Kansas buck that fell in its tracks when hit with a 130-grain Nosler Accubond fired from a 6.5-284 Norma cartridge in a Blaser R39 rifle. It was ranged at 267 yards. (Photo: Ron Spomer)

The 6.5 Family

This little-known .260 Remington isn’t the Lone Ranger out there. It’s a near ballistic triplet to the 6.5×55 Swedish Mauser and 6.5 Creedmoor. If you can handle just 2 foot-pounds more free recoil, the 6.5-284 Norma makes any of the four short-action 6.5mms nigh perfect for most big game hunting. The 6.5-284 can add 150 fps muzzle velocity to the same long, extremely efficient 140-grain .264 bullets the others shoot.

The 6.5 Advantage: High BC

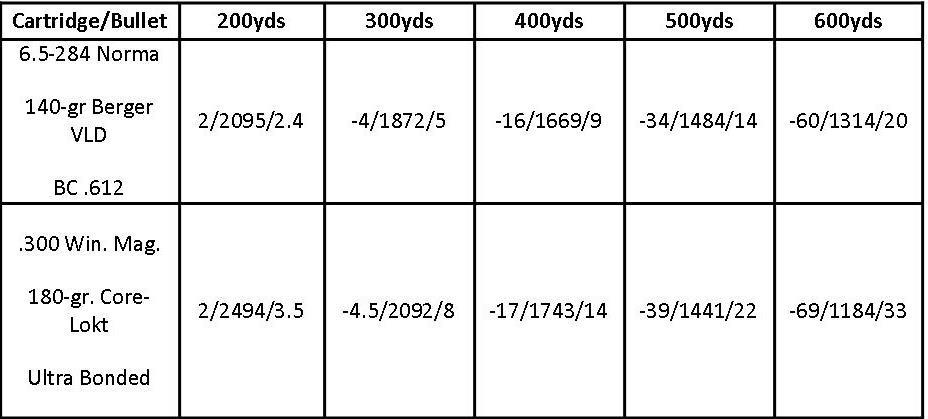
Those long, sleek bullets are the real magic behind these mid-size 6.5mm cartridges. Target shooters discovered this some time ago, but hunters are just now beginning to appreciate it. We used to think we needed bigger, heavier bullets and magnum doses of powder to increase ballistic performance. Turns out we can get much of the same results from high BC .264-caliber bullets without the magnum recoil. Here’s an example:

Drop/Energy/Wind Drift comparison, both zeroed at 240 yards, 10 mph right angle wind

deer cartridge comparison-hunting rifle ballistics chart


What’s going on? Ballistic Coefficient. The longer, sleeker and more pointed a bullet, the less energy it wastes pushing air out of its way. It conserves energy. You can get the same trajectory performance out of the .300 Winchester Magnum, but you’d have to fire a 200-grain boat tail spire point to do it. And that’s a lot more recoil, more powder, a louder blast, occasional reduced barrel life and most times a longer barrel and a bulkier rifle.Look carefully at those numbers. Even though the “little” 140-grain bullet carries 400 foot pounds less energy at 200 yards, it’s already deflecting less in the wind. By 500 yards it’s packing MORE punch than the 180-grain .300 magnum bullet, falling 5 inches less and drifting 8 inches less. It’s outperforming a .300 magnum.

Goldilocks Cartridges

The sweet thing about the mid-power 6.5mms is their overall balance. You might call them the Goldilocks cartridges. Not too slow, fast, weak, strong, loud, painful – but just right. They deliver all the performance you need for deadly results on whitetails, mule deer, black tails, pronghorns, sheep, hogs, black bears out as far as anyone ought to be shooting. And I wouldn’t hesitate to use them on caribou, elk and moose. After all, with the right bullet they’re outperforming .300 magnums.

hunting cartridges-deer cartridges-bullet ballistics

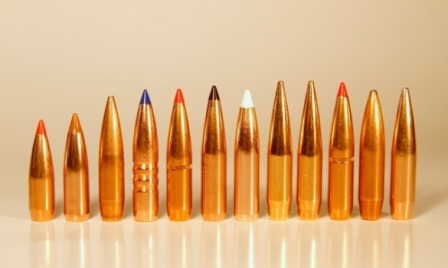
The 6.5s shoot a nice variety of bullet sizes from 95 grain through 160 grain. the optimum seems to be the extremely sleek, low-drag, high BC 140 grains. (Photo: Ron Spomer)

Those are the facts. And now, you have all the ammunition you need to convince anyone with an open mind that the 6.5mm cartridges are Super Centerfires in a mild-mannered package.


Ron SpomerAbout Ron Spomer:

Ron is rifles/optics columnist for Sporting Classics and North American Hunter magazines and host of Winchester World of Whitetail on NBC Sports. Learn more at (www.ronspomeroutdoors.com).


Download your FREE copy of…

Download your FREE copy of our "Ultimate Guide to Deer Hunting Success, 2nd Edition" eBook

12,503 total views, no views today
Posted in Big Game Hunting, Bullets, Guest Writers, Guns & Ammunition, Hunting & Fishing Equipment, Ron Spomer | Tagged , , , , , , | 1 Comment

To See or Not to See: 3 Reasons to Carry Hunting Binoculars You Probably Haven’t Thought Of

By Steve Sorensen

If you’ve had your fill of technical bino talk,
tune in!

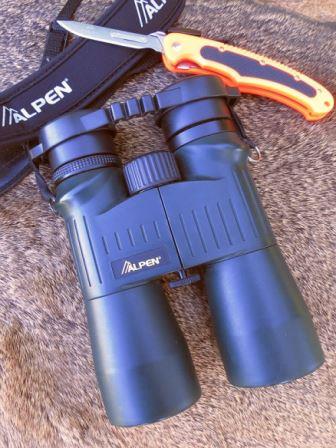
Hunting binoculars and a Havalon knife

A good pair of binoculars and a Havalon knife – two essentials to carry on every whitetail hunt. (Photo: Steve Sorensen)

Nearly every article you read about binoculars gives you the lowdown on the technical stuff – power, field of view, objective diameter, exit pupil, prisms, coatings, brightness. It’s all aimed at the hunter who is considering a purchase. But the truth is this: I don’t know a hunter who doesn’t already have a pair of good hunting binoculars. Ask a hundred hunters if they own binos – I’ll bet a hundred say “Yes.”

I’ll also bet not one out of 10 of those same hunters remember to take their binoculars hunting with them. No, it doesn’t count having a pair in your truck. You gotta carry them, and use them. So if you’re the guy who doesn’t carry his binos in the woods, let’s set aside all the technical stuff right now and focus on using the binoculars you already have.

I know – when you do carry them, you just don’t use them. Let’s fix that right now. Here are three reasons you don’t carry binoculars – and how to change that.

1. Binoculars slow you down.

“Don’t slow me down!” People say it like slowing down is a bad thing. When it comes to hunting, slow is a good thing. Slow is how you don’t miss things. Slow is how the game animal you’re pursuing isn’t aware of your presence. Slow is most definitely better when out hunting.

The truth is most of us move too fast when we’re in the woods. That old Simon & Garfunkel tune, “Slow down, you move too fast,” should be a theme song for hunters. If “feelin’ groovy” means tuning in to your environment and getting into “the zone,” you can only do that if you’re moving slowly.

It ain’t easy to slow down because real life tumbles by at a faster pace than ever, and we get ramped up to its speed. When you step into the woods, all that needs to change. Binoculars can help you do that.

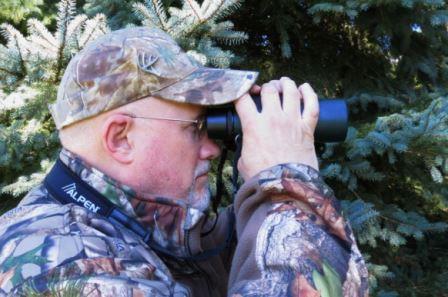
“But binoculars are cumbersome,” you say. Well, I say that’s a good thing if it slows you down. Don’t take a pair of compact binos and stuff them into a pocket or pack where you’ll eventually forget where they are. Hang ’em around your neck – you HAVE to walk slowly if you don’t want them beating against your chest all day. Put your binos where you’ll think about them, even if they are big and uncomfortable. Let them bounce against your chest. Yes, there are disadvantages to that, but you can remedy that later. (See sidebar.) For now, let ’em bounce. Be very conscious of them – that’s the goal here. Become aware of your binoculars – you won’t use them if you’re not aware of them.

A good pair of hunting binoculars can improve your hunt

One difference between so-so binos and quality binos will show up when you actually use them. Your eyes won’t get nearly as tired using quality glass. (Photo: Steve Sorensen)

2. Binoculars make you a better observer when you’re not using them.

“Huh?” You say, “Don’t you observe when you are using them?” Yep – seems counter-intuitive, but suppose you’re on a stand. You see a deery-looking thing you can’t identify. This UGO (Unidentified Grounded Object) doesn’t move, but maybe that’s because it saw you first and it’s staring at you.

Very slowly lift your binoculars and get a good eyeful of details so you can dismiss this UGO, if that’s all it is, or shift into kill mode if it’s the real deal. So, resolve all the details about what’s on the other side of the valley and what’s in the shadows over yonder. Then you can go back to picking apart the landscape looking for that buck. Knowing what that distracting, questionable thing is allows you to focus on seeing what might actually be there. And when something shows up you haven’t noticed before, you notice it as new with your naked eyes. Now check it out with your binos.

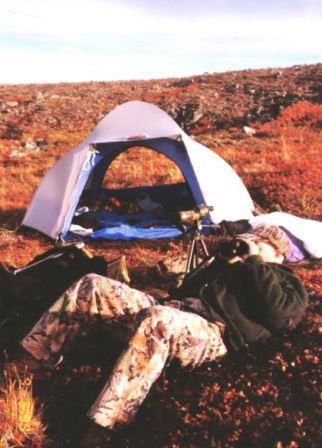
If you’re spot-and-stalk hunting, you’re glassing constantly. If you’re on a stand, you aren’t. But you should, once every 15 to 20 minutes, examine everything through your binoculars. You’ll see more detail and become more intimately acquainted with the view from your stand. When a new detail really does show up, and it has eyes, you’re more likely to notice it before it notices you.

3. Binoculars keep temptation at bay.

Glassing for moose with hunting binoculars

If binoculars are useful in finding a big ol’ trophy bull moose, surely they’re useful to the whitetail hunter. (Photo: Steve Sorensen)

I made a couple of bets at the beginning of this article, and I’ve got one more for you. I’m betting no one reading this would ever do this, but chances are you’ve heard of it or seen it done before. Maybe it has even happened to you. You’re in some crowded deer woods and you notice another guy a pretty good distance away looking through his scope. Is he looking at you? You ease over behind a tree and peek around to see him. Here’s where a fluorescent hat comes in handy. You wave your hat. He puts the gun down.

Yes, occasionally you have that guy who is a little too confident and a little too stupid at the same time. Please, don’t be that guy.

If you need the clincher, here it is: carry a pair of binoculars and you’ll get more game. It’s a no-brainer. It’s like having a camera. A pro photographer once told me, “The secret to taking good pictures is this: force yourself to take lots of pictures – odds are some of them will be pretty good.”  Something similar is true about using binoculars. The secret to depending on binos is forcing yourself to use them a lot. You’ll soon find out they do a lot more than bring the world up close.

None of this is meant to imply that the technical details are unimportant. If you’re thinking about buying a pair of good hunting binoculars and want to know all the technical stuff in order to make an intelligent purchase, you should definitely read it all. Check out Havalon’s articles on buying and using binoculars. Now, start glassing!

Binoculars-binos-hunting


hunter outdoor writer steve sorensenAbout Steve Sorensen:

Outdoor writer and speaker Steve Sorensen is the author of Growing Up With Guns, writes an award-winning newspaper column called The Everyday Hunter®, and edits content on the Havalon Post. He also writes The Everyday Hunter® Handbook series, including a new book called Essentials of Scent Control. Invite Steve to speak at your next sportsman’s event, and follow him at www.EverydayHunter.com.


Download your FREE copy of…

file-1746218384

4,179 total views, 1 views today

Posted in Binoculars, Guest Writers, Hunting & Fishing Equipment, Steve Sorensen | Tagged , , , , , | 4 Comments

5 Easy Steps for “Caribouing” Your Deer

By Judd Cooney

Here’s why bringing your deer out whole might actually be a good idea!

Skinning a deer before gutting

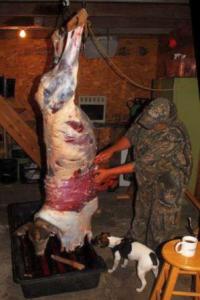
Skinning the deer before gutting it keeps scavengers and predators away from your hunting area. Dog is optional. (Photo: Judd Cooney)

My hunter was unhappy about having to drag his trophy buck a couple hundred yards to the truck. When we got there, he stated in no uncertain terms that it would have been a heck of a lot easier to drag if we had gutted it on the spot.

I explained in my typical gentle way that our policy was to gut a deer on our leases only when it was in a difficult location and NEVER to eviscerate a deer  recovered near one of our foodplots or a feeding area. We have a lot of coyotes in our section of Iowa, and the last thing we want to do is attract them to our prime hunting areas. To further control these canine deer killers, my partner Sheri and I have coyote traps and snares set around our key hunting spots. A gut pile would give them a free lunch without consequences and could reduce the effectiveness of our trapping efforts.

So, we like to “caribou” our deer.

What is Caribouing?

Getting ready to gut the deer

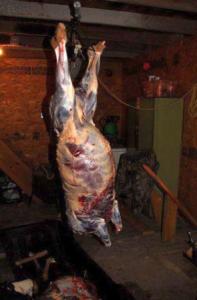
Head, hide and legs are gone, but the guts are still in the deer. (Photo: Judd Cooney)

“Caribouing” is a term that comes from the Far North. It describes how the denizens of that inhospitable habitat process caribou with minimum fuss and mess. Once a hunter watches Sheri (she’s a world class taxidermist and experienced butcher) wield her Havalon Piranta to apply the same process to his deer, the argument about our “bring ’em out whole” policy ends immediately.

To make our job easier we’ve installed a hydraulic winch in the skinning area so one person can back a truck into the room and hang even a big buck by himself. We saw off the hind legs below the hocks, cut a hole between the bone and Achilles tendon and insert a gambrel, meat hooks or other type of hanger. If you have a lot of overhead space, removing the hind legs first is not necessary, but the low ceiling in our processing area necessitates it.

Step One: Skinning

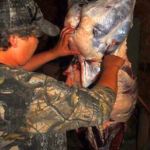
Hang and begin skinning the deer. When Sheri gets past the hindquarters she jams her elbows and forearms against the hide and applies her full weight to pulling the hide loose. Very effective. Split the hide along the back of the front legs to the center of the brisket and then saw off the legs at the elbow joint to facilitate peeling the hide from the front legs. Pull the hide down to the base of the ears and cut off the head with the skin attached.

Step Two: The Front Half

Cut off the front shoulders and bone out the neck meat for grinding. Cut a slit in the legs and hang the front quarters on some meat hooks, a gambrel or run a cord through and hang wherever available.

Removing the backstraps for quartering a deer

First cut to remove the backstraps is right in front of the hindquarters. (Photo: Judd Cooney)

Step Three: Backstraps and Hindquarters

Cut the muscles crosswise in front of the hindquarters to start stripping out backstraps. Peel them using your fingers and knife to separate from the backbone and ribs until they come free. Hang on a gambrel or lay on a clean surface.

Step Four: Gutting

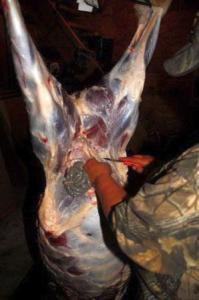
Carefully cut around the anus from the outside, as deeply into the pelvic canal as possible, so you can pull it from the inside through the pelvis; that way it keeps its contaminants with the innards. Next, cut through the lower belly muscle below the hindquarters and drop the intestines. Paunch far enough to finish cutting loose the bladder, intestines and anus. Drop the guts the rest of the way out, cutting loose as needed.

Step Five: Tenderloins

Gutting the quartered deer

Begin gutting the deer. (Photo: Judd Cooney)

This gut dropping operation exposes the tenderloins. They’re against the back, inside the abdominal cavity on either side of the spine. Carefully use your razor sharp Havalon hunting knife to peel these choice morsels away from the spine and lay or hang with backstraps. With the tenderloins removed, either cut or saw through the back bone just below the hanging hindquarters to fully separate guts with the carcass.

We use a plastic sled situated under the hanging carcass to drop the head, hide, carcass and guts on it. This keeps the mess off the floor and facilitates loading into the pickup bed for disposal, or pulling behind a 4-wheeler or snowmobile into the field behind the camp house for coyote bait.

Step Six: Separate Hindquarters

Use a meat saw or regular cross cut saw to cut down through the pelvis and separate the two hindquarters. Now you have four quarters ready for the butcher, or to cut up yourself.

This is a simple, methodical process, and it’s fast, neat and easy! Your meat now cools faster, has less hair on it and each piece is light enough to handle easily.


judd-cooney-head-shot-457x542About Judd Cooney:

For the past 30 years Judd has been writing and photographing full time in addition to running his guiding and outfitting operation, spending 18-20 hours a day trying to avoid working an 8-5 job. He says, “I wouldn’t change it for the world!” He has articles or photos in many of the outdoor magazines every month, covering bowhunting, muzzleloader hunting, big game, small game and predator hunting, plus turkey, waterfowl and upland game hunting. He can be reached through his website, www.JuddCooney.com.


Looking for the perfect knife to skin that trophy buck? Try the all-new Havalon Piranta Black Stag – the sharpest knife you’ll ever use! Click here:

Black stag hunting knife and skinning knife

5,305 total views, no views today
Posted in Big Game Hunting, Deer Hunting, Deer Processing, Field Dressing Tips, Guest Writers, How To, Judd Cooney | Tagged , , , , , | Comments Off on 5 Easy Steps for “Caribouing” Your Deer

Recipe: Venison Steak Diane

By Brooke Hart

When you get a good lookin’ deer,
you want all the meat you secured to be as
tasty and flavorful as possible!

When it comes to cooking venison backstrap, as with all wild game recipes, flavor is everything. The backstrap portion of the deer runs along the spine of the animal, and it’s one of the most tender cuts of meat because deer rarely use the muscles in that area. Generally, the meat here is very tender and lean, and if prepared the right way, it can be a surefire way to cure a hungry appetite. There are many different ways to cook venison and achieve the taste you want from this area. Below is one of my favorite venison backstrap recipes, the always tasty Venison Steak Diane. A delicious twist on a classic dish!

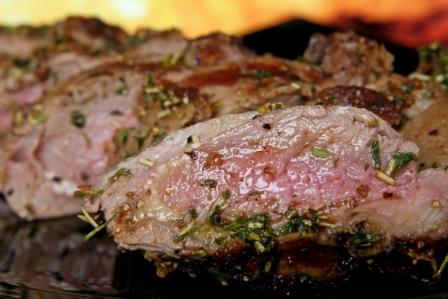
Venison deer meat cooked for venison steak diane

Once you have the venison prepared, you can cook it specifically to your liking, with every side cooked without overcooking it in the middle.

Venison Steak Diane:

To create Venison Steak Diane, you first need a tender cut of meat, so get all your backstrap ready and start slicing. You’ll want to cut the meat into medallion shapes and size them up before preparing it.

What you need:

1/2 a pound of venison backstrap

2 tablespoons of unsalted butter

1 minced shallot

Salt

1/4 cup of brandy

3 minced garlic cloves

1/2 cup of venison stock

1 tablespoon of tomato paste

1 tablespoon of mustard

2 tablespoons of Worcestershire sauce

Around 1/4 cup of heavy cream

Minced herbs for garnish (include items like chives, parsley, basil and so on)

What you do:

Once you have the venison prepared, refrigerate it overnight or for a few days. When you take it out of the fridge, salt it and then let it sit for about 20 minutes, until it reaches room temperature. Then you’ll want to heat the butter in a saute pan at medium heat for about two minutes. Pat the venison dry on all sides and cook every side of it. Take your time to ensure that the butter won’t scorch in the pan. It will take about 10 minutes to get a brown crust on the venison’s outer portion without overcooking it in the middle. Once the meat is done, loosely wrap your venison in some tin foil and set it aside for now.

Next, put the shallots in the saute pan and cook them for 60 seconds. Then add the garlic and cook for another 30 seconds, making sure you don’t burn the garlic as you go. After that simmers for half a minute, deglaze the pan with brandy and scrape off anything that’s stuck to the sides. Let the brandy cook down to a glaze and then add the tomato paste, mustard, venison stock and Worcestershire sauce. Stir the combination and let it boil down until you can drag a wooden spoon across the pan and leave a trail that doesn’t automatically fill itself back in. On high heat, this should only take 2-3 minutes.

Now turn off the heat and let the boiling process come to a halt. Stir the cream into the sauce until it’s as light as you might enjoy. You won’t want to boil or cook the sauce any longer. While the sauce sits for a brief moment, slice the venison into the medallion shapes and sizes you desire. If the center is not quite cooked, the meat can sit in the sauce and re-heat itself. You can garnish your creation with herbs like chives, basil or parsley.

Using a good sauce recipe with your venison backstrap is always a great idea. Once you cook your meat, simply add as much or as little sauce as you want in order to flavor the venison to perfection.

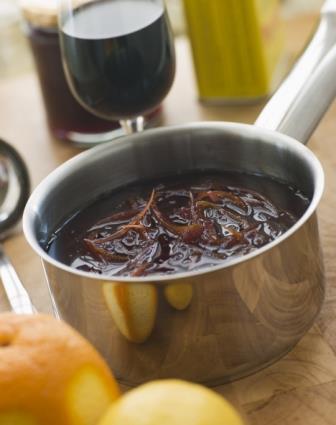
Cumberland sauce being prepared for a delicious venison steak diane

Using a sauce with your venison backstrap recipe is a great idea. When you use a sauce on top of your cooked meat, you don’t have to worry about whether or not you like the flavor. You can just try a little and if you don’t like it, you don’t have to use it and your meat isn’t ruined in the process.

Cumberland Sauce:

Cumberland sauce is one of the most popular sauce recipes to go along with venison backstrap, especially when cooking Steak Diane. This sauce does not take a lot of time to prepare.

You will need:

Ground black pepper

Zest of a lemon and an orange

1/4 cup of red currant jelly

1/2 teaspoon of dry mustard

1/4 teaspoon of cayenne

A pinch of salt

1/4 cup of venison stock

1 minced shallot

1/2 cup of port wine

What you do:

Cook the meat in a large sauce pan with melted butter. Take it out and put it in some foil once it’s cooked to your liking. After the meat comes out of the pan, check to make sure there is still some butter left. Saute the shallot then add the wine. Add the rest of the ingredients and boil it down until it is thick but still something you can pour. You can serve the sauce on the side or on the meat itself, and voila, you’ve got one hearty, delicious dish on your hands.


Download your FREE copy of…

???????

5,415 total views, no views today
Posted in Cook Deer, Cook Venison, Deer Recipes, Guest Writers, How To, Recipes & Cooking | Tagged , , , , , , | Comments Off on Recipe: Venison Steak Diane