The Early March Turkey Hunter

By Steve Sorensen

What should you be doing in March to insure
gobbler success this spring?

early season gobbler

If you begin scouting early, you’re more likely to get your gobbler early. Here’s one that bought my call on opening day. (Photo: Steve Sorensen)

With the National Wild Turkey Federation  convention behind us, and turkey gear makers peddling their wares at sportsman’s shows across the country, it’s not too early to begin scouting for spring gobblers. Southern hunters should be scouting hot and heavy now, with the earliest seasons only weeks away.  But what about those hunters who seldom kill a gobbler. Those who lose enthusiasm. Those for whom failure becomes a way of the woods in spring?

The answer is to become an early March turkey hunter. Even in the far north reaches of wild turkey habitat, it’s not too early to start looking for the place where you’ll tie your tag to the leg of a longbeard. If you want to increase your odds of success, it’s time to begin scouting now.

You’ll often find spring gobblers at the same places year after year, but the turkeys don’t guarantee it. That’s because many variables control where they go. Their first consideration is food. They always need food, and they’ll look for the easiest place to
find it.

Another consideration is snow depth. Harsh winters will cause turkeys to form big flocks, sometimes numbering over 100. That’s because these three-toed birds need to scratch through snow for food, so several flocks combine where they capitalize on easy food sources. When snow isn’t deep they won’t all feed in the same place, so you’ll see only 10 or 20 at a time.

gobbler in a corn field

Early or late on a winter day, a 20-mile drive on rural roads will likely put some turkey territory on your list of places to hunt. (Photo: Steve Sorensen)

Here are four productive mid-winter scouting strategies.

  1. Drive to scout — Where turkeys are now may not be where they will be in May, but it still pays to scout from a vehicle. With snow depths of less than a foot, you should see turkeys out feeding on easy pickings. Drive rural roads and look for the big black birds out in the fields. Use binoculars. Note particularly cornfields. Also look for fields where farmers have spread manure. The sound of a tractor is a dinner bell calling turkeys to feed on undigested seeds and bugs that find their own nourishment in the manure.
  1. Study maps — Once you see some turkeys, get a map and focus first on those areas. Examine topographic maps for roosting areas. The big birds will probably use the wooded draws and hollows not far from the fields. Also look at online GIS maps (Geographic Information Systems) or plat maps that show property boundaries, and figure out who owns the land. Start making a list of places where the hunting looks promising, and begin approaching the landowners to ask for permission to scout. Don’t overlook properties adjacent to farms. Lock in a place early and save yourself from last-minute frustration as the clock ticks down to opening day.
  1. Boots on the ground — You can take those first two steps no matter how cold the weather or how deep the snow. Now it’s time to step into the woods near where you see gobblers in fields. If you find hemlocks or white pines, it’s likely that turkeys are roosting there because evergreens make life easier by offering thermal cover and keeping snow from accumulating on the ground. Any nearby thorn brush might still hold crabapples, and hardwoods might offer acorns or other nuts for turkeys to feed on. In the hollows you’ll find spring seeps warm enough to provide turkeys protein in the form of invertebrate life, and grit turkeys need for grinding food in their gizzards. Look for tracks (and keep your eyes open for shed antlers).
turkey calling assortment

I always say turkey calls are like knives — you can never have too many. But not every turkey call will find a place in your vest. Well in advance of the season, go through your calls and spend a half hour per week finding out which calls you can really make sing songs that attract gobblers. (Photo: Steve Sorensen)

  1. Practice your turkey calling — Back in the warmth of your house or car, practice your turkey calling. Don’t wait until the week before season to decide what calls you use. Get all your calls out and spend a half hour with them at least once a week for a month. When you get comfortable with three or four styles, do some serious practice with hen yelps, soft tree calls, purrs and clucks. That’s usually all you need to call in a gobbler, although I’ve expanded my own repertoire to include fighting purrs. (I should have started using fighting purrs years ago. They’re deadly on the scratchbox call I make — see my website, www.EverydayHunter.com.)

I always say turkey calls are like knives — you can never have too many. (Hint: if you haven’t tried a Havalon  knife, there’s your reason to get one. You’ll be glad you did!)

Three of these four things don’t depend on the weather, so it’s not a major commitment to begin scouting turkeys in early March. The bottom line is that if you start these things now, you’ll be miles ahead of the guy who begins his scouting a week or two before the season opener.


hunter outdoor writer steve sorensenSteve Sorensen is the author of Growing Up With Guns, and The Everyday Hunter Handbook Series. He also writes an award-winning newspaper column called The Everyday Hunter®, and contributes content to Havalon Nation. He has published articles in top magazines across the USA, and won the 2015 “Pinnacle” Award for magazine writing. Invite Steve to speak at your next sportsman’s event, and follow him at www.EverydayHunter.com or on Facebook at www.facebook.com/The-Everyday-Hunter-319307228936/.


shop havalon knives now

Click here to read Jerry’s complete review…


2,925 total views, no views today

Posted in Guest Writers, How To, Hunting Tips, Land & Water Fowl Hunting, Spring Turkey Hunting, Steve Sorensen, Turkey Hunting, Uncategorized | Tagged , , , | Comments Off on The Early March Turkey Hunter

Seven Tips for a Sharp Ice Auger

By Mike Bleech

How to make that hole through the ice easy!

In the early 1970s we had a miserably cold winter. Ice built to a thickness of more than 30 inches on local lakes, and I had what was then the latest technology in ice drilling equipment – a “spoon” type auger. Oh, how great it was with 6 inches of ice. With 30-plus inches, not so good.

More Pain Than Gain

IceFishing-1-640x800I got a few holes through the ice, but it was far from easy despite the fact that my shoulders and back were pretty strong. Not long after that, the current styles of hand powered, drill-type augers became readily available – a big improvement, but getting through thick ice was still a lot of work. When ice fishing for panfish, a 5-inch auger is adequate, and much easier to use than a 7-inch auger. In either case, with each passing winter my shoulders and back began to show their age.

Then, before the latest turn of century, a gas-powered auger became a necessity. But guess what! Even this takes a toll on an aging body.

It’s All about the Edge

With the technological advancement of ice augers, one thing remained true. Keeping a good edge on the auger blades is necessary to take full advantage of these ice fishing tools. Same for a spud bar.

Unless you’re going to spend extra money on extra blades, or having someone sharpen your bladed, you need to learn how get the right edge on your auger blades. Knowing how will keep you from ruining more blades than you actually sharpen.

IceFishing-2-800x533
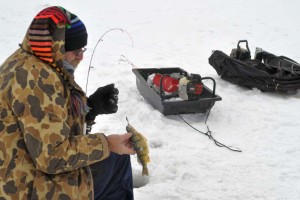
The right tools are important, and today sharpeners with positive angle guides are common. These feature sharpening stones set in plastic holders which are attached to metal rods. The edge to be sharpened is set in a clamp with slots to hold the metal rod at the correct angle. Each kit has three, maybe more, grades of sharpening stones. With the very hard blades on ice augers, diamond stones may be best, but they must be purchased separately.

Seven Tips

With the right tools in your ice fishing gear chest, here are seven tips for getting an edge that will breeze through the thickest ice.

  1. Remove the blades from the ice auger, and be very careful not to lose any shims. You’ll probably need them when you reattach the blades.
  1. Study the blades before doing anything. Note that only one side should be sharpened. Then select the correct angle for your blade. This requires very careful, close-up examination with good light. A little trial and error may help.
  1. Avoid any temptation to “improve” the angle to make it sharper. The angle selected by the auger manufacturer was chosen for good reason. A hard working blade like an ice auger would chip and bend over quickly if it had a blade shaped more like a knife.
  1. Unless a blade is terribly worn, in which case it might be best to replace it, do not use a coarse grit sharpening stone. Start with a medium grit, then finish with a fine grit stone.
  1. Do not over-sharpen. Once too much metal is removed an ice auger blade is worthless. Also, try to sharpen both blades of a two-blade ice auger the same, removing about the same amounts of metal. Blades should be in balance, though this is seldom a problem.
  1. IceFishing-3-800x552
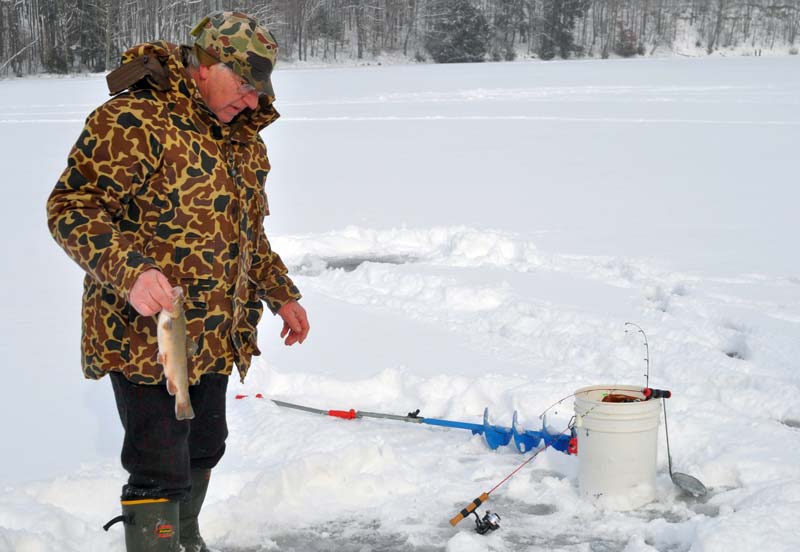
After sharpening one side of the blade, the side which has the bevel, remove rollover from the opposite side. But do this without creating any bevel on this side of the blade.
  1. Often when ice fishers think they need new blades, the real problem is that all is needed is a shim, or two, to set the auger at the best angle for cutting ice. Ice fishers should carry the correct tool for removing blades and spare shims. Blades must be tested on ice to determine whether the angle is correct.

It is unlikely that blades need to be adjusted during the course of one ice fishing season. The exception is if a shim slips, or if a bolt works loose.

What You’ve Heard about Reopening Old Holes

Some experienced ice fishers insist that an auger, either gas-powered or hand-powered, should never be used to reopen old holes because it ruins blades. I doubt that anyone has actually scientifically tested this supposition. But even if reopening old holes does not dull blades, this process is hard on the shoulders because cutting tends to be jolting.

Carry an ice spud if you want to reopen old holes. At some very popular ice fishing hot spots, some anglers need only carry ice spuds.

If the process of sharpening ice auger blades is not for you, at least keep a pair of spare blades handy. Every reader in this space should well understand the importance of sharp edges.


mike-bleech-outdoor-writerMike Bleech has been a full-time freelance writer/photographer since 1980 with more than 5,000 articles published in more than 100 publications. He is the outdoor columnist for the Erie Times-News and the Warren Times Observer. Over the years he has become an accomplished trout fisherman and an expert at hunting the Allegheny National Forest and other public lands.


shop havalon knives

Click here to read Capt. Dave’s complete review…


4,902 total views, 1 views today

Posted in Fresh & Saltwater Fishing, Guest Writers, How To, Hunting & Fishing Equipment, Ice Augers, Ice Fishing, Ice Fishing, Mike Bleech, Uncategorized | Tagged , , , | Comments Off on Seven Tips for a Sharp Ice Auger

6 Tips That Can Help You Bag More Cottontails

By Keith Sutton

Family secrets from a couple of respected old-timers
will put you on more rabbits!

I was a fortunate kid. When I was 12 years old, my great uncles, Julius and Pat, started letting me accompany them on their frequent rabbit hunts. They didn’t own packs of beagles like many hunters, so we’d “walk ’em up,” kicking through briar patches and brush piles to roust rabbits from their hiding places.

wintry days offer best rabbit hunting

Wintry days often serve up the best rabbit hunting, but you may have to think like a rabbit to figure out where your quarry is likely hiding to stay warm.
(Photo: Keith Sutton)

These hunts were memorable and fun. And thanks to the hunting tips these veteran nimrods shared, our outings were highly successful, too. We usually bagged eight to a dozen rabbits on every trip, which helped feed all our families.

The things my uncles taught me remain valuable for the connection they provide to that generation and for putting more rabbits in my game bag. I’m betting they’ll prove useful to you, too. Here’s what they said:

  1. “Watch over your shoulder.”

In isolated patches of cover, a cottontail may head directly away and disappear from sight, then circle well behind the hunter. Others sit tight until the gunner passes, then squirt out behind.

“Look over your shoulder every few minutes, and you’ll glimpse some of those renegades before they make good their escape,” Uncle Pat told me. Once I started listening, most rabbits I killed behaved that way. The same is true today.

  1. “Shoot fast but be safe.”

Uncle Pat also taught me that snap shooting is a must when hunting rabbits in heavy cover, so it’s important to identify your target before shooting.

“You have to shoot fast but be safe,” he coached. “Get your eyes on the rabbit, be sure it’s a rabbit, then shoulder your gun and shoot without leading. But if the rabbit bolts across open ground, swing through its body and beyond the head, shooting just as the bead clears the rabbit’s nose. When your target is running straight away, you’ll want to aim at that white tail, but don’t do that! Swing through the rabbit, centering your shot just beyond the head for a clean kill.” Experience has shown his advice was true.

  1. “Look for their eyes.”
look for rabbits eyes when stalking

Look for the rabbit’s round black eye when stalking. It’s the one thing that breaks the cottontail’s near-perfect camouflage. (Photo: Keith Sutton)

Stalking rabbits as they sat in their forms was something my uncles and I often did. The trick is to spot the rabbit before it spots you. Considering a cottontail’s superb camouflage, this can be tough.

“Look for their eyes instead of their whole bodies,” Uncle Julius used to say. “A rabbit’s round, dark eyes look out of place against the crisscross of cover and are easily spotted if you walk slowly, and carefully examine all brush and weeds. You may overlook some rabbits huddled in their forms, but you’ll also bag a few at close range after spotting the eye.”

  1. “Make them worry, then they’ll run.”

Uncle Pat taught me another rabbit-hunting technique that has proven very effective over the years. It’s based on the idea that rabbits, being at the bottom of the food chain, are highly nervous animals, and suspense is something they can’t handle very well.

“You have to make them worry, then they’ll run,” he taught me. To do it his way, enter a covert and begin walking very slowly. Go 10 paces, and stop for a minute. Then repeat the process. The sound of your approach may flush cottontails, but as often as not it’s the silent treatment that makes them bolt. Apparently, the rabbits think they’ve been detected and decide to make a run for it.

  1. “Think like a rabbit.”
stop and go shooting tactic

Rabbit hunters who adapt a stop-and-go walking pattern often get more shooting opportunities than those who wade through brush nonstop. (Photo: Keith Sutton)

Rabbit hunting often is best on cold, miserable days when snow or ice blankets the landscape. Rabbit fur has poor insulating qualities, so cottontails must take shelter from the weather, making them easier to find and less likely to flush wildly.

“To find bunnies when it’s freezing outside, you have to think like a rabbit,” Uncle Julius said. “Where would you go to escape the cold if all you had to wear was a light jacket? That’s where rabbits are likely to be.” As always, he was right.

  1. “Whistle while you work.”

A running rabbit often will stop in its tracks if you sound off with a loud, shrill whistle, giving you an extra moment or two for a shot. Here’s a final tip both uncles shared that can help you bring home the makings for delicious hasenpfeffer.

“Remember to whistle while you work,” they said. “It doesn’t work every time, but when it does you can make a clean killing shot so there’s rabbit in the stew pot tonight.”


keith sutton headshotKeith Sutton of Alexander, Arkansas, has been following his uncles’ advice for more than half a century while hunting rabbits throughout the southeastern U.S. He is the author of more than a dozen books on hunting, fishing and the outdoors. Autographed copies are available through his website, www.catfishsutton.com.


torch-red-cta_small-game


3,089 total views, no views today

Posted in Guest Writers, How To, Hunting Tips, Keith Sutton, Rabbit Hunting, Small Game Hunting, Tracking, Uncategorized | Tagged , , , | Comments Off on 6 Tips That Can Help You Bag More Cottontails

Transitioning from Targets to Hunting

By Tracy L. Schmidt

Turn Your Skills into Confidence
with These Three Tips

big doe at quartering-away angle

A big doe at a perfect quartering-away angle. These are the moments I live for as a bowhunter.
(Photo: Tracy Schmidt)

I’ll never forget that first year I learned how to shoot a bow. Weeks of practice made me proficient enough to place my aluminum arrows consistently into a paper plate at 15 yards. My boyfriend (now my husband) insisted that I wouldn’t be ready to head for a treestand until I could place 10 out of 10 into that paper plate he had stapled to a bag target.

When I finally mastered the feat, I thought it was time to go hunting and everything would be the same. It wasn’t. Although I was fortunate to harvest a deer my first time out with bow and arrow, I also learned that shooting at live game is a completely different ballgame than shooting at a paper plate, or even a 3D target. Here are three keys that helped me transition from target practice to go-time hunting.

ground blind view

A view from my favorite ground blind. I try to take a few practice shots from the blind before the season starts. (Photo: Tracy Schmidt)

1) Get Dialed In
It’s imperative to practice the skills necessary for accurate shooting out to your effective hunting range. (My personal limit is still only 20 yards.) That means shooting broadheads regularly in the weeks leading up to the hunt and throughout hunting season.

In the weeks before the season I shoot 15 to 30 arrows per session, but during hunting season my practice periods often consist of shooting only two or three broadhead-tipped arrows at a target. I squeeze my practice in whenever I have time — before or after work, or at odd times during the weekend. I don’t allow myself any warm-up shots. The first shot is always the most important, so my “make the first shot count” approach makes me practice more meticulously.

show proficiency at a target

You’re not ready to go hunting until you can demonstrate proficiency at a predetermined distance.
(Photo: Tracy Schmidt)

2) Get Real
Shooting at a 3-D target as though it’s a real-world situation helps me get ready for the hunt. For example, we will take our GlenDel buck target and tuck it into some brush exposing only the vitals. We will also place it at various angles (quartering away, broadside, etc.) and practice those shots from 15 to 20 yards.

During these practice sessions I’ll shoot my regular gear (Muzzy-tipped Easton arrows) and wear my hunting jacket and gloves. I wear an armguard while practicing, so I do the same when I’m hunting. I even take care in choosing my hats. I have to wear a short brim or it interferes with my bow. I make my practice sessions as realistic as possible so when I’m out in the woods and the real deal comes along it’s as much like practice as possible. I do in practice what I anticipate doing in prime time.

3) Get a Sense of Urgency
Lastly, my husband has pounded it into my head that bowhunting is a serious lifestyle (we never call it a “sport”), and one that requires a predator attitude. When you’re hunting for targets-to-hunting-call-outdinner and any deer will do, you need to act with a greater sense of urgency when a shot opportunity comes along. This means being instantly ready to draw your bow, anchor, acquire the sight pin on the animal’s vitals and release the arrow.

It might also mean that you have to “stop” the deer as it walks in front of you. A simple “blatt” with your mouth will do this, but you need to already be at full draw. Dan coaches me through what he calls “quick draw” practice. “Here comes the deer. He’s moving quickly. Get ready. Draw. Stop him. Shoot.”

be familiar with sight pins and know limits

Make sure you are familiar with your sight pins and know your limits before going hunting. (Photo: Tracy Schmidt)

Think of the quick-draw approach as a 1-2-3 countdown:

  1. Come to full draw in one smooth motion.
  2. Settle the bowstring to your anchor point (the corner of your mouth, your nose, whatever).
  3. Acquire the sight pin, focus on the point of impact and release the arrow.

When we practice this at home, the goal is to complete the entire process in just a few seconds. In fact, when Dan first taught me this technique, he’d count “Three-two-one-shoot.” We practice shots from various angles; from tree stands and from ground blinds.

In reading more about how Fred Bear approached the hunt, I’ve learned the hunter must develop a shooting instinct. It means learning how to perform under pressure by making your routine second-nature, without rushing the shot. If you have never tried this technique, please do. Even if you never have to shoot a deer using the quick-draw approach, you will learn that it makes shooting sessions more realistic than anything else you might have tried before.

In bowhunting, these three tips add up to confidence. And confidence is everything.


Tracy Schmidt headhsotTracy Schmidt is a deer hunting enthusiast, master gardener and certified food-preservation specialist from Wisconsin. Her husband Dan is editor-in-chief of Deer & Deer Hunting magazine and co-host of Deer & Deer Hunting TV on NBC Sports.


shop havalon piranta


2,121 total views, no views today

Posted in Archery Hunting, Beginners Guide, Big Game Hunting, Bowhunting, Deer Hunting, Guest Writers, How To, How to Hunt, Hunting Tips, Tracy Schmidt, Uncategorized | Tagged , , , | Comments Off on Transitioning from Targets to Hunting

Venison Chili: Ground Versus Cubed

By Tracy Schmidt

Two ways to great chili!  

In my family, we eat our chili prepared with both ground venison and cubed cuts. It can be an interesting conversation around the table when we discuss which chili recipe is better. I have several great recipes for chili, but the two I am sharing with you here are ones I make most often.

2-BaconChili-800x600

We like to top our chili with cheese and a little bit of extra chopped
sweet pepper. (Photo: Tracy L. Schmidt)

My decision whether to use ground or cubed venison depends mostly on two questions:

  • How much time do I have?
  • Which meat do I have in the freezer?

It’s hard to beat a perfectly cooked venison steak and a baked potato. I like my steaks for steaks and my chops for chops (and for kabobs in the summer). That’s why I don’t use up all those cuts on chili. Most often I’ll cube up a small roast when I make chili. (The roast is also what I use when I am canning venison.)

Those are the reasons I reach more often for ground venison. Ground meat is also really easy to defrost in the microwave in an after-work time pinch.

  • My recipe for ground meat: Chili with Bacon is perfect for a work night when time is short and I have plenty of ground venison stored away. The bacon gives the chili more of a smoky than spicy flavor.
  • My recipe for cubed meat: Smokey Valley Chili takes more time, so if it is a cold winter day and I’m planning to stick around the house, that’s the one I pick.

I often serve my chili with fresh chopped sweet peppers and freshly grated mild cheddar for toppings and cornbread on the side. Both of these recipes will fill you up and get you in the mood to go back out into the woods to get more deer (not that you really need another reason!)

Chili with Bacon (Ground Venison)

1-BaconChili-600x800

The green peppers and beans add great texture to my bacon chili recipe. The diced tomatoes also add texture and great flavor. (Photo: Tracy L. Schmidt.)

1 pound venison, ground

4 slices thick bacon, diced

3/4 cup onion, diced

1/4 cup sweet green pepper, diced

2 15-oz. cans red kidney beans

2 14-oz. cans diced tomatoes

1 clove garlic, minced

1-1/4 teaspoons salt

1 tablespoon chili powder

pepper


In six-quart stockpot cook the bacon until crisp, remove pieces, drain on paper towels, and break into small pieces. Add onion and green pepper to grease in pot and cook until soft, but not brown. Add venison and cook until browned. Spoon out the drippings (mostly bacon grease and venison fat). Add beans, garlic, salt, chili powder, tomatoes, pepper and bacon. Cover pot and simmer for 15 minutes. Uncover and simmer and additional 45 minutes until thickened. Serves: 6

Smokey Valley Chili (Cubed Venison)


3-SmokeyValley-600x800

The Smokey Valley Chili is one of my favorites to make and serve for deer camp. It simmers on the stove for several hours until it gets nice and tender. Early in the fall during bow season, I often have a few extra jalapenos left in my garden to put on the top.
(Photo: Tracy L. Schmidt)

1-1/2 pounds venison, cubed

1 tablespoon vegetable oil

2 garlic cloves, minced

3 jalapenos, diced

1 cup onion, chopped

2 tablespoons chili powder

2 teaspoons ground cumin

2 teaspoons tapioca (acts as a thickener)

1 28-oz. can diced tomatoes with roast garlic and onion

1 16-oz. can kidney beans, rinsed and drained


In stockpot, brown stew meat in oil. Add all other ingredients, cover, and simmer for three hours making sure to stir and add liquid as needed.


Tracy Schmidt headhsotTracy Schmidt is a deer hunting enthusiast, master gardener and certified food-preservation specialist from Wisconsin. Her husband Dan is editor-in-chief of Deer & Deer Hunting magazine and co-host of Deer & Deer Hunting TV on NBC Sports.


shop havalon now


2,981 total views, 1 views today

Posted in Big Game Hunting, Deer Hunting, Deer Recipes, Guest Writers, Recipes & Cooking, Tracy Schmidt, Uncategorized, Venison Recipes | Tagged , , , , | Comments Off on Venison Chili: Ground Versus Cubed